


The best hairstyles for school are the ones you can do in five minutes or less, that stay neat until the last bell, and that never need a curling iron at 7 a.m. Below are 34 of them — ponytails, buns, braids, half-up styles and protective looks for straight, wavy, curly and coily hair, from quick first-bell fixes to braids that survive PE. Every style lists how long it takes and who it suits, so you can pick tonight and sleep a little longer tomorrow.
What Makes a Good School Hairstyle?
A school hairstyle has a harder job than a weekend one. It has to be finished before the bus comes, survive six or seven hours of lessons, lunch, wind, a backpack strap and probably some running around — and still feel comfortable at 3 p.m. The styles that manage all of that share four things:
- They take five minutes or less. If a style needs twenty minutes and a second pair of hands, it is a party style, not a school style. Everything on this list is five minutes or under once you have done it twice.
- They hold without heat. None of these styles needs a straightener or curling iron. Heat every morning is slow, and daily heat is the fastest way to dry, split school-day hair. A few of the braids actually look better on hair that was braided damp the night before.
- They keep hair out of the face and off the neck. Hair falling into eyes during a test, or sticking to the neck in gym class, is the main reason styles get pulled out by lunchtime. Ponytails, braids, buns and pinned half-ups all pass this test; loose hair only works if the front is clipped or twisted back.
- They are comfortable for hours. An elastic that hurts by second period will be ripped out by third. Snug is good; tight enough to pull at the hairline is not. Softer elastics, scrunchies and claw clips hold just as well for most styles and are far kinder.
One more honest rule: the best school hairstyle is one you have practised once at the weekend. A brand-new braid attempted at 7:40 on a Monday takes fifteen minutes; the same braid on Wednesday takes four. If you wear your hair down most days — for example with curtain bangs — keep two emergency elastics and a claw clip in your bag; a 30-second half-up rescue beats a bad hair day every time.
5-Minute Classics: Ponytails, Buns and Half-Ups
Start here. These seven styles need the least practice and cover almost every school morning, including the ones where the alarm did not go off.
1. Sleek High Ponytail

Time: 3 minutes · Best for: medium to long straight or wavy hair · Lasts: all day
The high ponytail is the school classic because it is fast, tidy and keeps every strand off your face. Brush your hair up towards the crown — flipping your head upside down while you brush stops the bumps underneath — then secure it high with a snag-free elastic. For the sleek version, smooth a pea-sized amount of gel or leave-in over the top before you brush, and wrap one thin strand of hair around the elastic, pinning it underneath, so no band shows. The Y2K version of this style adds one step: after the ponytail is in, smooth your baby hairs along the hairline into soft swoops with a toothbrush and a dab of edge gel. Either way, it survives a full day, including sports, better than almost anything else on this list.
2. Low Ponytail with a Hair Wrap
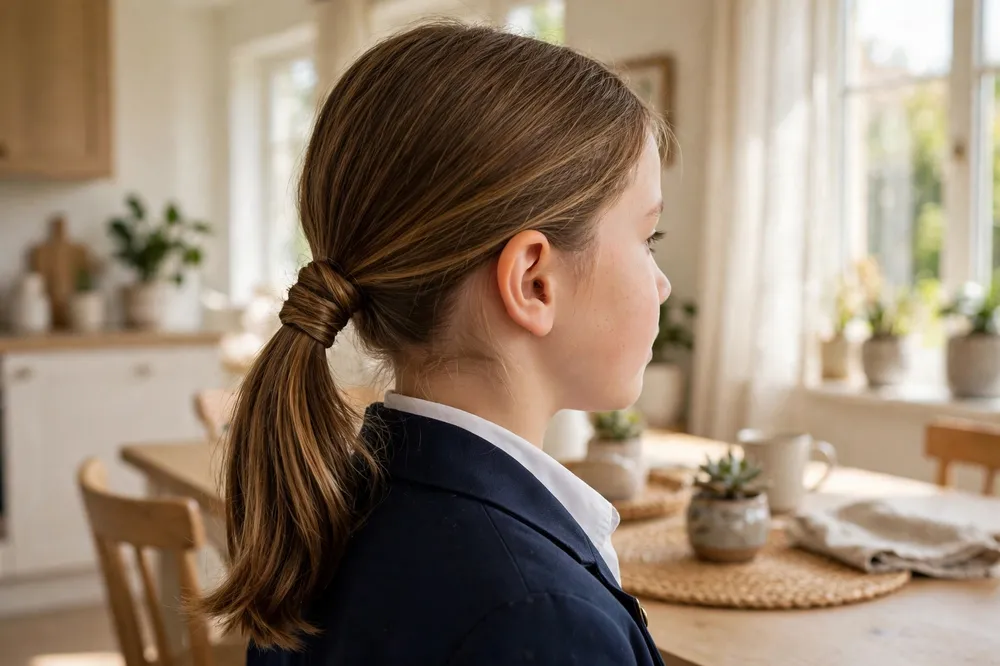
Time: 2 minutes · Best for: all hair types, medium to long hair · Lasts: all day
A low ponytail sits at the nape, pulls far less on the roots than a high one, and suits younger girls and anyone who gets headaches from tight styles. Gather the hair low, secure it, then take a small section from underneath the ponytail, wrap it around the elastic two or three times and pin the end underneath — a two-minute style that looks like a ten-minute one. The polished variation is a smooth low ponytail with a clean middle part, brushed flat on both sides; it is the go-to for school photos. The relaxed variation is the low side ponytail: same steps, gathered just behind one ear and worn over the shoulder with a soft scrunchie.
3. Messy Bun

Time: 2 minutes · Best for: second-day hair, medium to long hair · Lasts: most of the day
The messy bun is the honest answer to “I woke up late.” Gather your hair into a ponytail wherever you like it — high, mid or low — but on the last pull through the elastic, stop halfway so the hair forms a loop. Fan the loop out with your fingers, wrap the loose ends around the base and pin or tuck them in, then pull out two small strands at the front so it looks deliberate rather than rushed. It works precisely because second-day hair has grip: freshly washed, slippery hair slides out of a messy bun by break time. On straight or wavy hair, a quick spritz of water or dry shampoo before you start gives the same grip. The low messy bun at the nape is the softer, younger version and pairs well with a headband.
4. Slicked-Back Bun
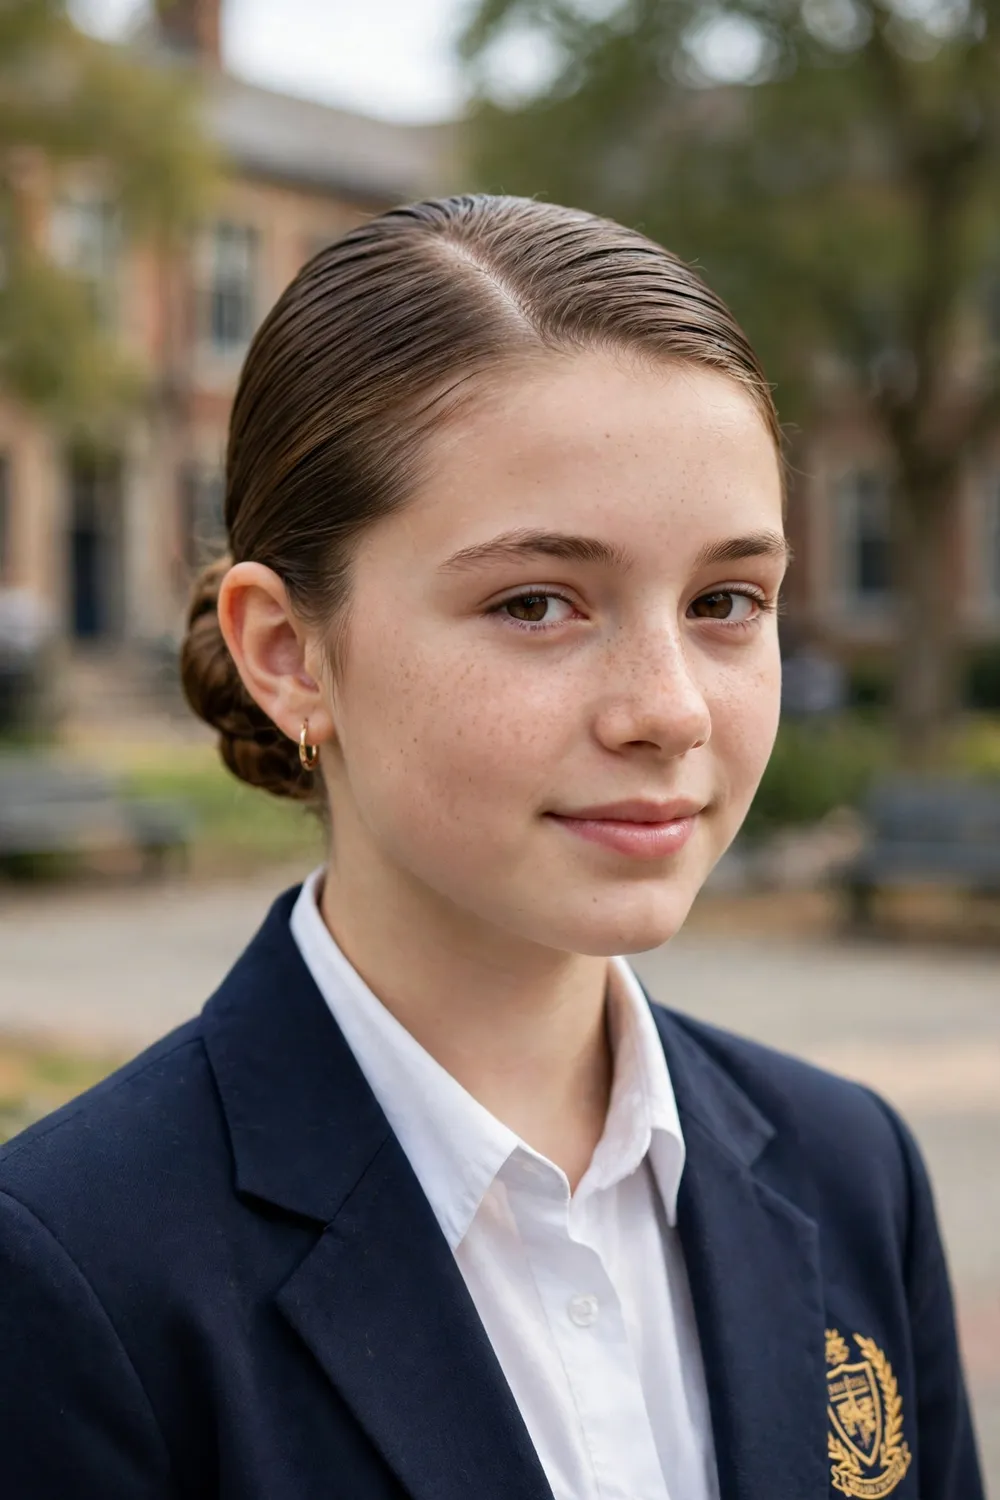
Time: 3–4 minutes · Best for: all hair types, presentation and photo days · Lasts: all day
When a day calls for looking properly put-together — class photos, presentations, concerts — this is the style. Work a small amount of gel or smoothing cream through the top and sides, brush everything straight back (or back from a deep side part, which flatters round and heart faces), gather it into a low ponytail, twist the tail and coil it flat against the head, pinning as you go. Twisting the coil into a low chignon shape — a flat spiral at the nape — is the more dressed-up finish. The high version, brushed up into a gel-smoothed top bun, is just as secure and is a favourite for dance and sports days; on very curly hair, wrapping a satin scarf over the bun for ten minutes while you eat breakfast sets it smooth without extra product. Use alcohol-free gel so it does not flake white by lunchtime.
5. Space Buns
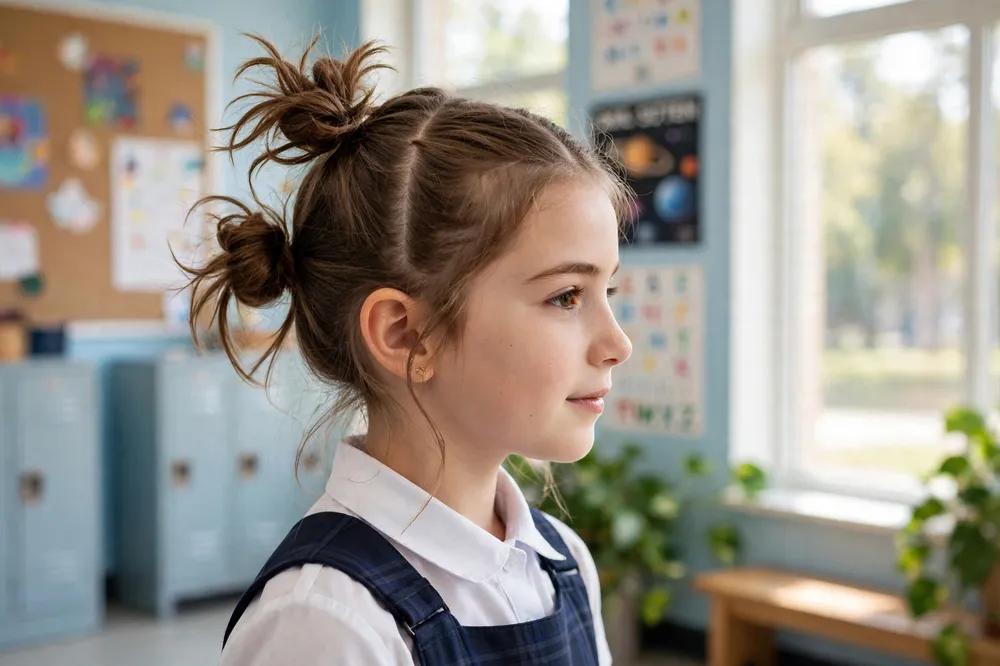
Time: 4–5 minutes · Best for: medium to long hair, all textures · Lasts: all day
Part your hair straight down the middle, make two high pigtails, twist each one and coil it around its own base into a bun, then secure with an elastic and a pin or two. Splitting the hair into two buns shares the weight, so space buns are noticeably more comfortable than one big bun on thick hair — and they hold through PE because each bun is small and close to the head. Leave two thin strands out at the front if you want it softer. Slightly messy space buns, where you puff each coil out with your fingers instead of twisting tightly, are the fastest version and the most forgiving for beginners.
6. Half-Up Claw Clip
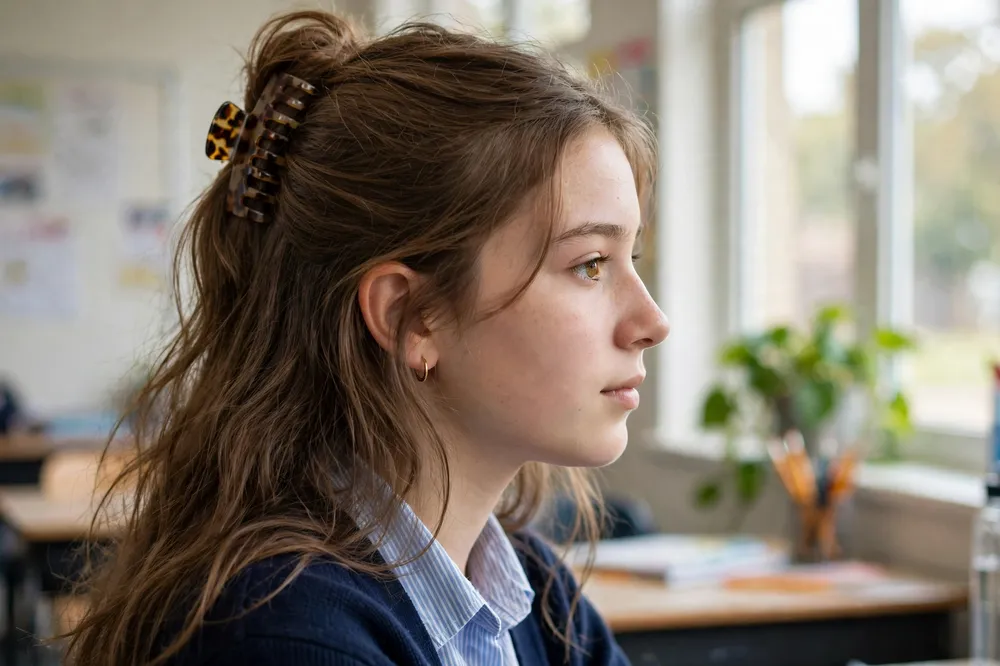
Time: 1 minute · Best for: shoulder-length hair and longer, all types · Lasts: all day
This is probably the fastest real hairstyle in existence. Gather the top half of your hair from about the temples back, twist it once or twice, push it slightly up for a little lift at the crown, and clamp a medium claw clip over the twist. Your face is clear, your length still shows, and there is no elastic pulling anywhere. The twisted half-up version from most school lists is the same idea done with the twist flatter against the head — pick whichever your clip size handles. Keep a spare clip in your school bag: this is also the 30-second fix for any style that gives up at lunchtime.
7. Half-Up Top Knot
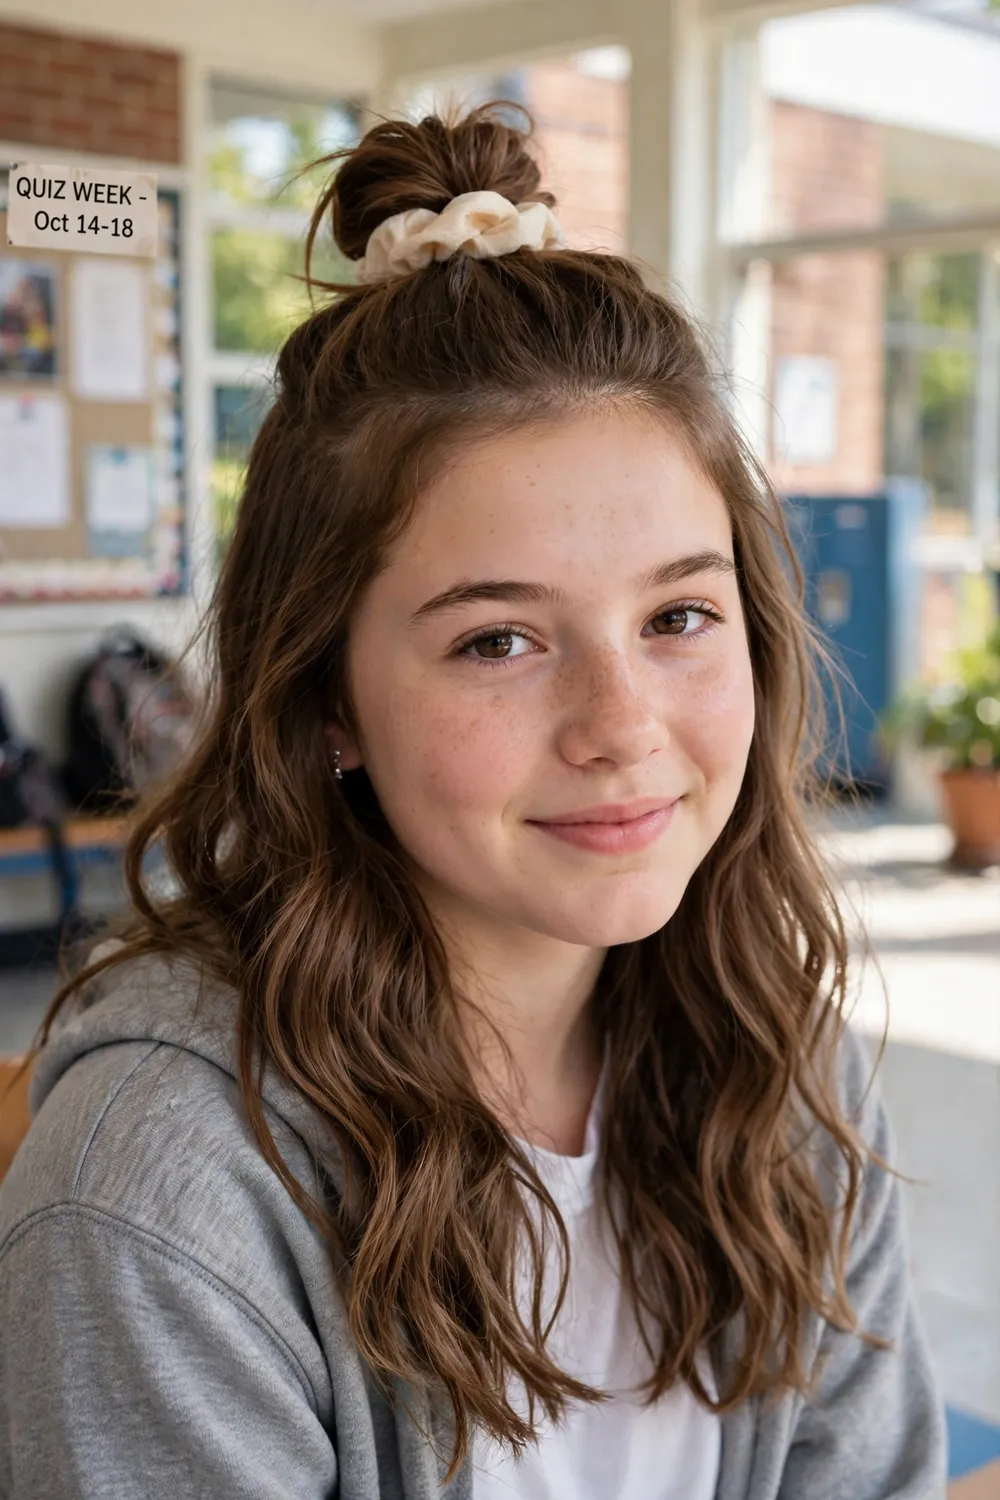
Time: 2 minutes · Best for: medium to long hair, wavy and straight · Lasts: all day
Take the top section of hair — roughly from temple to temple over the crown — twist it until it coils into a small knot, and secure it with a mini elastic or two pins. The hair underneath stays loose, so you get the face-clearing benefit of an updo with the look of hair worn down. It works on freshly washed hair that is too slippery for a full bun, because the knot only has to hold a third of your hair. On curly hair, do the same thing with a small bun (a half-up mini bun) and let the curls underneath spring free — no twisting needed, just gather, loop and pin.
Braids That Last All Day
If the day includes PE, sports practice, a windy walk home or just a lot of moving between classes, braids are the answer. A braid locks the hair into itself, so there is nothing to slip, sag or blow loose — a good braid done at 7 a.m. still looks like a hairstyle at 4 p.m. They are also the best styles for growing hair out, because the ends are tucked away from backpack straps and jacket zips instead of rubbing against them all day.
8. Classic Three-Strand Braid
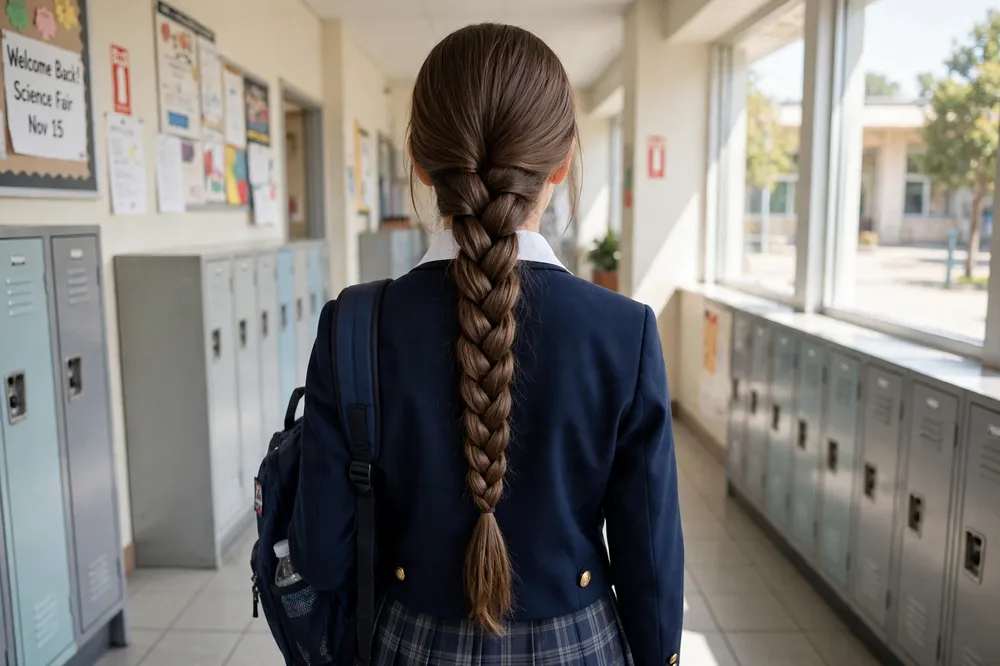
Time: 3 minutes · Best for: medium to long hair, every texture · Lasts: all day
The braid every other braid is built from: divide the hair into three sections and cross the right over the middle, then the left over the new middle, all the way down. Keep the tension even — not tight at the scalp, just consistent — and it stays smooth for hours. Two upgrades cost no extra time. Braiding a thin ribbon in with one section gives the ribbon braid, a pretty detail for spirit days and photos. And braiding the hair while it is slightly damp, then leaving it in through the school day, means soft waves when you take it out in the evening. Master this one braid and styles 9 to 17 all become variations.
9. Single French Braid

Time: 5 minutes (3 once practised) · Best for: medium to long hair · Lasts: all day, even through sports
Start with a small section at the crown and braid three-strand style, but each time you cross a section over, pick up a little more loose hair and add it in. By the time you reach the nape, all the hair is inside the braid, so nothing escapes at the sides — that is what makes the French braid the most secure single braid for active days. It takes one or two weekend practices to get the adding-in motion smooth; after that it is genuinely quick. For a tidier, more dressed-up finish, try the tucked French braid: stop at the nape, fold the remaining tail up underneath the braid and pin it flat, so it reads as a neat updo instead of a braid.
10. Double Dutch Braids

Time: 5 minutes · Best for: medium to long hair, thick hair especially · Lasts: all day and into the next
Dutch braids are French braids in reverse: instead of crossing sections over the middle, you cross them under, so the braid stands up on top of the hair in a bold 3D line. Part the hair down the middle, clip one side away, and Dutch-braid each side from the hairline to the ends. Worn tighter and closer to the scalp, the identical style is what most people call boxer braids — same technique, sportier finish. Double Dutch braids are the single most PE-proof style in this guide: nothing is loose, nothing swings, and on many hair types they still look good the next morning, which makes them the Sunday-evening hero of busy families. A little oil or leave-in on the edges before braiding keeps the hairline comfortable.
11. Side Braid
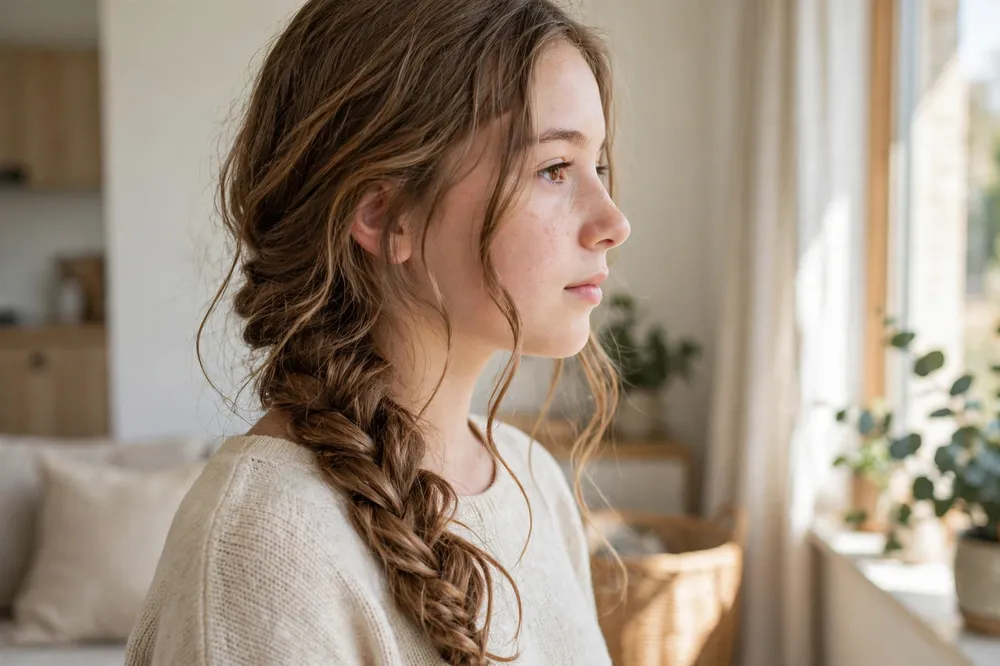
Time: 3 minutes · Best for: long hair, wavy and straight · Lasts: most of the day
Sweep all the hair over one shoulder and braid it loosely, starting just below the ear. Pull the braid apart very gently with your fingers to widen it — this “pancaking” is what makes a side braid look soft and full instead of thin and tight. Leave a couple of strands loose at the front. It is the easiest braid to do on yourself in a mirror because the whole thing happens in front of your shoulder where you can see it, which is why it is a good first braid for girls doing their own hair. It suits picture days and presentations where you want something pretty that still reads as an everyday style.
12. Side Fishtail Braid
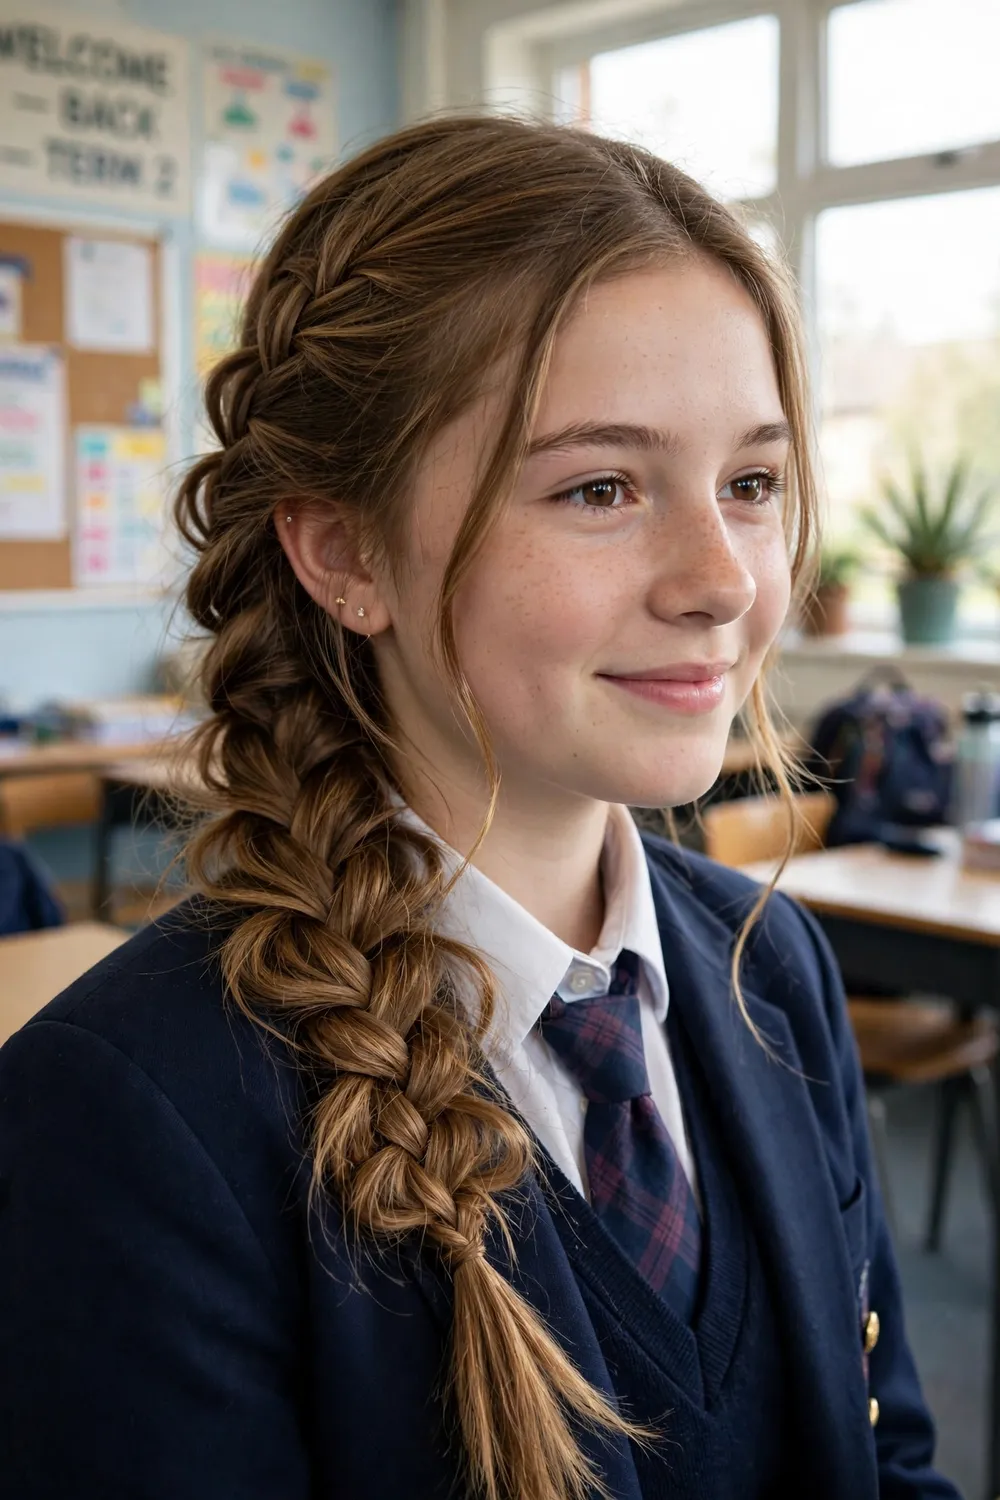
Time: 5 minutes · Best for: long hair · Lasts: all day
The fishtail looks intricate and is actually the simplest braid of all — it uses only two sections. Split the hair in two, take a thin strand from the outside of the left section and cross it to the right, then a thin strand from the outside of the right and cross it to the left. Repeat. The thinner the strands you cross, the finer and more detailed the woven pattern. Do it over one shoulder so you can watch it grow, secure the end, then pinch and pull the edges apart slightly for that soft, wide fishtail shape. It takes a little longer than a three-strand braid, so save it for mornings when you are not already running late — or braid it the night before, because a fishtail slept in still looks good.
13. Braided Ponytail
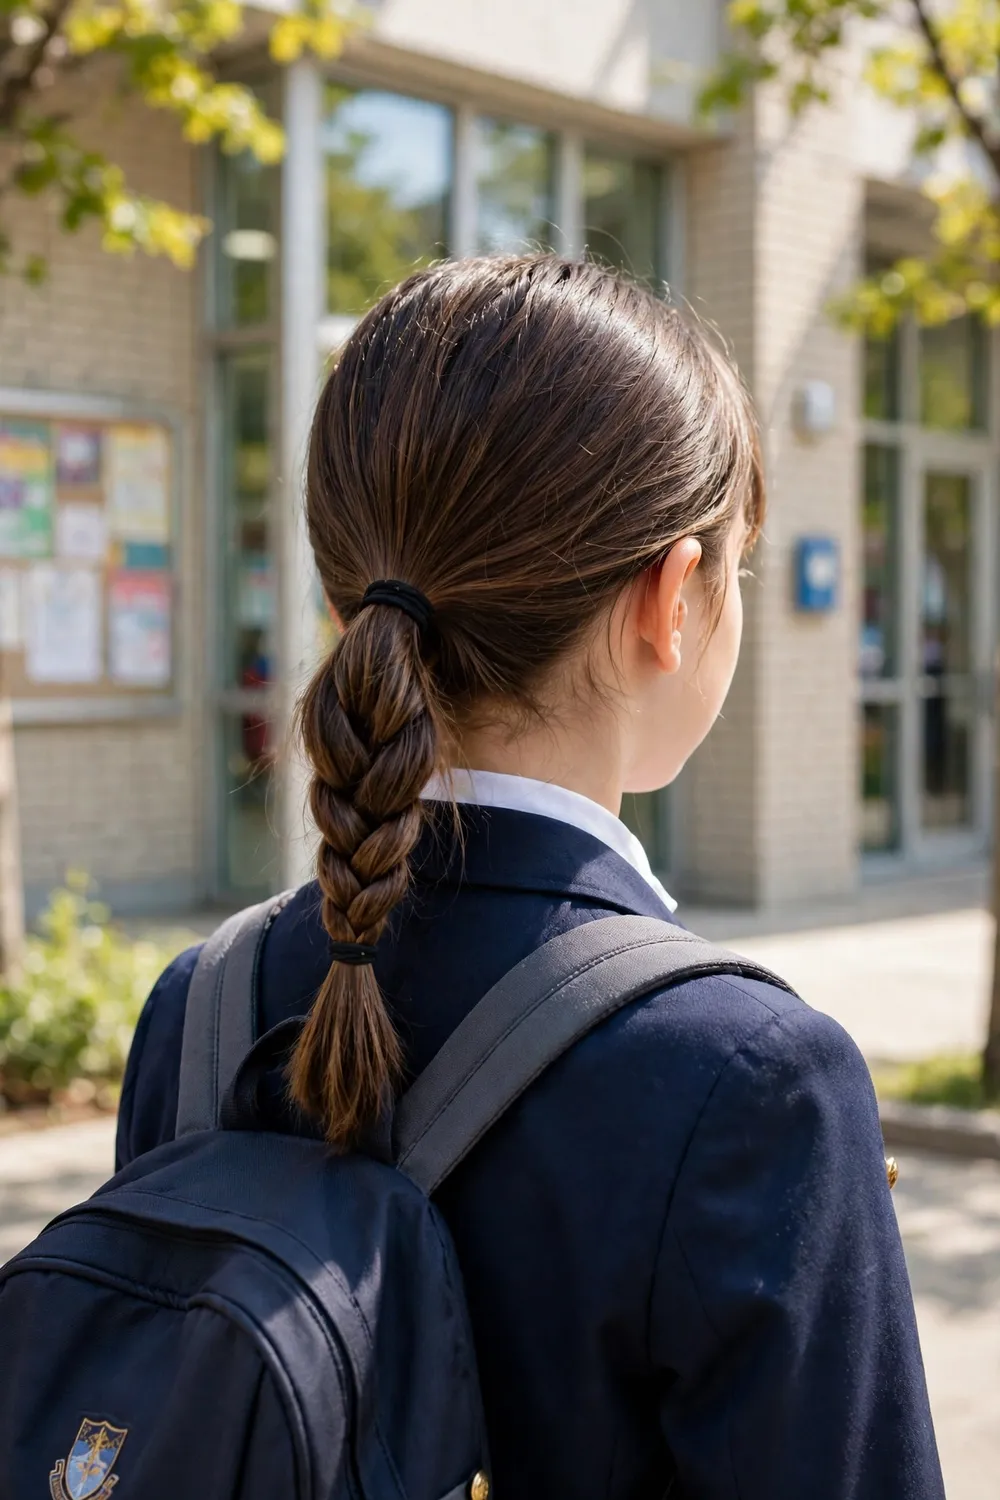
Time: 3–4 minutes · Best for: medium to long hair, active days · Lasts: all day
Make a normal low or mid ponytail, then braid the tail in a plain three-strand braid and secure the end with a small elastic. That is the whole style — but it changes everything about how a ponytail behaves. A loose ponytail tangles, swings into everything and needs re-brushing by lunch; a braided one stays in one smooth piece, does not knot itself in the wind, and cannot get caught in a backpack zip. It is the style to pick for field trips, sports days and any day you will not be near a mirror.
14. Dutch Braid Ponytail
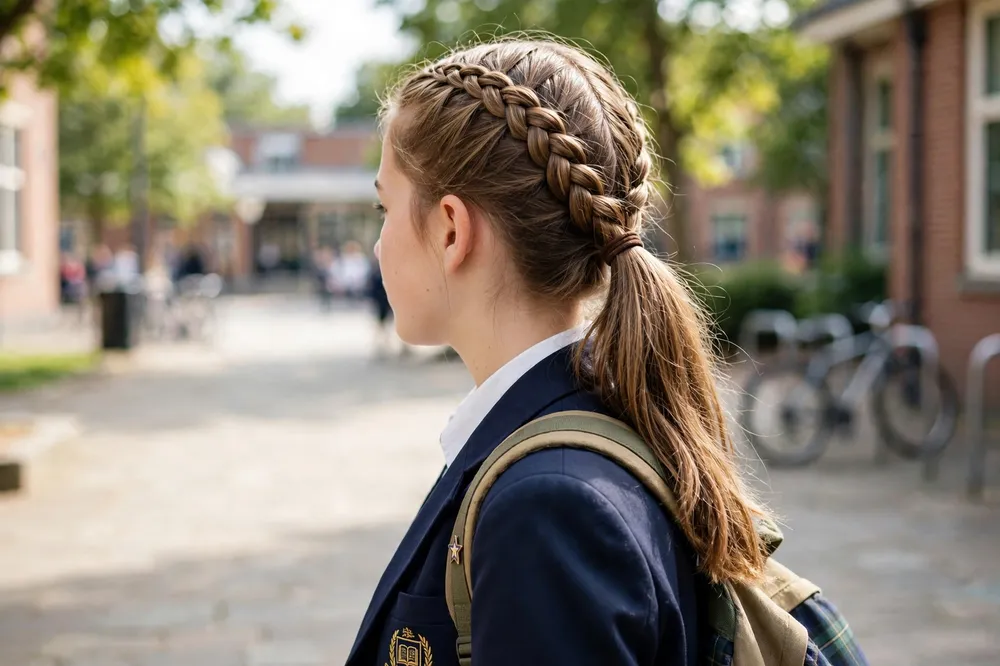
Time: 5 minutes · Best for: medium to long hair, thicker hair · Lasts: all day
Start a Dutch braid at the front hairline and braid backwards, adding hair as you go, but only until you reach the crown. There, gather everything — the braid plus all the loose hair under it — into a ponytail and secure it. The front of your hair is braided flat and tidy, so no strands fall into your face during lessons, while the ponytail keeps the sporty feel. A French braid ponytail is the same style with the braid woven over instead of under, giving a smoother, flatter top — try both and keep the one your hands find easier. This is a strong picture-day style too, because the braid detail photographs beautifully from the front.
15. Twin Pigtail Braids
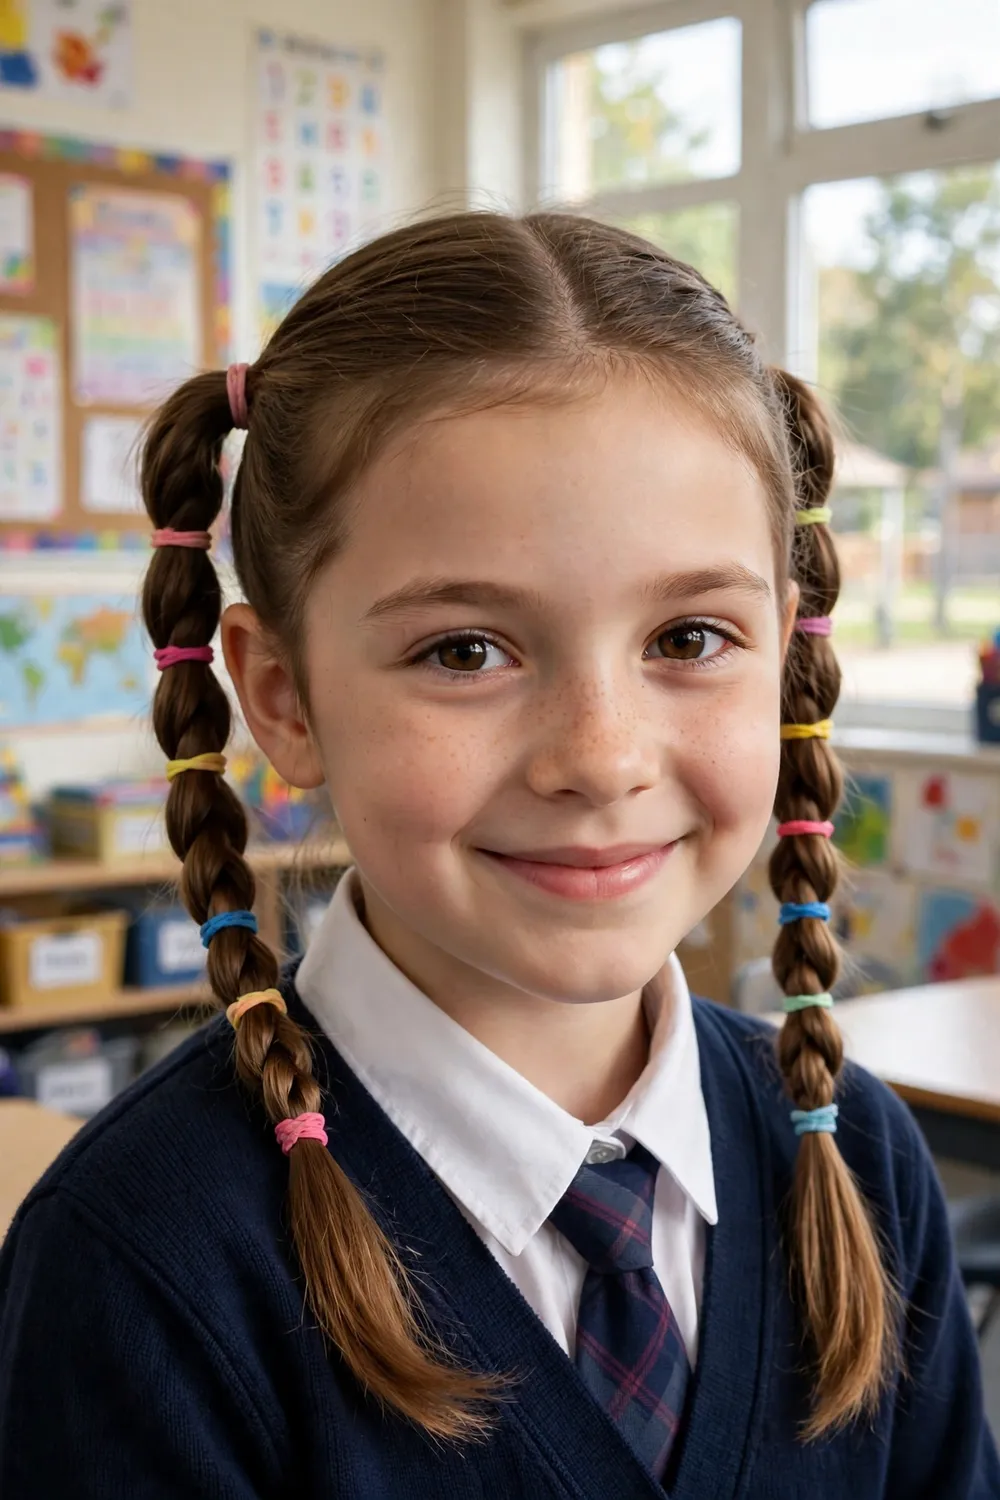
Time: 4–5 minutes · Best for: younger girls, medium to long hair · Lasts: all day
Part the hair down the middle and braid each side into its own three-strand braid, finishing with small colourful elastics or tiny bows. Two braids balance the weight evenly, tangle far less than loose hair on a windy playground, and are one of the easiest styles for a parent to do quickly on a young child — each side takes under two minutes once you have the rhythm. For a fun variation, draw the part in a zigzag with the end of a comb instead of a straight line; zigzag-part pigtails look impressively fancy in class photos and take the same time. On very long hair, braiding both sides also keeps hair safely out of the way for art, science and cooking lessons.
16. Braided Headband
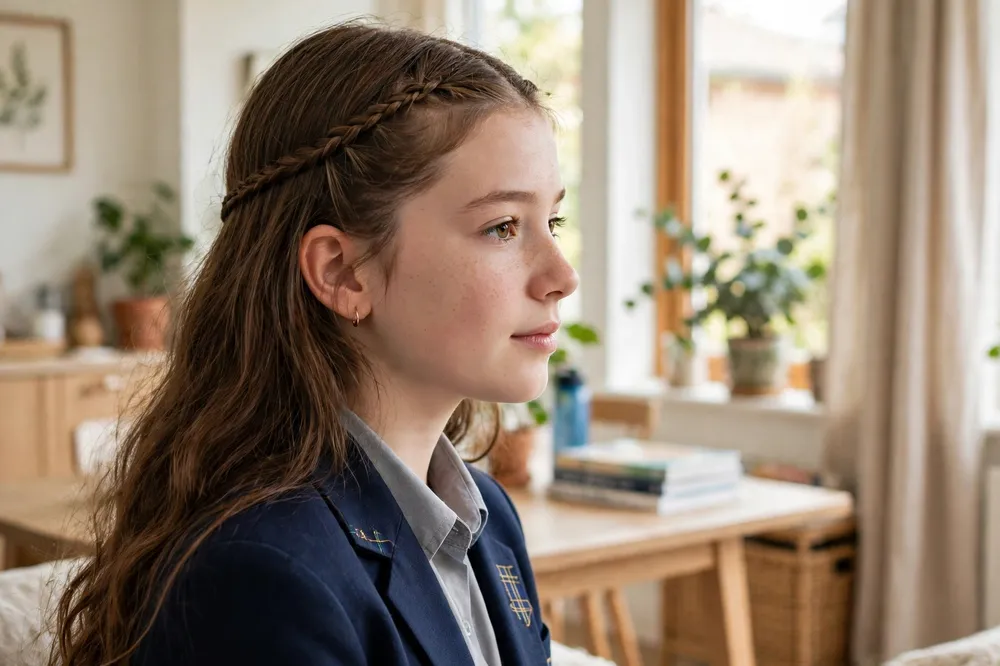
Time: 3 minutes · Best for: wearing hair down, all lengths past the chin · Lasts: all day
Take a section of hair from behind one ear, braid it into a thin three-strand braid, then bring it over the top of your head and pin it behind the other ear, letting the rest of your hair fall over the pinned end. Your own hair becomes the headband: the front stays off your face for reading and writing, the back stays loose, and there is no actual headband to clash with a uniform rule or give you a headache by lunch. It works on straight, wavy and curly hair, and it is the kindest style here for a growing-out fringe, because the braid holds short front pieces exactly where they misbehave most.
17. Braided Crown
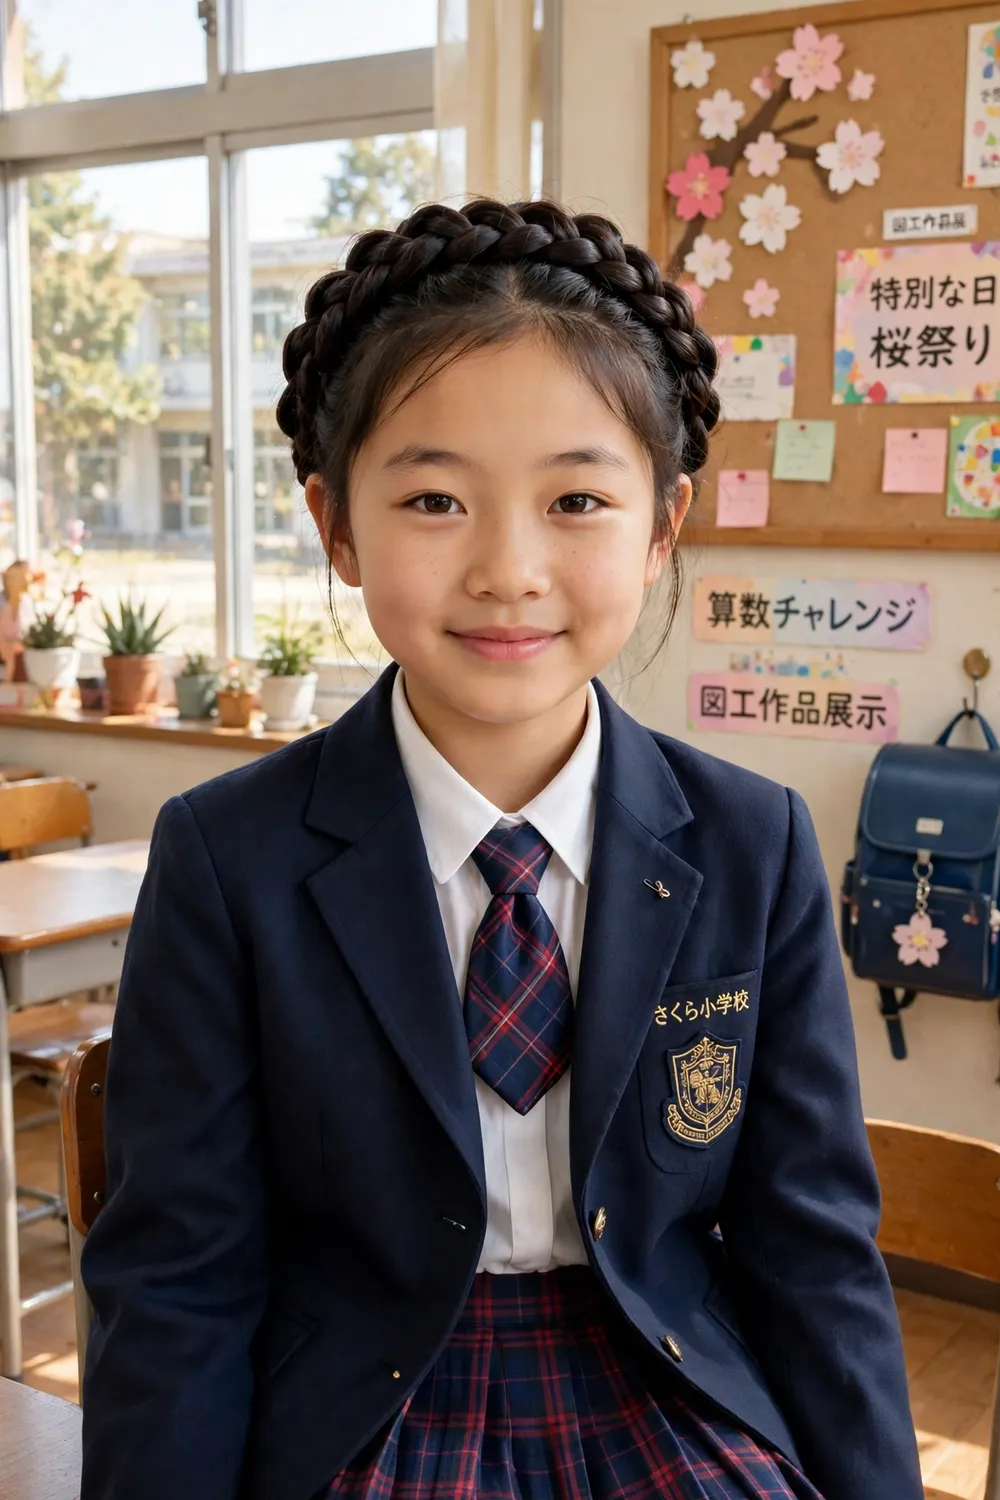
Time: 5 minutes · Best for: long hair, concerts, ceremonies and photo days · Lasts: all day
Start a French or Dutch braid behind one ear and keep braiding around the hairline — across the front, around the other side and along the nape — adding hair as you go, until the braid has travelled the full circle and the end can be tucked under its own beginning and pinned invisibly. Every strand is up and secured, nothing touches your neck or shoulders, and the result looks far more complicated than it is: this is the style for school concerts, award days and end-of-term photos. It does need one practice run first, and it is much easier to do on someone else (or have done for you) than on your own head — for younger girls, this is a lovely weekend-practice style for a parent and daughter to learn together.
Ponytail Upgrades: Five Ways to Make a Ponytail Look New
The ponytail is the style everyone falls back on, which is exactly why it can start to feel boring by October. These five versions use the same one minute of gathering and tying, then add one twist — sometimes literally — that makes the ponytail look like a different hairstyle. If the ponytail is your everyday go-to, our 34 Best Ponytail Hairstyles guide has 34 more versions — sleek, braided, curly and messy — to rotate through the week.
18. Bubble Ponytail
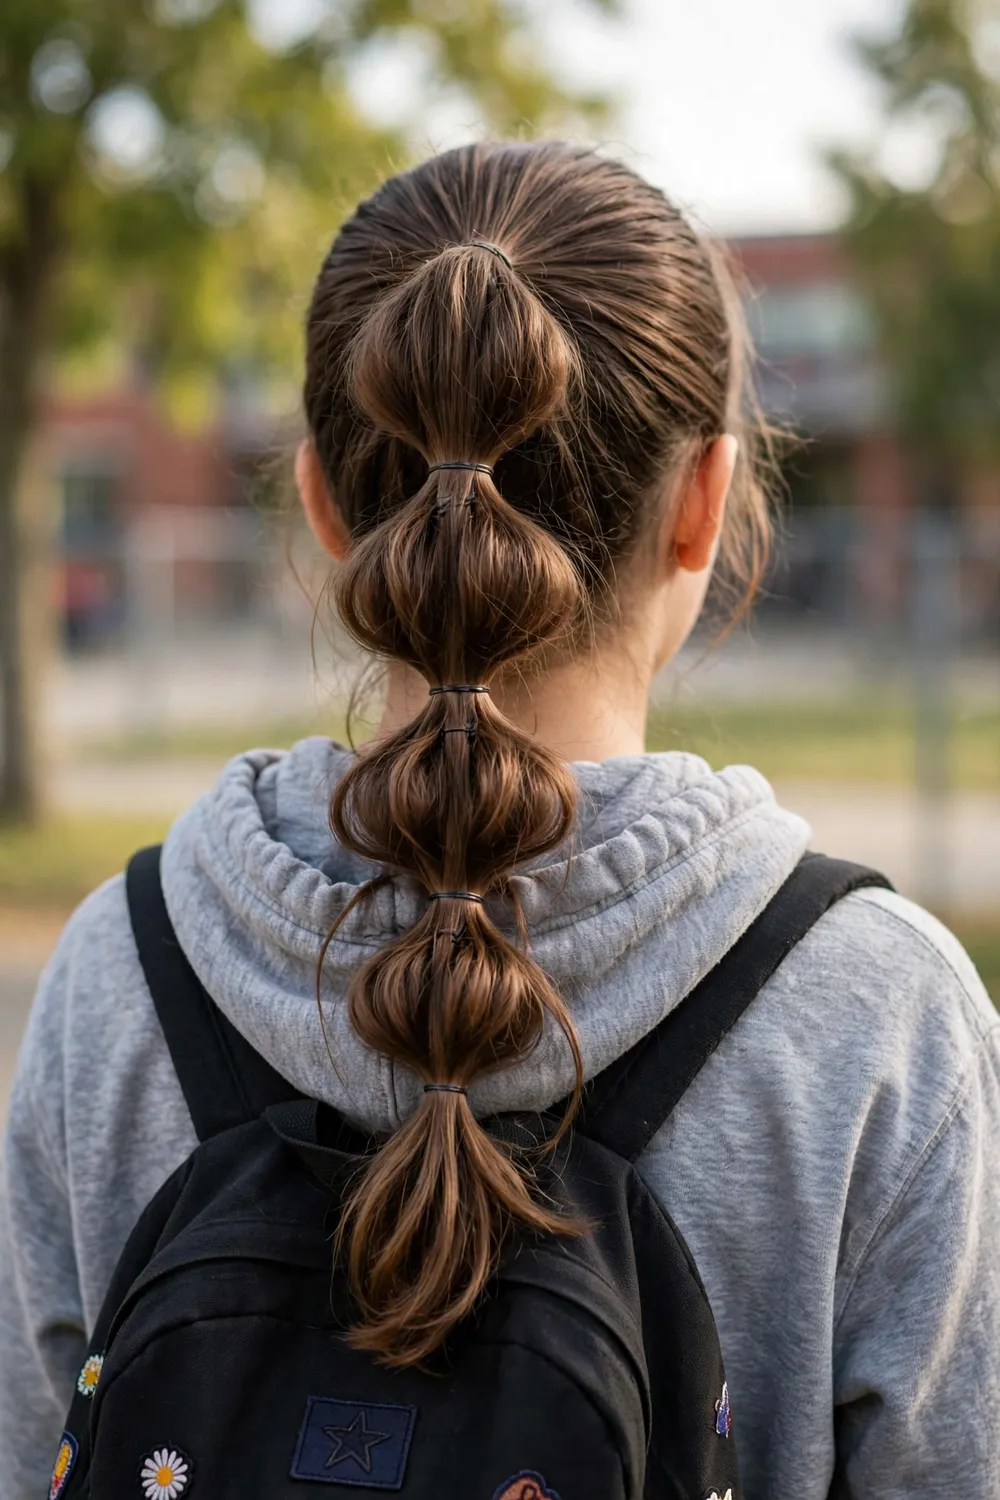
Time: 3 minutes · Best for: long hair with some thickness · Lasts: all day
Make a high or mid ponytail, then add small elastics every two to three inches down the tail. After each elastic, gently pull the hair between the bands outwards on all sides so each section puffs into a rounded bubble. The secret is pulling evenly — tug a little, turn the ponytail, tug again — rather than yanking one side. Match the elastics to your outfit or use clear ones for a floating effect. The bubble sections stop the ponytail tangling into one solid rope during the day, and the style regularly gets asked about in the corridor, which is a lot of return for two extra minutes.
19. Pull-Through Ponytail

Time: 5 minutes · Best for: long hair, girls who cannot braid yet · Lasts: all day
This style fakes an elaborate braid using only elastics. Tie a ponytail, then tie a second ponytail just below it using the hair underneath. Split the first ponytail in two, pull the second ponytail up through the middle of the split, then join the two halves under it with a new elastic, adding the next section of loose hair. Repeat down the length, puffing each loop out as you go. The result is a chain of interlinked loops that looks like a woven braid from every angle and holds just as securely — a genuine option for younger girls and anyone whose braids never come out even, because there is no braiding skill involved at all.
20. Rope Twist Ponytail

Time: 2–3 minutes · Best for: medium to long hair · Lasts: all day
Tie a ponytail and split the tail in two. Twist the left section to the right until it feels springy, twist the right section to the right too, then wrap the two sections around each other to the left — opposite directions are the whole trick, because the twists then lock against each other instead of unravelling. Secure the end and it holds itself. A rope twist ponytail looks polished in a way a plain ponytail does not, swings less in PE, and untwists in seconds at the end of the day with zero tangles. It is also the fastest way to make fine hair look thicker, because the twist adds visible texture and width.
21. Knotted Ponytail
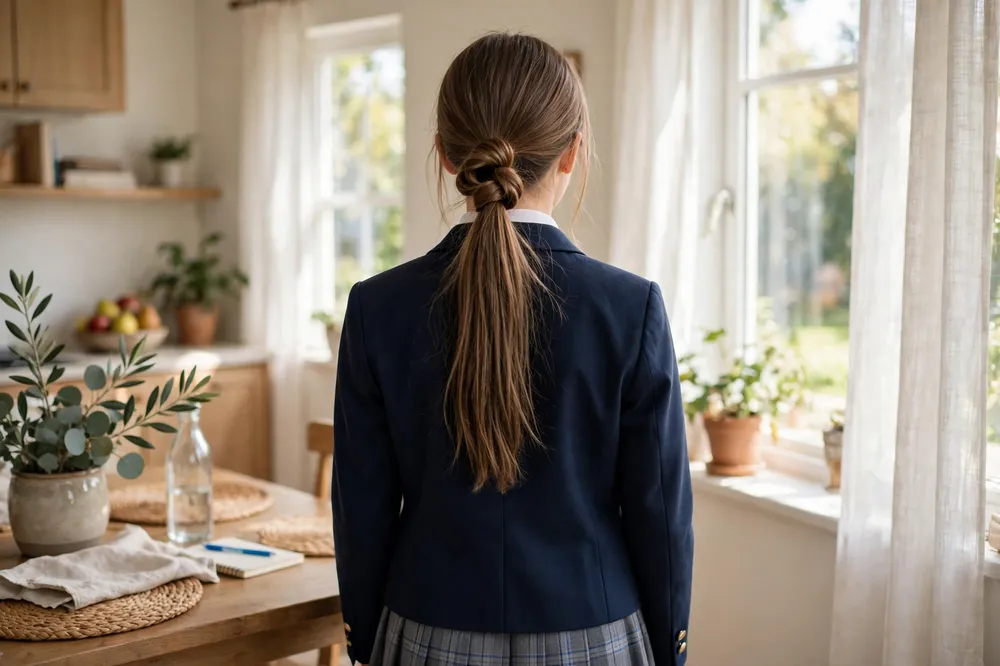
Time: 2 minutes · Best for: long hair, second-day hair with some grip · Lasts: most of the day
Divide loose hair into two equal sections at the nape and tie them in an ordinary knot, exactly like the first knot of a shoelace. Pull it snug against the head, tie a second knot directly beneath the first, and let the ends fall as the ponytail. Slip one small clear elastic over the knots if your hair is very silky. Because there is no band on show, a knotted ponytail looks grown-up and a little bit clever — a good choice for older girls who have gone off obvious elastics and scrunchies. It needs length to spare, since each knot eats about two inches, so it is one for hair past the shoulders.
22. Scarf Ponytail
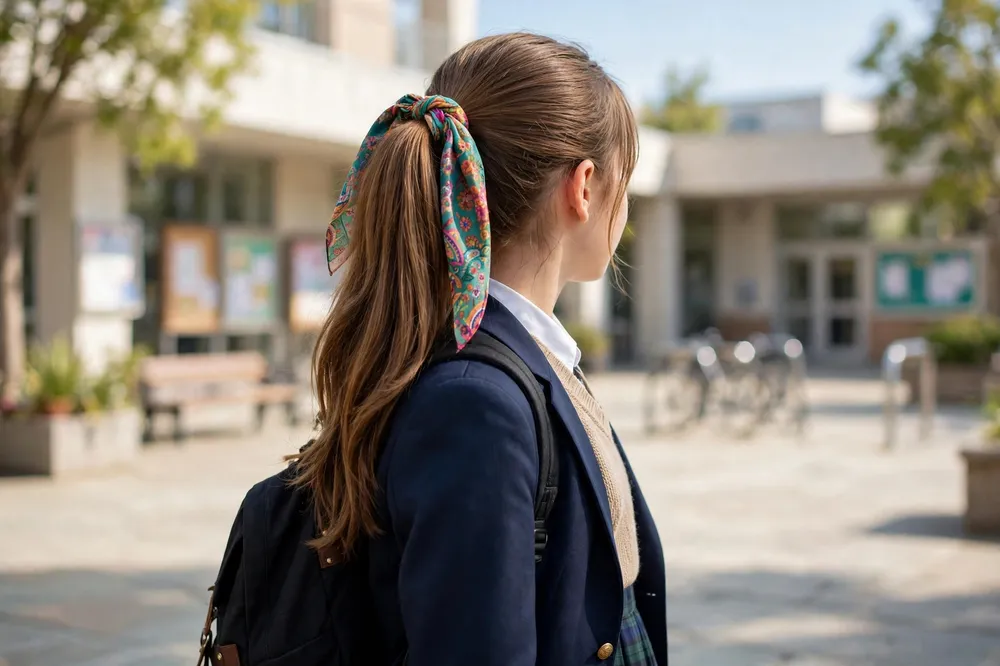
Time: 2 minutes · Best for: any ponytail, all hair types · Lasts: all day
Make any ponytail from this list, then fold a slim scarf into a band, wrap it around the elastic and tie it in a bow or simple knot, letting the ends trail down with the hair. The scarf hides the elastic completely, adds the one splash of colour many uniforms allow, and — in silk or satin — is gentler on the hair than a bare elastic. Keep the scarf ends shorter than the ponytail itself so they do not catch in zips and straps.
Half-Up Styles and Pretty Details
For days when you want your hair mostly down but still school-practical — photos, birthdays, the last day of term — the answer is to control the front and let the back do what it likes. Every style here keeps hair out of the eyes while leaving length and curls on show.
23. Twisted Half-Up
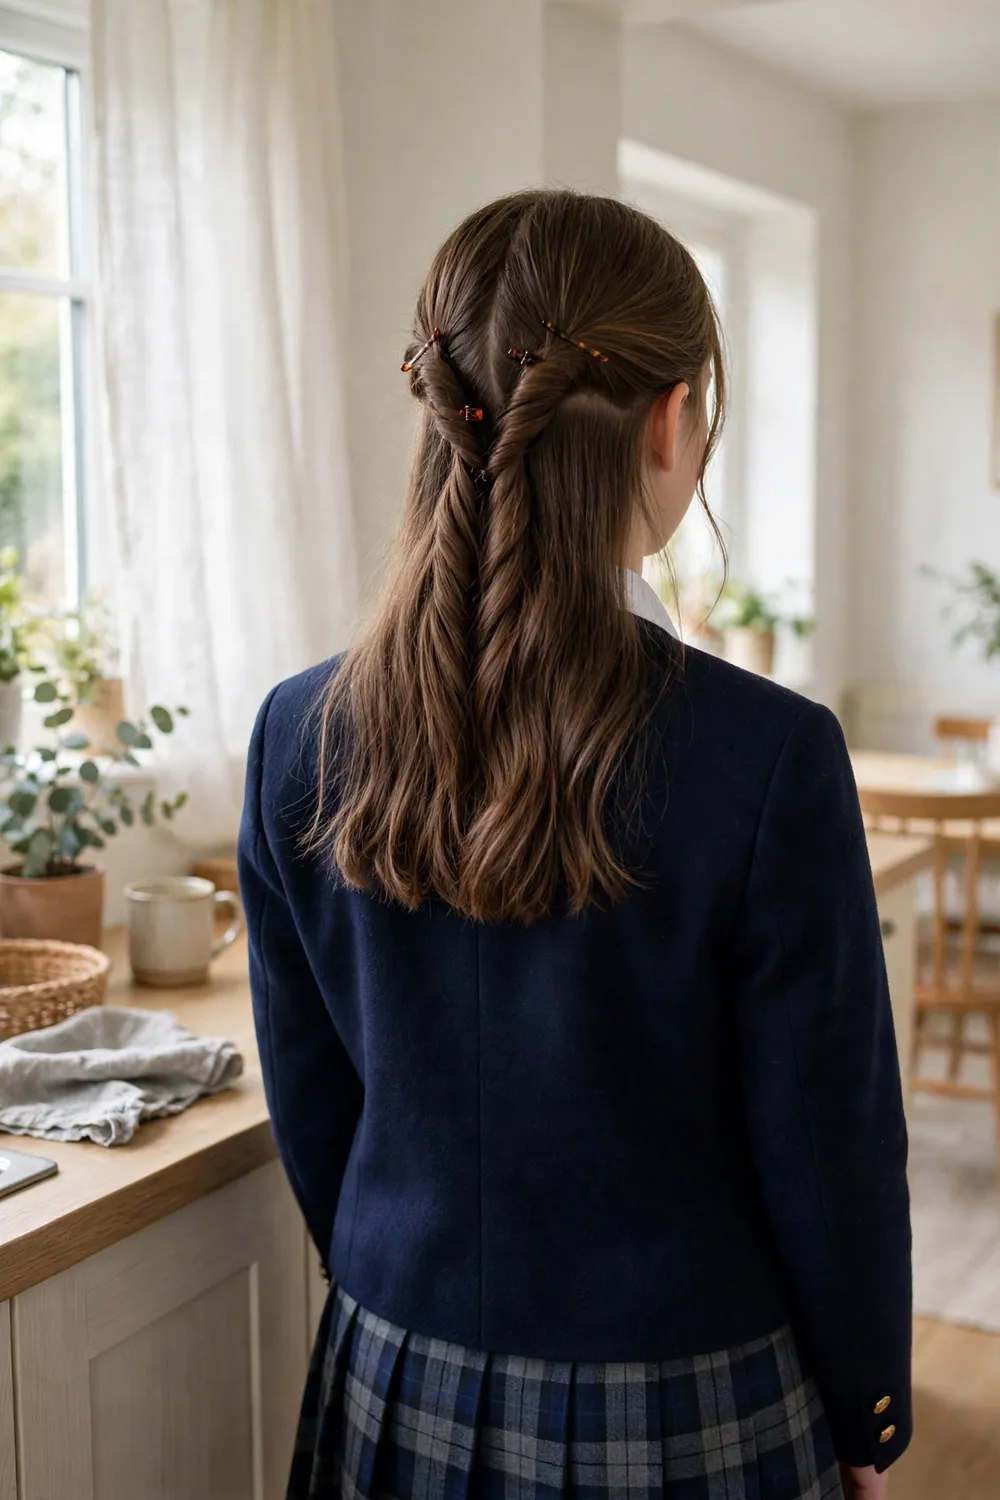
Time: 2 minutes · Best for: all lengths past the chin, straight and wavy hair · Lasts: all day
Take a small section of hair from above each ear, twist each one backwards away from the face, and pin them together where they meet at the back of your head with a small clip or two crossed bobby pins. That is the entire style, and it flatters almost everyone because the twists frame the face instead of scraping the hair flat back. It is the gentlest style in this guide for fine or fragile hairlines, since nothing pulls. On curly hair, skip the twisting and simply clip the two sections back — the curls give the same framed effect on their own.
24. Criss-Cross Half-Up
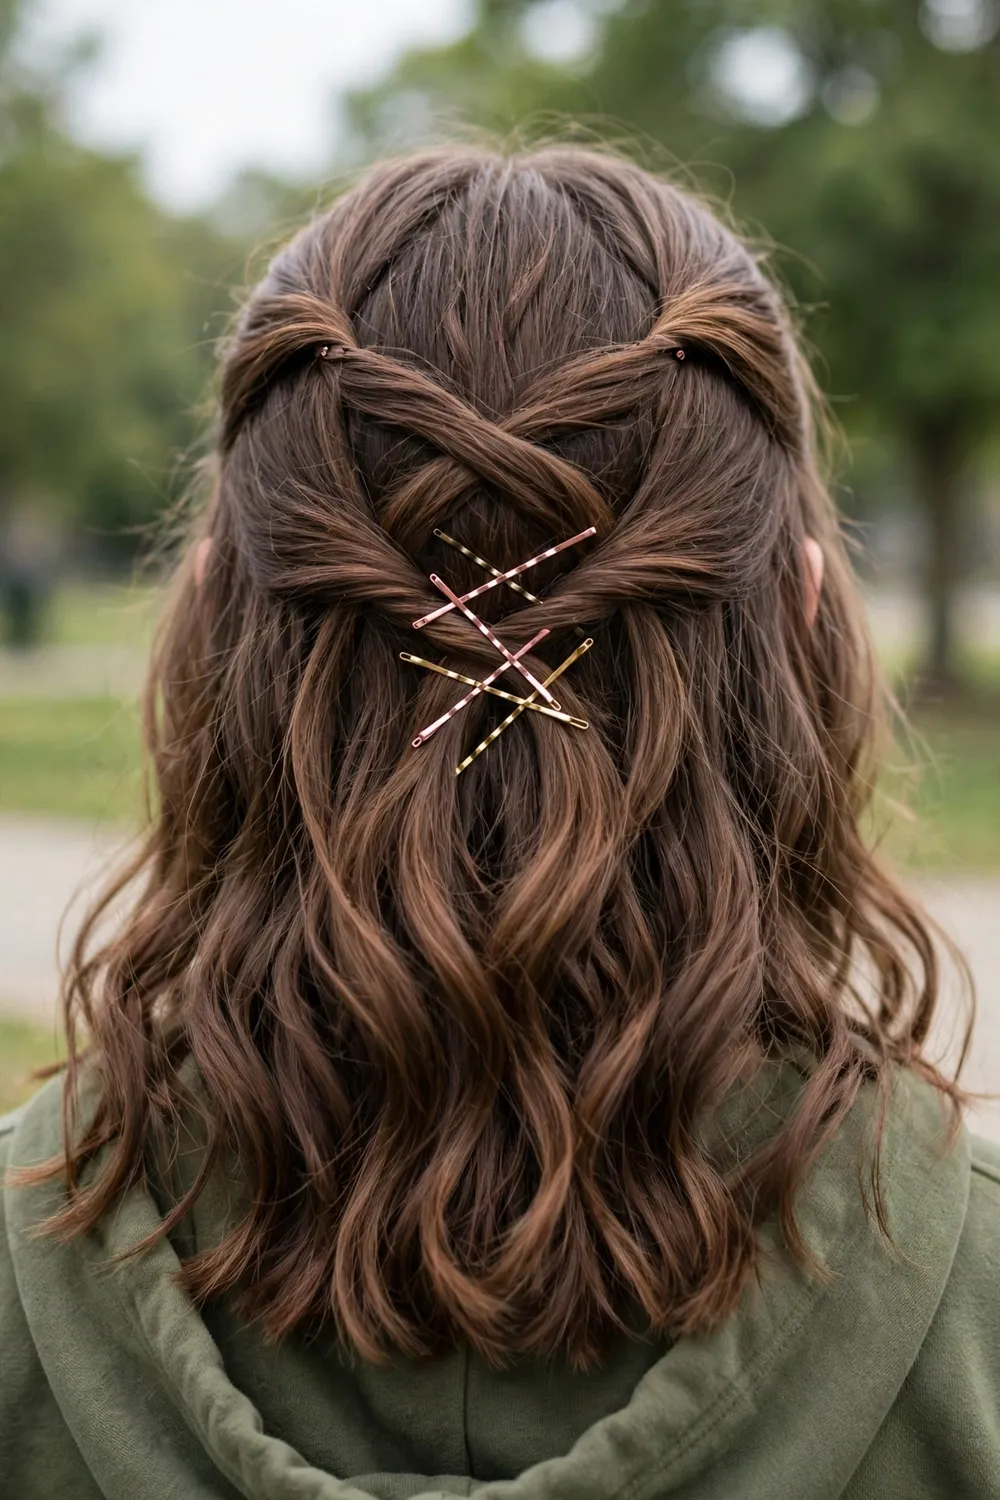
Time: 3–4 minutes · Best for: medium to long hair · Lasts: all day
Take a small section from the right side of your head, bring it across the back and pin it on the left. Take a section from the left, bring it across and pin it on the right, just below the first. Repeat once more on each side and you have a row of neat X shapes holding the top of your hair back while the rest falls loose. It looks like a woven pattern and reads as far more skilled than it is — pins and crossing, nothing else. Hide each pin under the next section as you work down and the back looks seamless. This is a lovely choice for class photos because the detail shows from behind as well as the front staying tidy.
25. Waterfall Braid
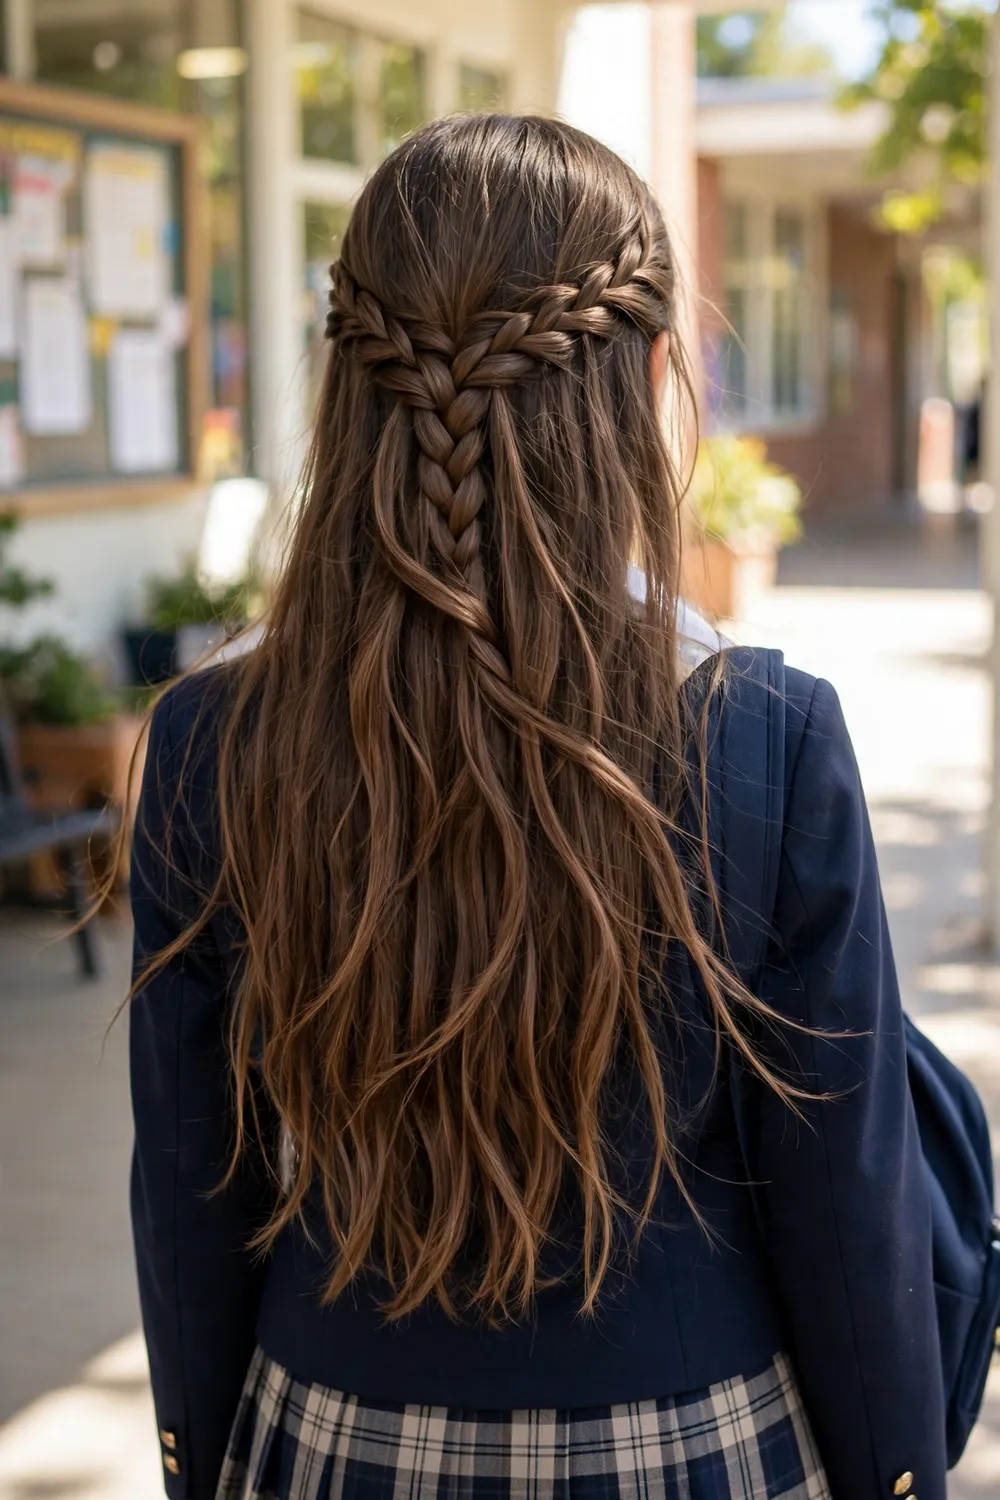
Time: 5 minutes · Best for: long wavy or curly hair, special days · Lasts: most of the day
Start a small French braid at one temple and work it horizontally across the back of the head — but every time the top strand crosses over, let it drop and hang loose, and pick up a fresh strand from just behind it to take its place. The dropped strands fall through the braid like water through a stream, which is where the name comes from. Finish behind the opposite ear with a small elastic or pin. Be honest about timing: this is the slowest style in the guide and the one most worth practising on a weekend or on a friend first. On wavy and curly hair it is genuinely beautiful, and because it only pins the top layer, it is a special-occasion style rather than a sports-day one.
26. Twisted Headband
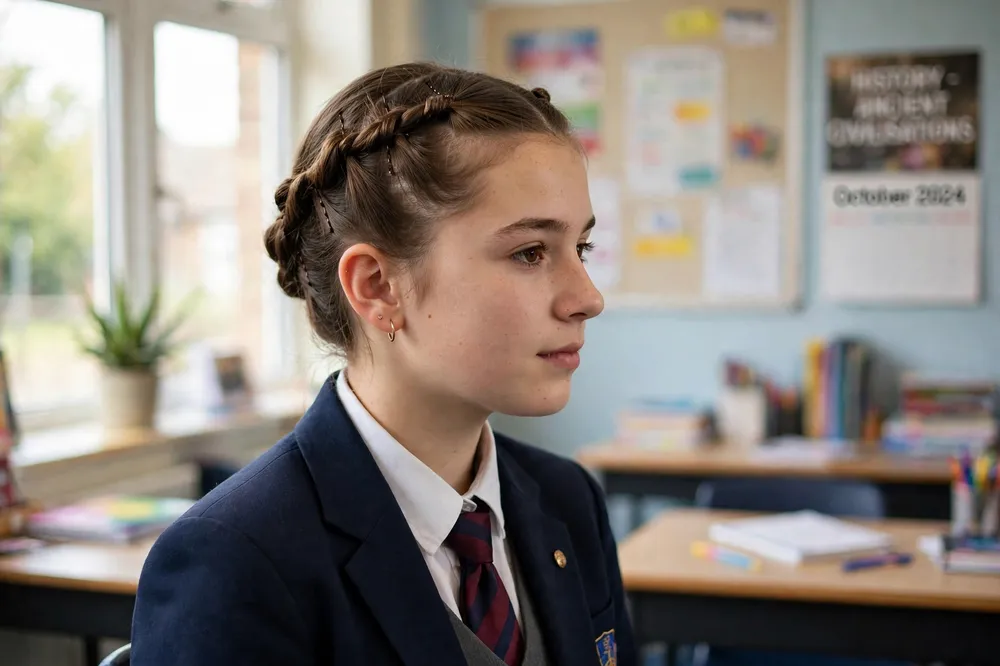
Time: 2 minutes · Best for: growing-out fringes and bangs, all lengths · Lasts: all day
Take a small section at the front on one side — including the fringe or bangs if you have them — twist it back along the hairline and pin it behind your ear. Do the same on the other side so the two twists meet at the back like a headband made of hair. This is the problem-solver style: it tames a growing-out fringe, holds back the short front layers that escape every ponytail, and keeps hair off the forehead during lessons, all while the rest of your hair stays completely loose. If you wear curtain bangs, twist just the longer side pieces back and leave the bangs down — the style works around them instead of against them.
27. Headband Tuck

Time: 2 minutes · Best for: medium to long hair, hot days · Lasts: all day
Put on a soft, stretchy headband over your hair, worn on top like an ordinary headband. Then, starting at the front, tuck small sections of hair up and over the band, working all the way around until every end is tucked in and the band is covered in a smooth roll. No pins, no elastics, and it genuinely takes two minutes once you have done it once. The close cousin is the rolled tuck updo: gather the hair into a low ponytail without tying it, roll the whole ponytail upward and tuck the roll in against the head, then pin the edges — the same rolled silhouette without a headband. Both keep every hair off the neck, which makes them summer-term favourites, and both look polished enough for assemblies and photos.
28. Side-Swept Twists

Time: 3 minutes · Best for: medium to long hair, spirit days and photos · Lasts: most of the day
Part your hair deeply on one side. On the heavier side, take a two-inch section near the temple, split it in two, and twist the pieces around each other, adding a little more hair from the hairline as you travel back towards the opposite ear — like a flat twist stitched along the front. Pin it behind the ear, then sweep everything else over the opposite shoulder. The asymmetry is what makes it feel special: one side neat and structured, the other soft and loose. It is a good pick for one-shoulder tops, school concerts and any day with a camera around, and it behaves better than fully loose hair because the front is anchored.
29. Bow Bun
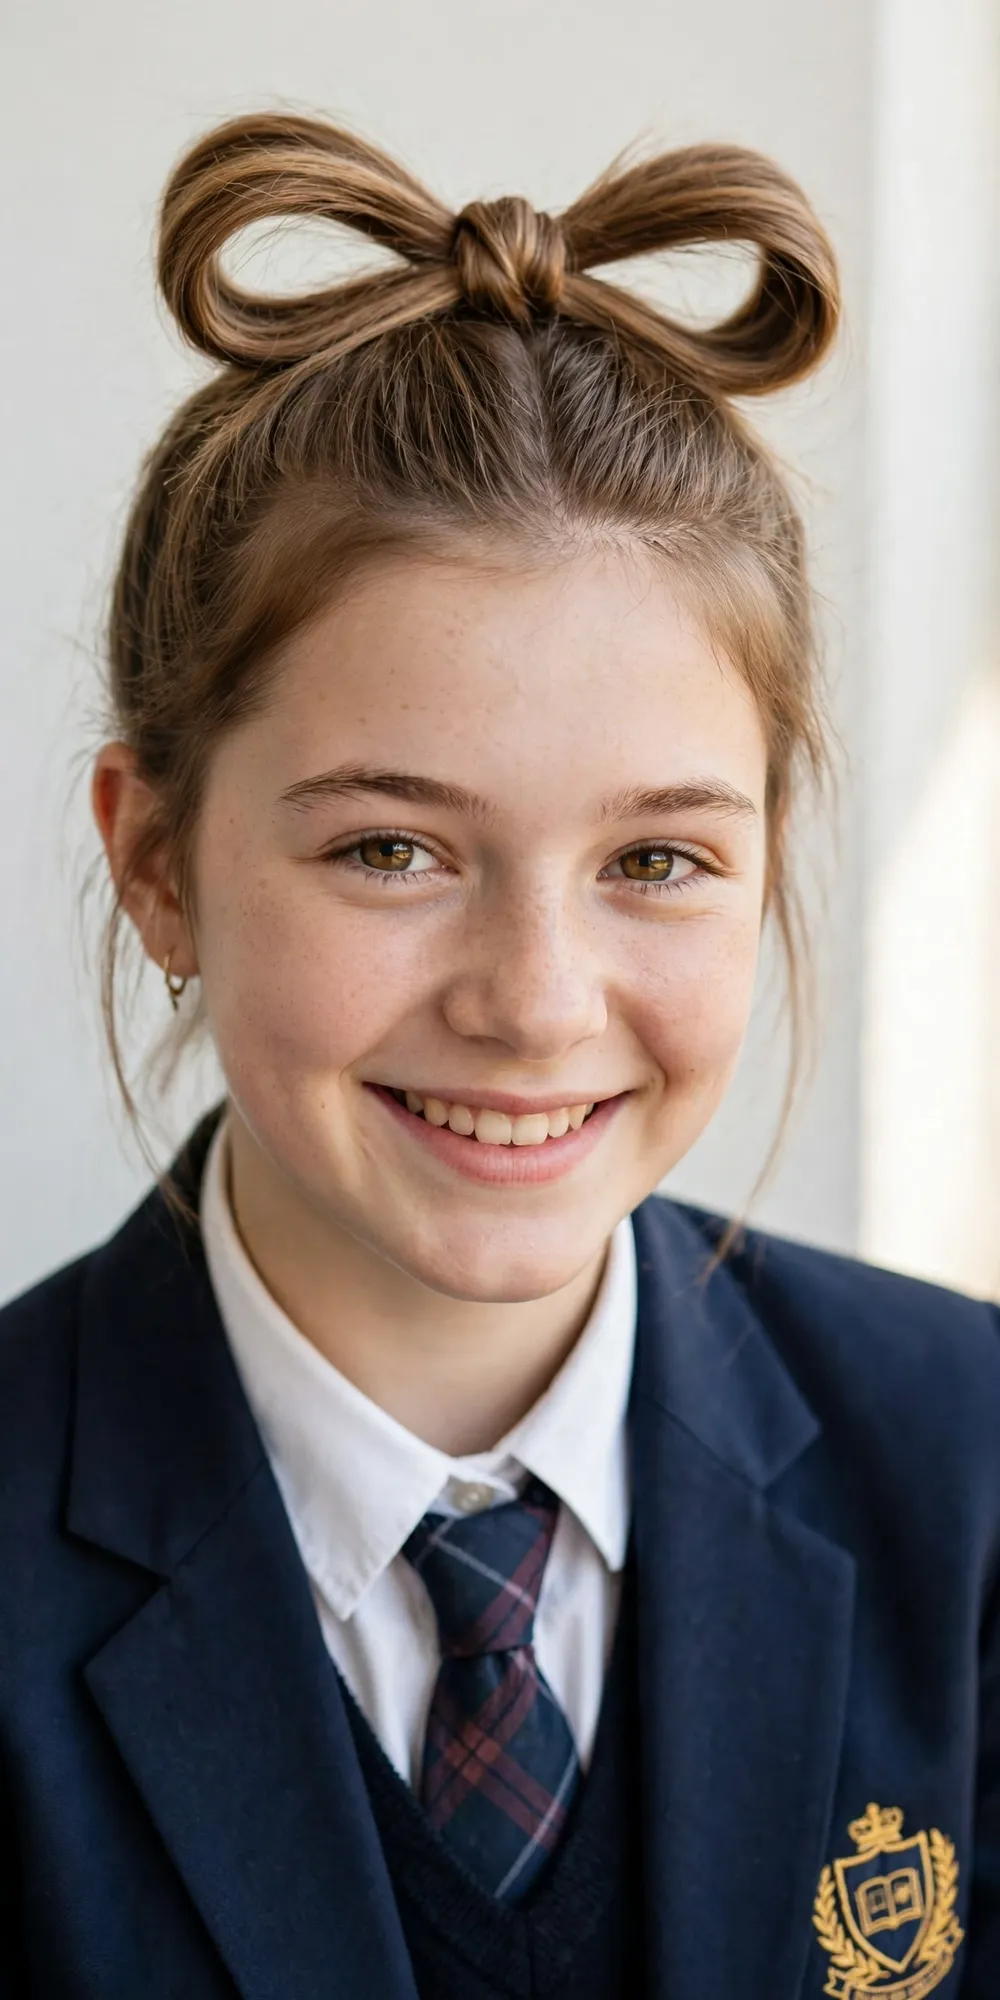
Time: 3–4 minutes · Best for: medium to long hair, younger girls and birthdays · Lasts: all day
Tie a high ponytail, but on the last pull, only bring the hair halfway through so it forms a loop with the ends pointing forward. Split the loop into two halves — these are the two sides of the bow — then take the loose ends, flip them back over the middle of the loop to make the bow’s knot, and pin everything underneath. Fan the two loops out and adjust until it reads clearly as a bow. It sounds like a party trick and takes about three minutes in real life; younger girls especially love that the bow is their actual hair. Smooth hair works best — very curly hair makes a softer, less defined bow, which is its own look.
30. Claw Clip Updo
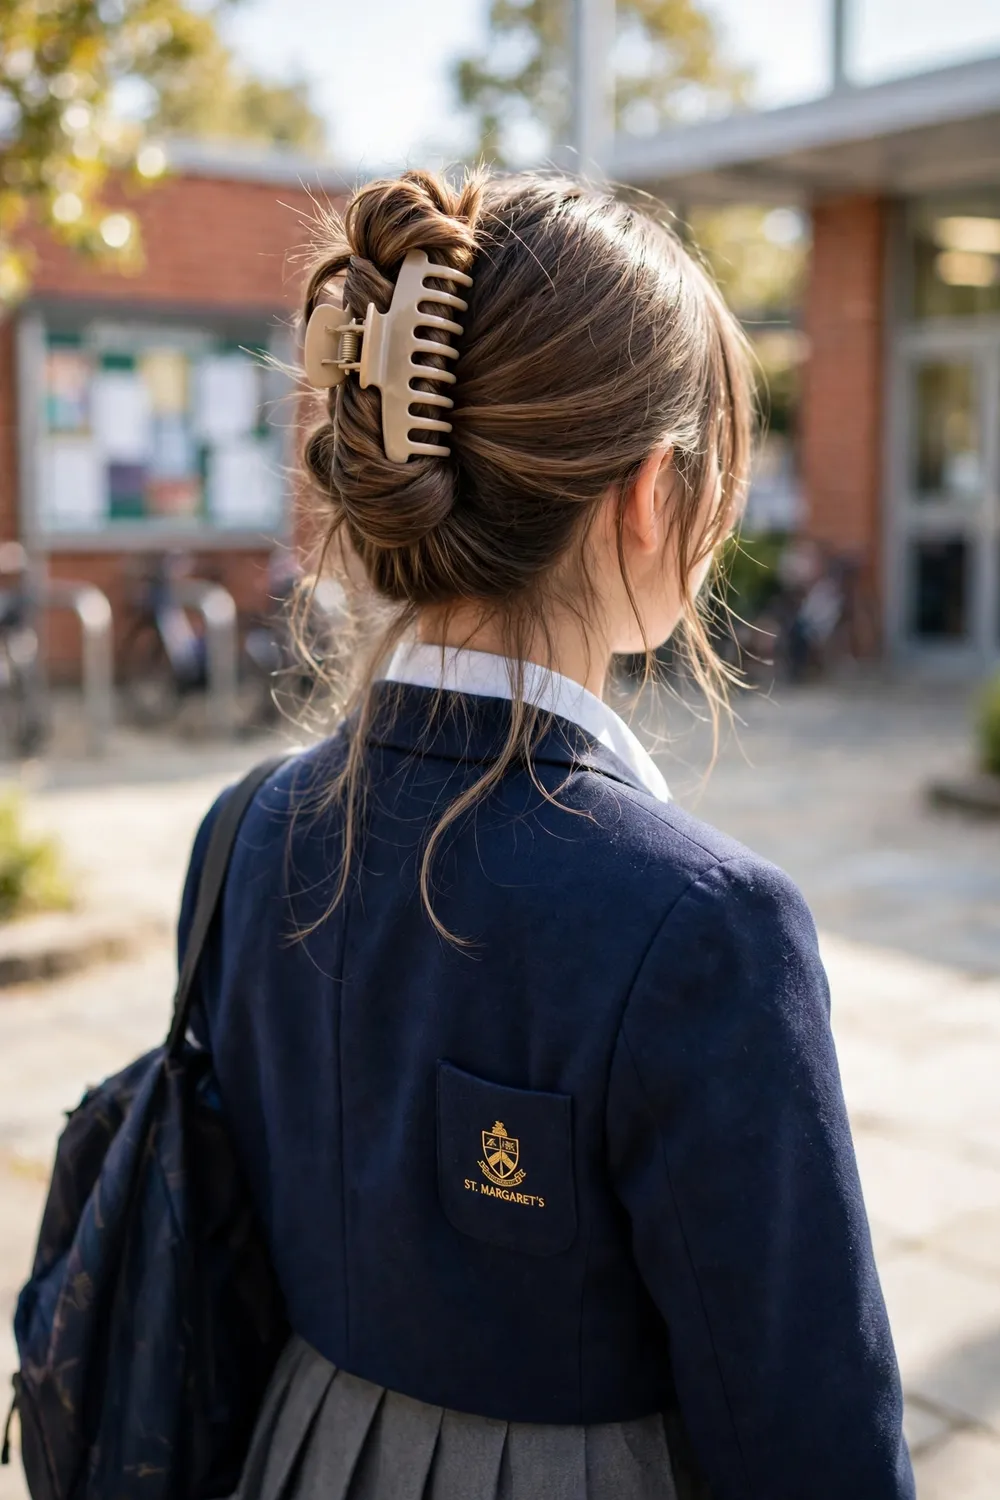
Time: 1 minute · Best for: medium to long hair, older girls · Lasts: all day
Gather all your hair at the back as if for a ponytail, twist the whole length upward against your head, fold the twist in half, and clamp one large claw clip over it. Let two strands fall at the front. Done — an actual updo in about sixty seconds, which is why it has become the default hairstyle of older students everywhere. The trick is clip size: a clip that is too small for thick hair pops open by second period, so choose one with long teeth and a strong spring, and re-clamp once after ten minutes if your hair is very smooth. Because the clip holds hair by gathering rather than pulling, it is comfortable until the moment you take it out — and taking it out at the end of the day is one motion.
31. Butterfly Clips

Time: 3 minutes · Best for: all hair types, younger girls and spirit days · Lasts: all day
Part the front of the hair into four to six small sections along the hairline, twist each section back once or twice, and clip each one with a mini butterfly clip in the colours of your choice. The clips do the job of pins — holding the front flat and out of the eyes — while being the decoration at the same time. It is the fastest way to make an ordinary hair-down day feel dressed up, it works on short hair that cannot manage most of this list, and it is easy for younger girls to do themselves because the clips are big enough to handle and nothing has to be even. Match the clip colours to a uniform accent or a school house colour for assemblies.
Curly, Natural and Protective Styles
Curly and coily hair does not need to be straightened or fought into the styles above — it has its own set of school-perfect looks that work with the texture instead of against it. These three also protect the ends, which matters more for natural hair because the lengths rub against collars and straps all day.
32. Pineapple Puff for Curly Hair

Time: 2 minutes · Best for: curly and coily hair, medium length and longer · Lasts: all day
Flip your head forward, gather all the curls loosely at the very top front of your head and secure them with a satin scrunchie or a soft puff cuff — loosely is the key word, because the curls are not being pulled into a ponytail, just corralled. Flip back up and the curls fountain out over the top while the sides sit smooth. Smooth a little edge gel around the hairline if you like a contrast between sleek edges and a big soft puff. The pineapple is also how curly hair should sleep before a school day: gathering it up at night stops the curls being crushed flat against the pillow, so the morning version of this style is often just taking the same scrunchie and repositioning it.
33. Two-Strand Twists
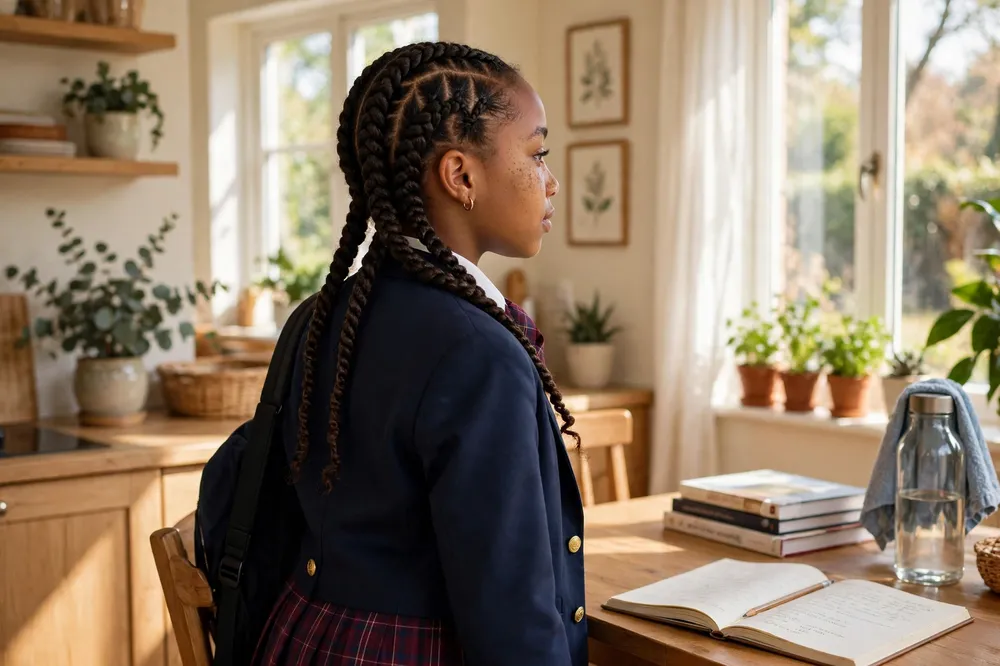
Time: 20–40 minutes to install (a weekend job), then 0 minutes each morning · Best for: natural, coily and curly hair · Lasts: 1–2 weeks
Divide damp, detangled hair into sections; split each section in two and twist the two pieces around each other from root to end, then move to the next. The twists hang like soft ropes, keep the ends tucked and protected, and turn school mornings into a non-event — there is nothing to style, just a quick spritz of water or leave-in if the twists look dry. For a change of look mid-week, gather the same twists up and pin them into a low flat twist updo, or pull them into one or two buns; the twists become the building blocks for half a dozen styles. Add a little moisturising cream to each section before twisting so the hair stays soft for the whole wear, and sleep with a satin scarf or bonnet to stop the twists fuzzing against the pillow.
34. Box Braids and Cornrows
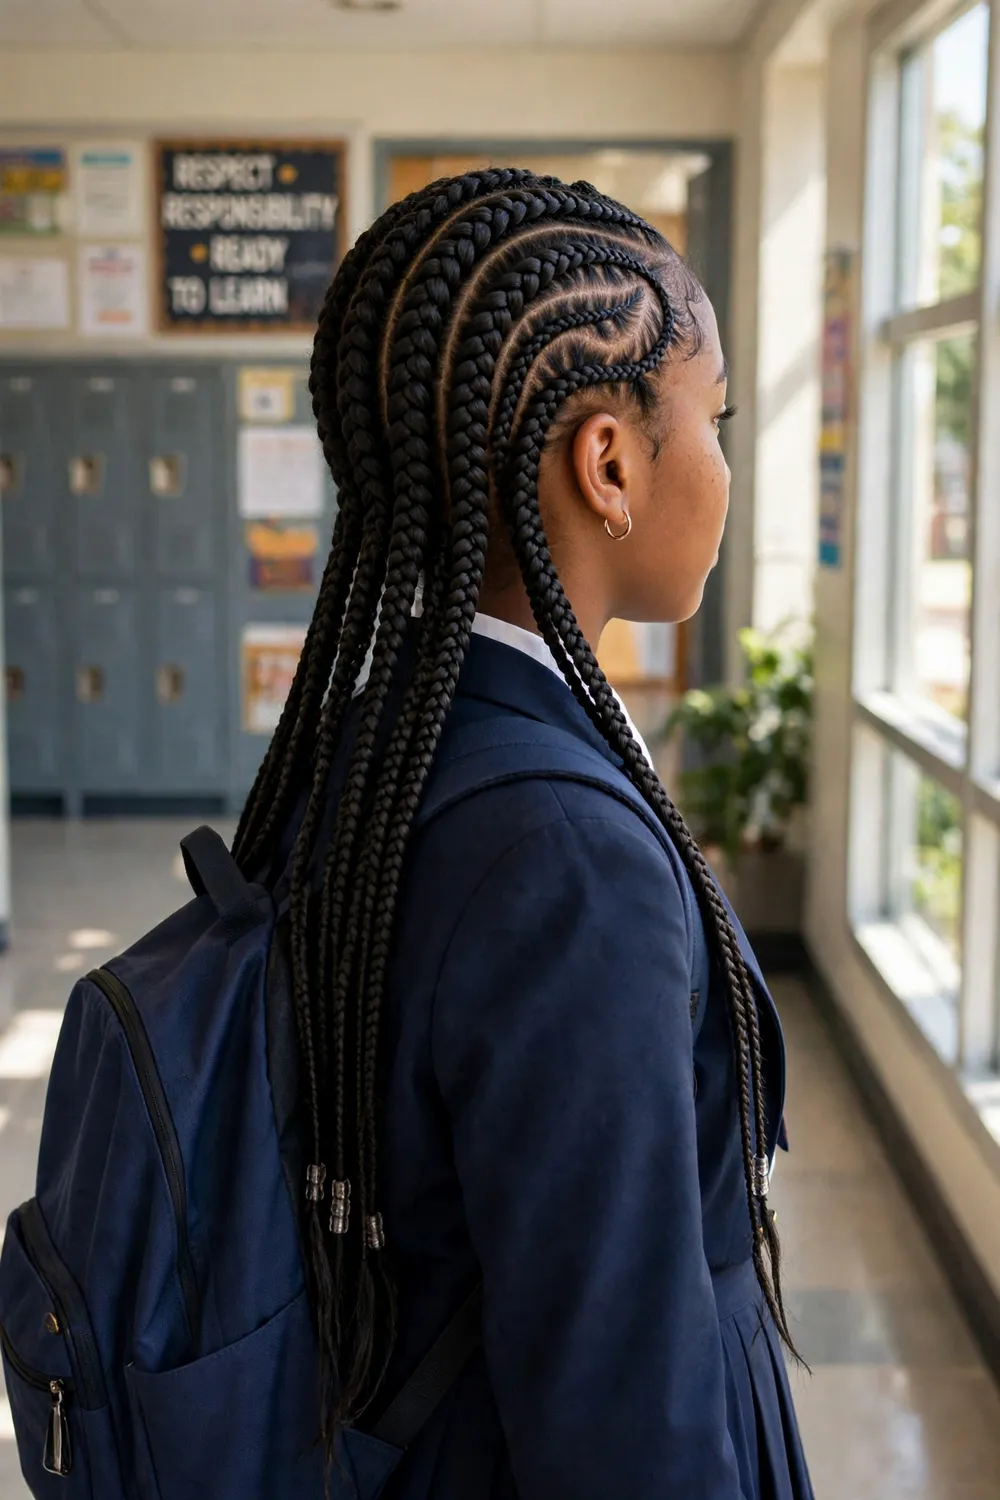
Time: hours to install (salon, family or a skilled friend), then 0 minutes each morning · Best for: natural and textured hair · Lasts: 2–6 weeks
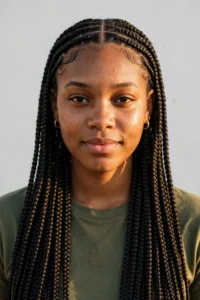
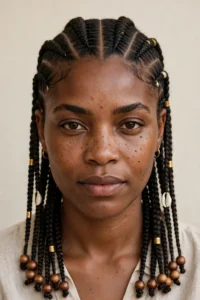
For the ultimate school-morning solution, braids installed once and worn for weeks are hard to beat. Box braids part the hair into small square sections, each braided down its own length, so the hair can be worn loose, in a ponytail, in buns or under a headscarf with no daily work at all. Cornrows braid the hair flat against the scalp in straight or patterned rows — two to four simple rows back is a clean school look that keeps every strand controlled for PE and swimming. Both protect the wearer’s own hair from daily combing and friction, which is why they are popular for growing hair out. Two care rules matter: keep the scalp clean and lightly oiled while the braids are in, and do not leave any install in past about six weeks — book the take-down as part of the plan, and give the hair a week or two loose between installs.
The 5-Minute School Morning Routine
The styles above are only half the secret. The girls whose hair looks done every day are not waking up earlier — they are doing most of the work the night before. Here is the routine that makes a five-minute morning realistic:
The night before (5 minutes):
- Brush or detangle fully. Knots left overnight are worse by morning. Work from the ends upward, in sections for curly hair, with a little leave-in if it is dry.
- Set the base. Sleep in a loose braid, a pineapple (style 32), or two loose twists. You will wake up with hair that is already detangled, mostly smooth and, in the braid’s case, already wavy — half the styling is done.
- Protect it while you sleep. A satin pillowcase, or a satin bonnet over braids and twists, stops the friction that causes frizz and morning tangles.
- Lay out tomorrow’s kit. Elastic, clip, brush — on the dresser, not somewhere in a drawer. Deciding the style tonight (pick from the list by tomorrow’s schedule: PE day = braids, photo day = something from the pretty-details section) removes the morning dither completely.
In the morning (5 minutes or less):
- Undo the sleep style and shake the hair out; brush only styles that are meant to be smooth.
- Refresh with a light mist of water — curly hair especially wakes up with water and a pea-sized amount of leave-in, not with a dry brush.
- Do the chosen style. Smooth a fingertip of serum or oil over the finished style to calm flyaways.
- Drop two spare elastics and a claw clip into the school bag. It takes five seconds and rescues any style that meets an unexpected PE lesson.
Mistakes to Avoid
- Trying a brand-new style on a school morning. First attempts are slow and uneven, and the style gets blamed. Practise braids and the waterfall once at the weekend; on school mornings, only do styles your hands already know.
- Pulling elastics too tight. Headaches, a sore hairline and breakage at the front are all signs a style is too tight. If it hurts when it goes in, it will be pulled out by lunch — redo it looser. Tight styles every day can damage the hairline over time, so rotate where ponytails sit.
- Using metal-clasp hair ties. The little metal bar on cheap elastics snags and snaps hair at the same point every day. Snag-free elastics, scrunchies and spiral ties cost the same and do not.
- Styling soaking-wet hair into tight styles. Hair is weakest when wet. Braiding damp hair is fine and even helpful; yanking wet hair into a tight slicked bun every day is not.
- Reaching for heat every morning. A straightener on a rushed morning gives you a half-done job and daily heat damage. Every style in this guide is heat-free; save heat for weekends, and always use a heat protectant then.
- Skipping the night-before detangle. Ten minutes of morning knot-fighting is almost always five minutes of evening brushing that did not happen.
Hairstyles for School FAQs
What is the quickest hairstyle for school? The half-up claw clip (style 6) and the claw clip updo (style 30) — both take about a minute. A low ponytail with a hair wrap and a messy bun take about two minutes. Nothing on this list takes longer than five minutes once you have practised it once.
What is the easiest hairstyle for school? For complete beginners, the low ponytail, the messy bun and the twisted half-up need no skill beyond tying and pinning. Braids take one weekend practice session to learn and then become just as easy — start with the classic three-strand braid (style 8).
Which hairstyle lasts the longest during school? Braids. Double Dutch braids, a single French braid and pigtail braids regularly survive a full day of lessons plus PE and still look neat at pickup — double Dutch braids often look fine the next morning too. Protective installs like box braids and cornrows last for weeks.
How can I do my hair fast in the morning before school? Do the work the night before: detangle fully, then sleep in a loose braid, twists or a pineapple on a satin pillowcase. In the morning you only refresh with water, style, and smooth — the full routine section above runs through it step by step.
What are good protective hairstyles for school for natural hair? Two-strand twists, box braids and cornrows are the strongest choices, because the ends are tucked away from friction and there is nothing to redo each morning. The pineapple puff is the best loose option, since it keeps curls gathered without pulling.
What are good school hairstyles for short hair? Short hair rules out most ponytails, but the twisted headband, braided headband, butterfly clips and twisted half-up all work from chin length, and a side braid works on anything long enough to gather to one side. Clips and twists at the front are the short-hair toolkit.
How do I stop my hairstyle falling out during PE or sports? Choose containment over decoration: braids first, then a slicked-back bun or a braided ponytail, secured with snag-free elastics rather than slippery scrunchies. Pin any style in two places, not one, and cross your bobby pins in an X — crossed pins hold through running in a way single pins never do.
My school has a strict dress code. Which styles are safest? Plain versions of the classics: a low ponytail, a three-strand or French braid, a slicked-back bun and a braided headband made from your own hair all keep hair neat without accessories that dress codes usually restrict. Save the butterfly clips, scarves and space buns for schools and days where accessories are allowed.
Final Word
Great school hair is not about the most complicated style in the corridor — it is about a small set of quick styles you can do half-asleep that still look intentional at the end of the day. Learn one ponytail upgrade, one braid and one half-up from this list, add the night-before routine, and mornings get quieter for everyone. For more ponytail ideas, see our 34 Best Ponytail Hairstyles guide — and browse our latest hairstyle guides — and save this page for the next morning the alarm lets you down.