

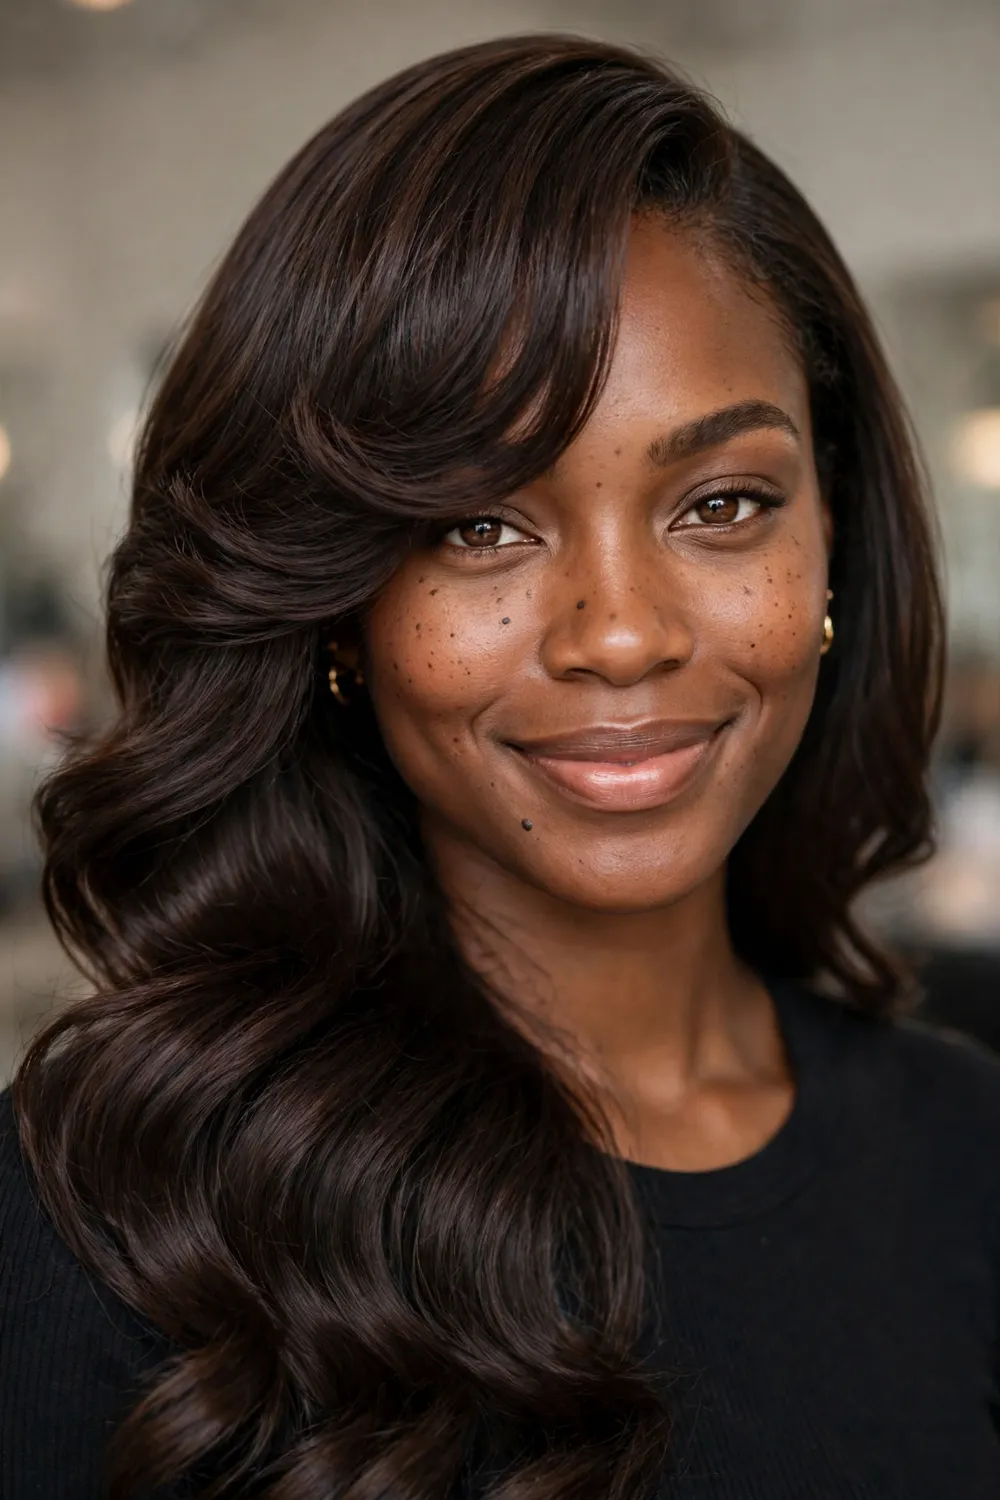
A quick weave is the fastest honest way to change your hair completely. You sit down with your own hair braided flat underneath, and two hours later you stand up with a bob you have never grown, curls you were not born with, or length you would need three years and a lot of patience to reach on your own. And if you hate it? It is out within the month. No long-term commitment, no growing-out phase, no regrets that follow you around until Christmas.
These 29 quick weave hairstyles lean hard into the one detail that flatters almost every face: a side-swept bang. A diagonal fringe softens the front of an install, hides a hairline that is not behaving, and stops a fresh weave from looking like it was placed on your head five minutes ago. If you only try three styles from this list, make it the Sleek Chin-Length Bob with Feathered Bangs, the Curly Quick Weave with a Side Bang, and the Glueless Closure Quick Weave with Soft Layers. Between them they cover polished, playful and protective — and one of them will suit the way you actually live.
What is a quick weave?
A quick weave is an install where wefted hair is bonded with adhesive onto a protective cap worn over your own hair, instead of being sewn onto braids the way a traditional sew-in is. Your natural hair sits underneath, usually braided flat or moulded down, and the cap acts as a barrier between your hair and the glue. It belongs to the wider family of artificial hair integrations, but the quick weave is the sprinter of the group: most installs take 60 to 90 minutes, against three to five hours for a sew-in.
That speed is the whole point, and it comes with an honest trade. A quick weave usually lasts two to four weeks, not the six to eight you might get from a good sew-in. It costs less, it comes out easier, and it asks less of your schedule. For a wedding, a holiday, a new job, or just a mood — it is hard to beat.
Read this first: glue, caps and your edges
Before the pretty pictures, the unglamorous part, because this is where quick weaves are won or lost.
The glue should never touch your own hair. The tracks get bonded to the cap, full stop. If a stylist starts applying adhesive directly to your natural hair, that is your cue to speak up. A stocking cap or wig cap costs almost nothing and it is the only thing standing between the glue and your strands.
Do a patch test if your scalp is dramatic. Some bonding glues irritate sensitive skin. A small test behind the ear, a day before your appointment, takes two minutes and can save you a miserable fortnight of itching. If your edges are already thin or tender, skip glue entirely and go for the glueless closure style at number 23, or save up for a sew-in. Your hairline is not the place to gamble.
Leave-out versus closure is a real decision. A leave-out — a small section of your own hair left free to blend over the tracks — looks the most natural, but it means heat on that section most days. A closure (a small lace or silk piece that mimics a part) protects every strand you own. Women who straighten their leave-out daily for three weeks often end up with a damaged patch in an otherwise healthy head of hair. Choose with your eyes open.
What it actually costs. Salon installs typically run somewhere between $65 and $150 depending on your city and the stylist, plus the price of the hair itself. Doing it yourself at home, once you own a cap, glue and basic tools, can come in under $40 in supplies. Anyone quoting you one exact price for every head is guessing.
The 29 quick weave hairstyles
1. Sleek Chin-Length Bob with Feathered Bangs

This is the style I would hand to a nervous first-timer, because it forgives nearly everything. The bob stops at the chin, the part sits deep to one side, and the bang is feathered — cut on a diagonal, light at the ends — so it skims across the forehead instead of hanging there like a curtain. That softness matters. A blunt bob on a fresh install can look severe for the first few days; the feathered fringe skips that awkward phase entirely.
Ask for two packs of 8 to 10 inch straight or silky yaki hair, and here is the detail most people miss: the bang should be cut after the weave is pressed and settled, not before. Cut it early and it springs up shorter than you wanted. A single pass of a small flat iron through the fringe each morning is all the styling it asks for. Keep the ends blunt and the bang light, and this one reads expensive from every angle.
2. Deep Side-Part Lob with Feathered Bangs
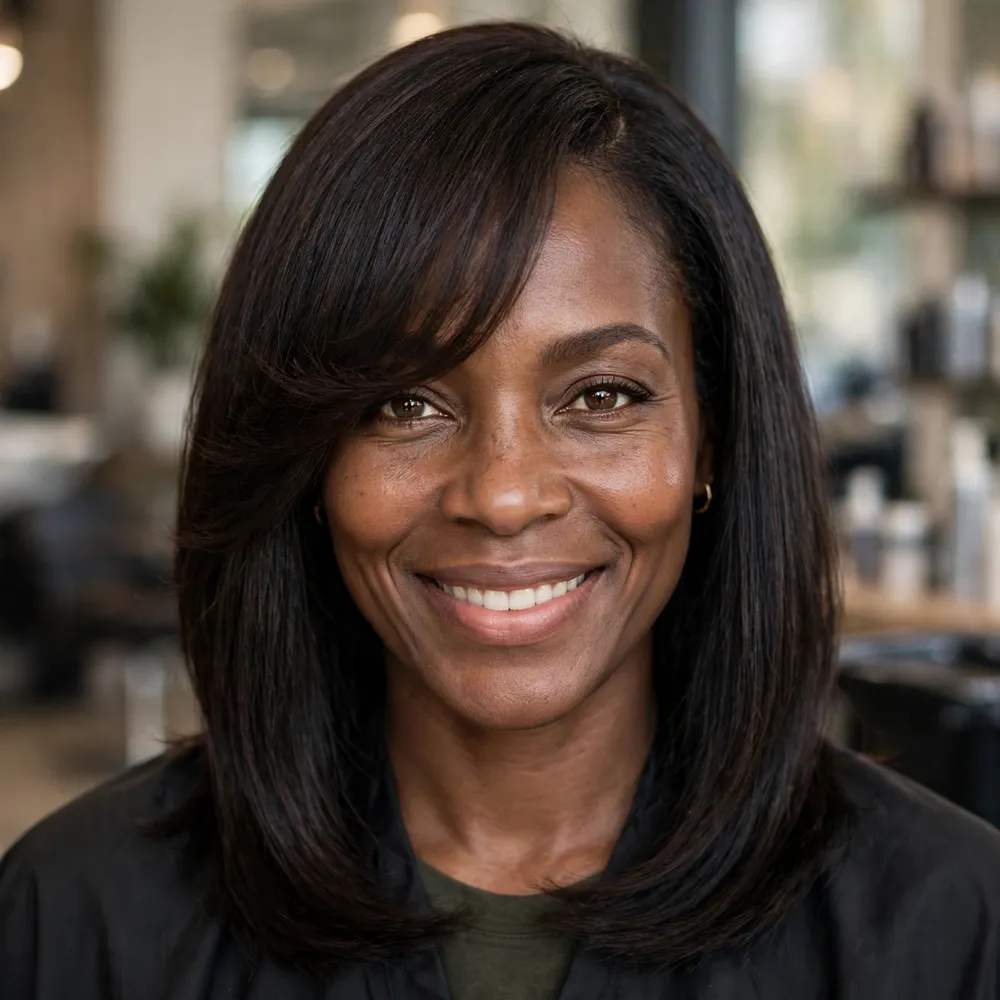
A lob — the bob’s longer sister, landing somewhere between chin and collarbone — buys you swing. That extra two inches changes how the whole style behaves: the front pieces fall in one long soft line into the bang, so nothing looks chopped. On round and heart-shaped faces it is especially kind, because the length at the jaw pulls the eye downward.
Body wave or loosely straightened hair works better here than pin-straight packs. Dead-straight hair can make the bang look like a separate piece that wandered in from another hairstyle. You want a slight bend at the ends so the fringe and the lengths belong to the same family. Styling is minimal: a little mousse worked into the damp bang, then wrap the hair for ten minutes so the sweep dries where you want it. Do not drown it in product. Heavy gel collapses the front by lunchtime, every single time.
3. Shoulder-Length Body Wave with a Soft Side Sweep

Body wave is the texture people pick when they want to look like they woke up attractive by accident. The wave is loose — more bend than curl — and the side-swept bang drops straight into that bend instead of sitting on top of it looking lost. It reads relaxed in person and photographs beautifully, which is a rarer combination than you would think.
Go for 10 to 12 inch bundles and keep the bang longer than feels safe, landing just below the brow. Bangs on wavy hair shrink once they curl, and a fringe cut to brow length while straight will be waving at your hairline by Friday. Ask your stylist to layer the front lightly so the bang melts into the wave rather than ending in a visible step. Refresh it with water and a fingertip of mousse, finger-combed only. A brush is where body wave goes to die.
4. Angled Bob with a Clean Razor Bang
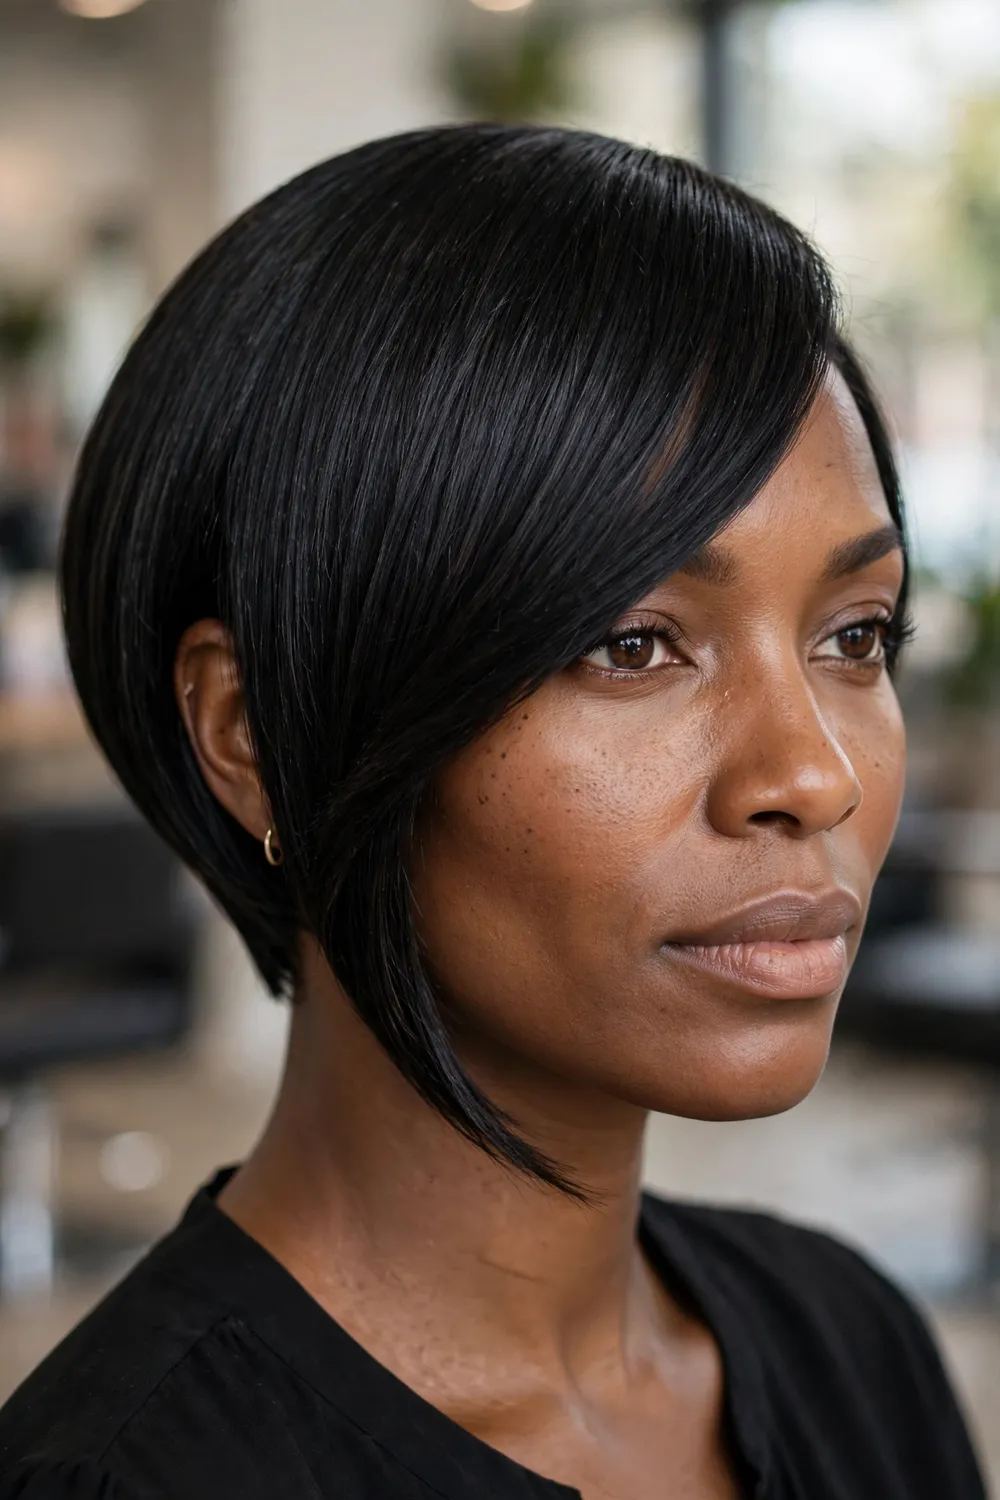
Shorter at the back, longer toward the chin, with a bang cut so clean it looks drawn on. The angled bob has attitude built into its geometry — the diagonal of the cut and the diagonal of the fringe echo each other, and the whole face looks lifted because of it. It is sharp, but the sweep keeps it from tipping into harsh.
One warning from experience: keep the bang thin. On this cut, a thick fringe swallows the forehead and the style goes from striking to crowded in one snip. You want it light enough to sweep, heavy enough to see. A razor finish gives the sleekest edge, though if your ends frizz quickly, ask for a soft scissor finish instead — it ages better over three weeks of wear. Serum goes on the ends only. Roots plus serum plus a fresh install equals a style that looks greasy by day two.
5. Bone-Straight Long Layers with a Chin-Grazing Fringe
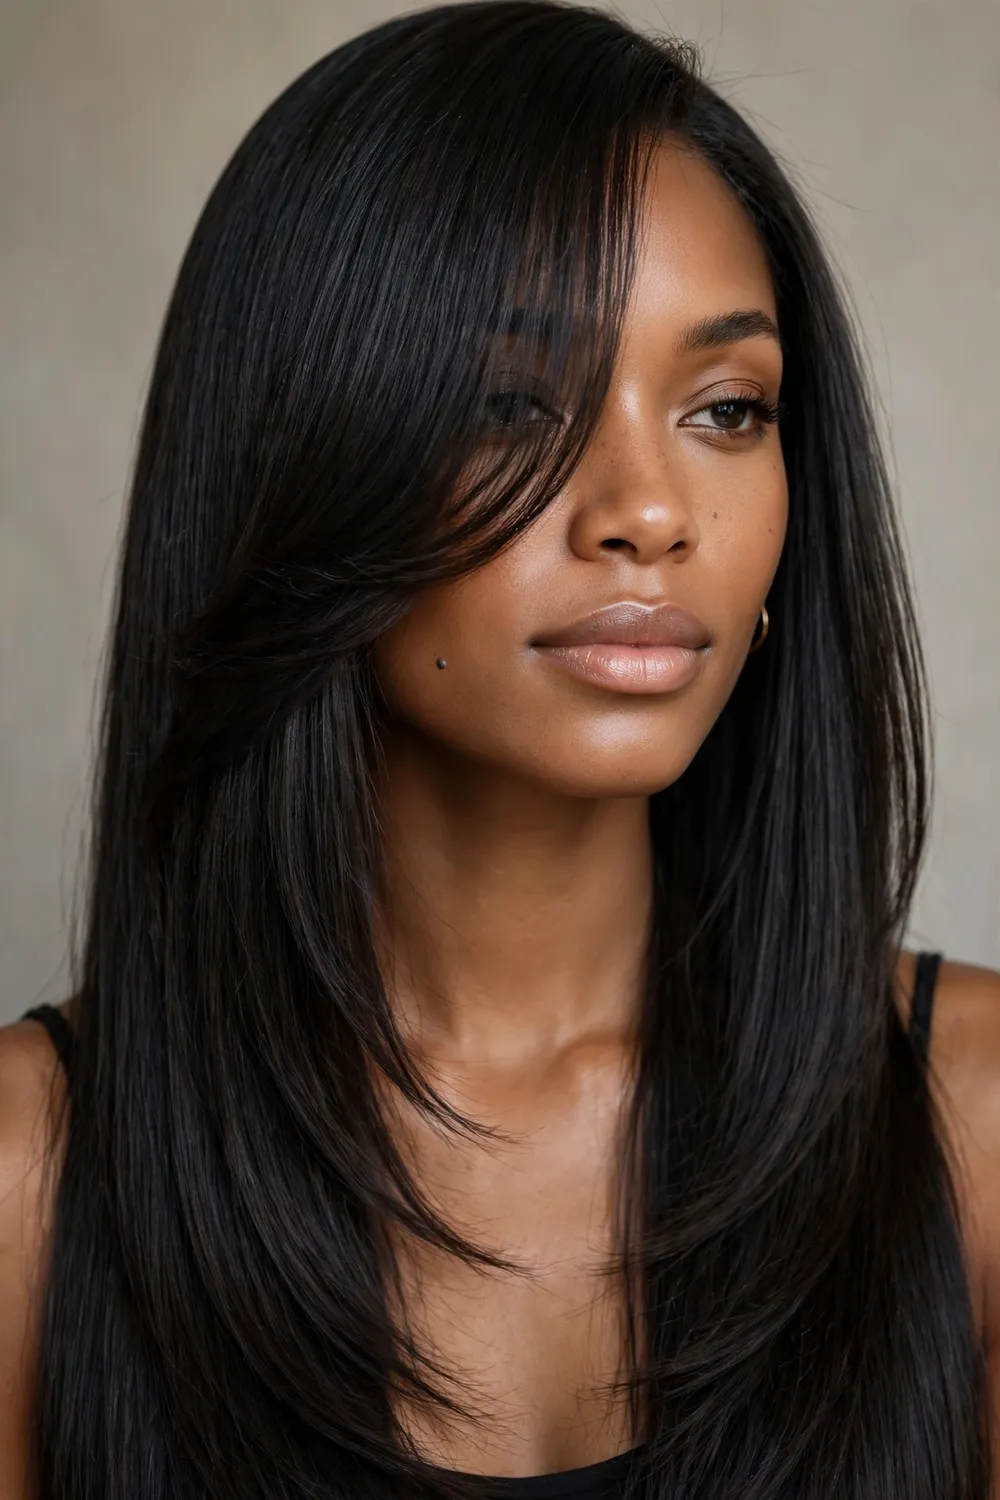
Long straight hair has one big problem: it can hang like two curtains and drag the face down with it. A side-swept fringe that grazes the chin is the fix. It gives the eye a diagonal to follow, breaks up all that vertical length, and keeps the style from looking like it is wearing you.
Texture choice decides whether this looks real. Mirror-shiny packs can make the fringe look pasted on, especially in photos. Yaki straight — with its slightly coarser, blown-out feel — blends far more believably on most Black women. And watch the density at the crown. It is tempting to keep adding tracks for fullness, but too much hair up top turns length into a helmet. Keep the crown light and let the ends do the showing off. Wrap it in a large silk scarf at night; long straight weaves tangle at the nape while you sleep, and ten seconds with a scarf saves twenty minutes with a brush.
6. Curly Quick Weave with a Side Bang
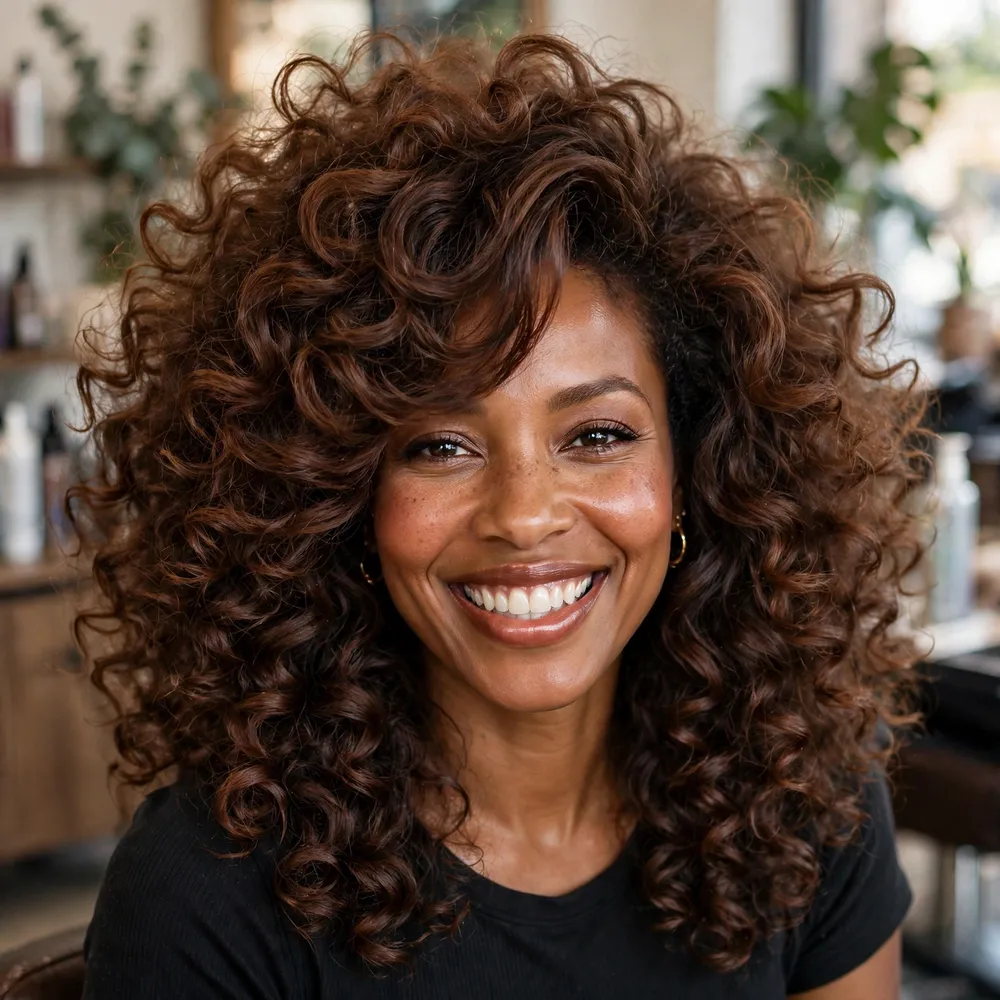
Curly installs are the great forgiving style of the weave world. The curl pattern hides the tracks, hides the blend, hides a multitude of small sins — which makes this the smartest pick if you are doing your first install at home. The side bang keeps all that volume pointed in one direction, so the curls frame your face instead of expanding around it like a halo.
Size matters more than people expect. Medium curls — the kind you can wrap around two fingers — let the bang fall in soft pieces. Tiny, tight curls tend to puff at the front and turn the fringe into a shelf. Use mousse to style, not heavy creams or oils; grease weighs the curls down and clumps them into ropes by day three. A diffuser on low heat is fine. High heat frizzes the bang first, and once the front looks tired, the whole style does.
7. Flip-Over Curls with a Swooped Fringe
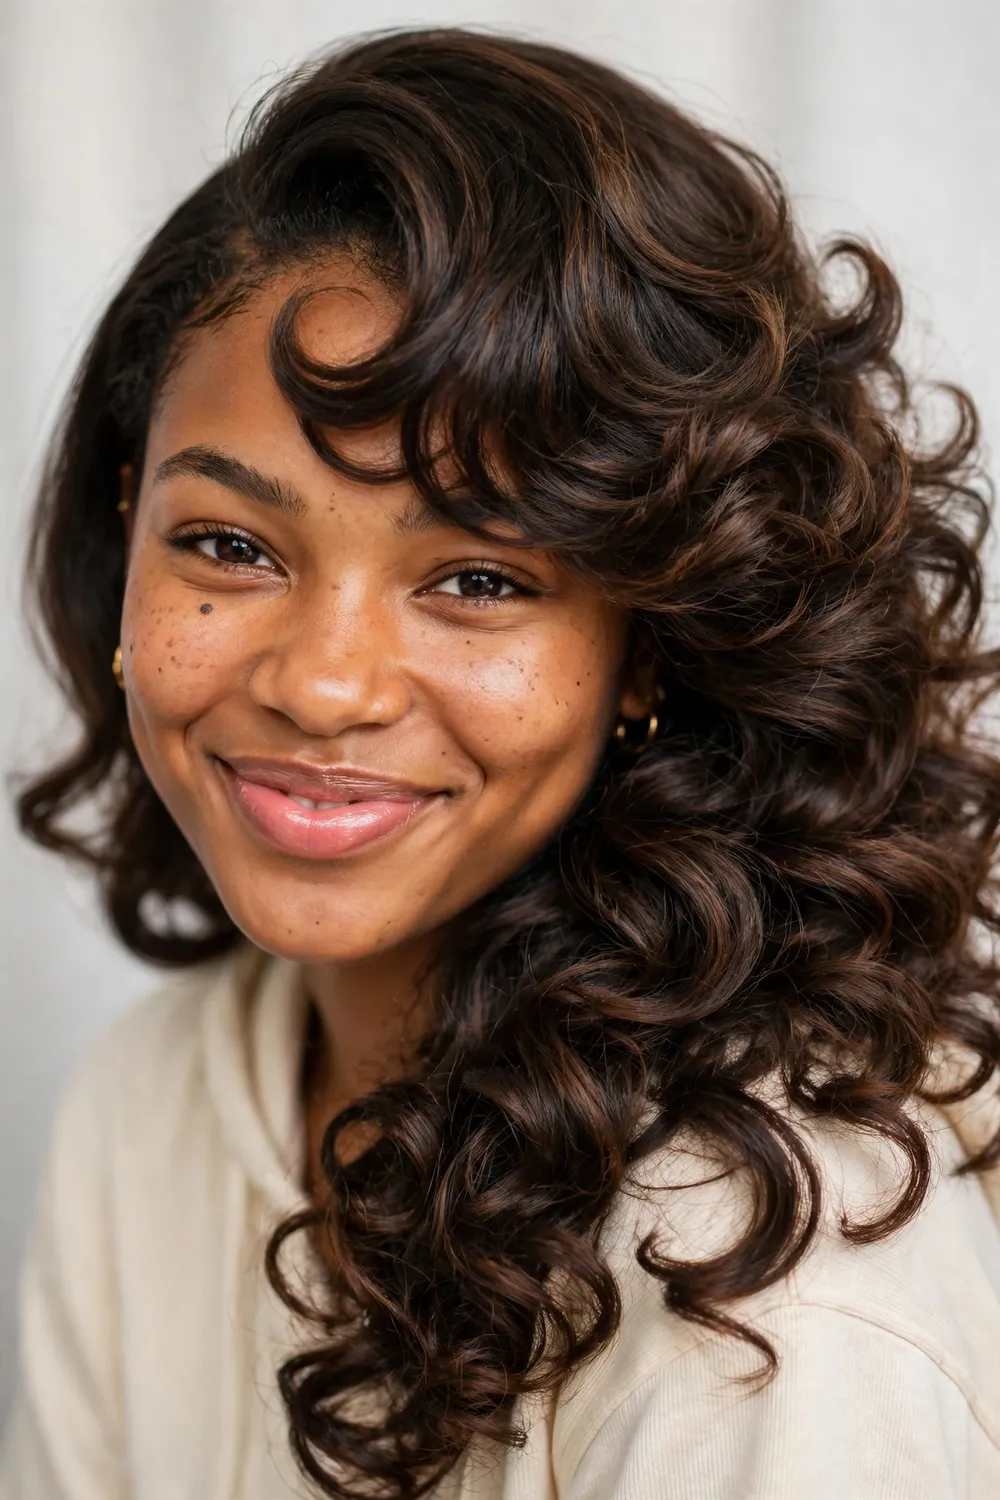
The flip-over method is for women who get bored by Wednesday. There is no fixed part — the hair is installed so it can be flipped left, right, or straight back — and the swooped fringe just goes along with whatever direction you choose that morning. It feels casual, but the balance underneath is doing serious work.
Keep the curls loose enough to fall in sections rather than bounce as one mass. If every curl is set identically, the style turns puffy and the fringe disappears into it. A good trick: pin the bang while it is still warm from the curling iron, and let it cool in the swept position. Hair learns shape while it cools. That is not salon mystique, it is just how heat styling works, and it buys you a fringe that stays swept without a drop of gel. A little oil on the ends only, big hoops if you like them, done.
8. Yaki Blowout with a Side Fringe

If I had to wear one quick weave to work every day for a month, it would be this one. Yaki texture mimics relaxed or heat-stretched natural hair, so the install never has that too-silky, doll-hair shine that gives weaves away. The side fringe reads like it grew there. Clients, colleagues, your own mother — nobody clocks it.
It is also the most practical texture on this list. Yaki tolerates heat well, revives fast with a round brush and a blow dryer, and can be bumped under at the ends, curled, or wrapped flat depending on your mood. Thin the bang slightly when it is cut. A full-thickness yaki fringe puffs up in humidity and starts levitating off the forehead, which ruins the illusion faster than anything. Expect this style to look better on day three than day one — the texture settles, the front relaxes, and it starts to look like your hair rather than an event.
9. Old-Hollywood Waves with a Draped Bang

Full glamour, no apologies. Old-Hollywood waves are sculpted into smooth S-shapes, and the side bang drapes across the forehead like it was placed there by a film stylist in 1947. This is the quick weave you book for the wedding, the gala, the photos you know will live on someone’s mantelpiece for a decade.
The technique secret is patience, not product. The curls must be pinned and left completely alone until they are cold. Brush them out while they are still warm and the wave collapses into frizz before you have even left the chair — I have watched it happen and it is genuinely painful. Ask for 12 to 14 inch body wave or loose deep wave hair, a soft side part, and glossy finish spray on the ends only. The bang should curve cleanly across the cheek. That curve is the entire point of the style; everything else is support staff.
10. Asymmetrical Lob with Tapered Ends

One side longer, one side shorter, and a side-swept bang stitching the two together so the difference looks deliberate. Asymmetry gives a lob energy that a symmetrical cut simply does not have — your profile looks different from each side, which is more interesting in photos than people admit.
The tapered ends are non-negotiable. Blunt ends on an asymmetrical cut look like a mistake, as if the stylist ran out of time on one side. Tapered ends bend slightly inward around the jaw and make the uneven lengths read as design. Keep the fringe light and touchable rather than thick and blocky, keep the part deep, and resist the urge to over-layer the crown. Too much layering up top and this style inflates into a fluffy mess that no amount of pressing will save. It suits longer necks and narrower faces best, and it is the rare style that looks just as good tucked behind one ear as it does loose.
11. Half-Up Quick Weave with a Bang Sweep
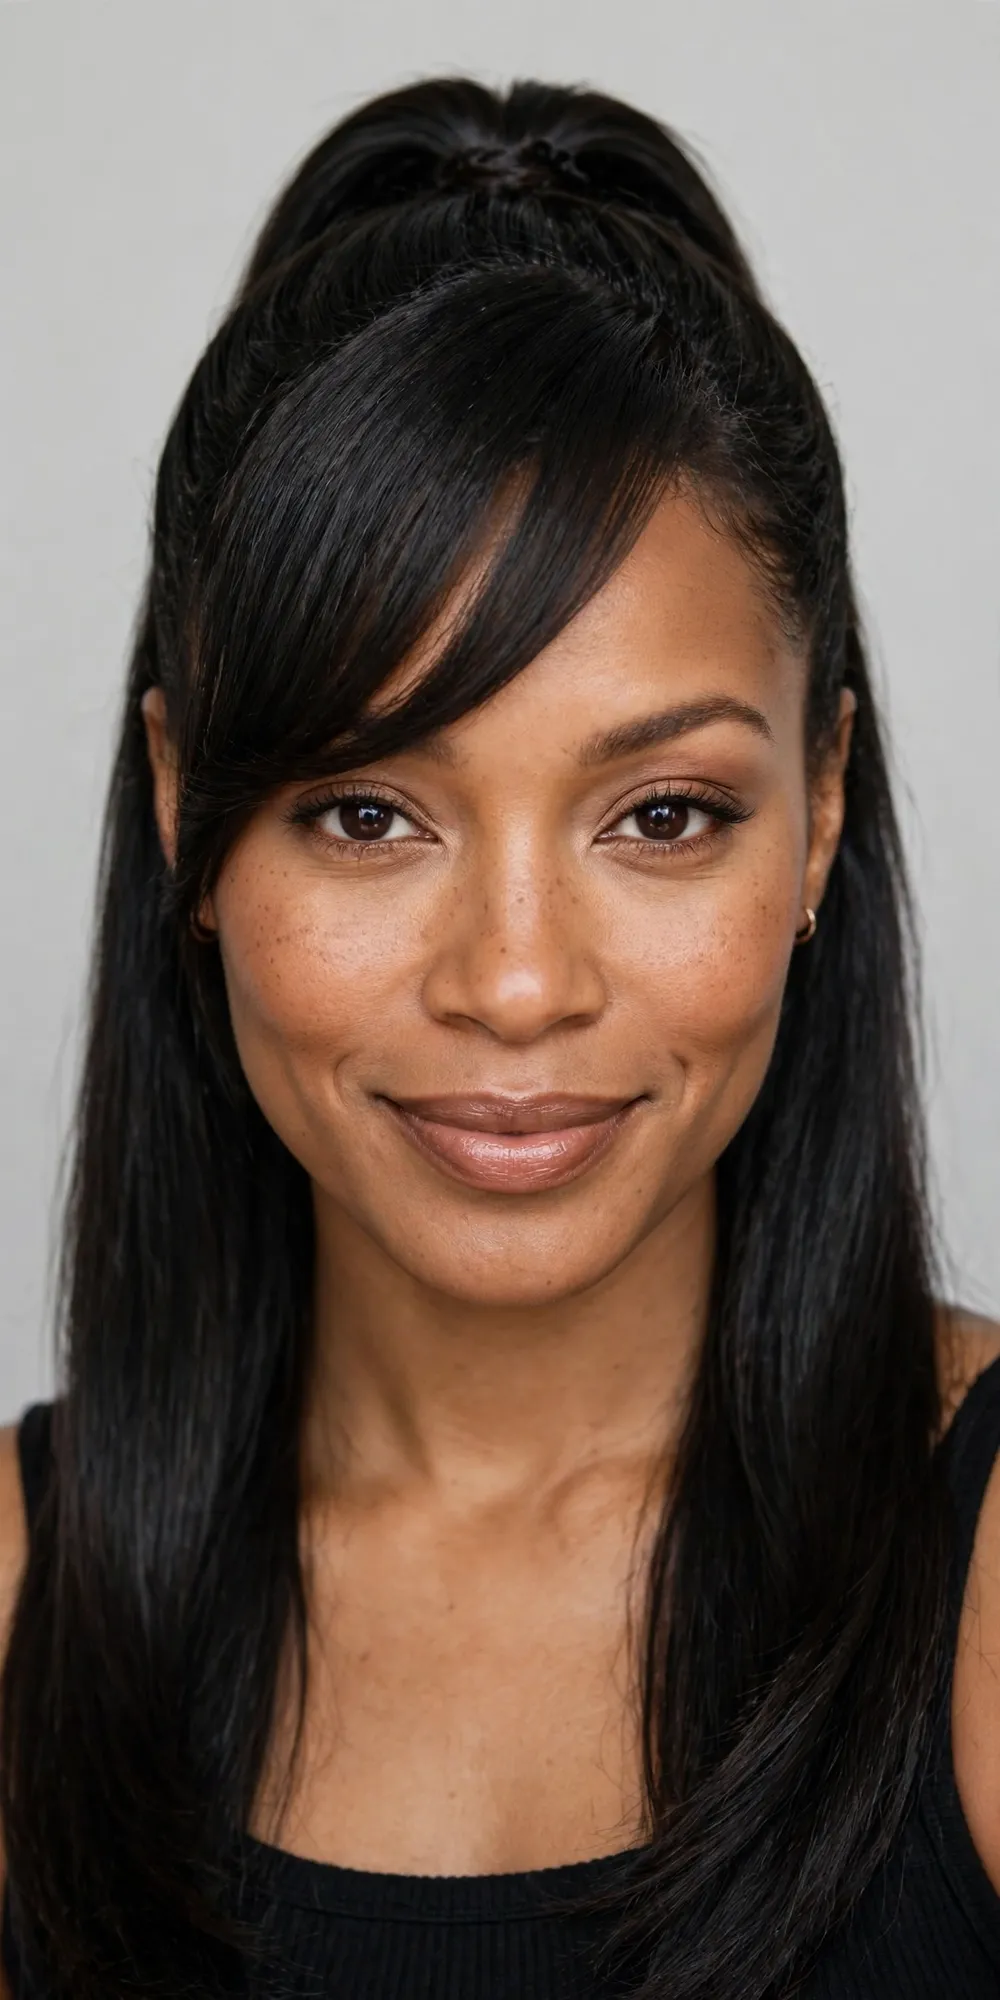
Half-up is the quickest way to make a week-old install look freshly done. Pulling the top section back gives you lift at the crown and a little formality, while the side-swept bang stays loose at the front doing the softening. It is the style equivalent of putting on earrings — small effort, suspiciously large effect.
Body wave or loose curls carry this best, because texture keeps the pulled-back section from looking scraped and severe. The pins or the small elastic holding the top section must be genuinely hidden; a visible elastic kills the illusion instantly. Keep the bang long enough to rest against the cheekbone, and let the loose lengths curl softly so the top and bottom halves look related. One small accessory is plenty if you are dressing it up. The fringe is already the decoration — do not make it compete with three clips and a bow.
12. Big Layered Glam with a Side Sweep
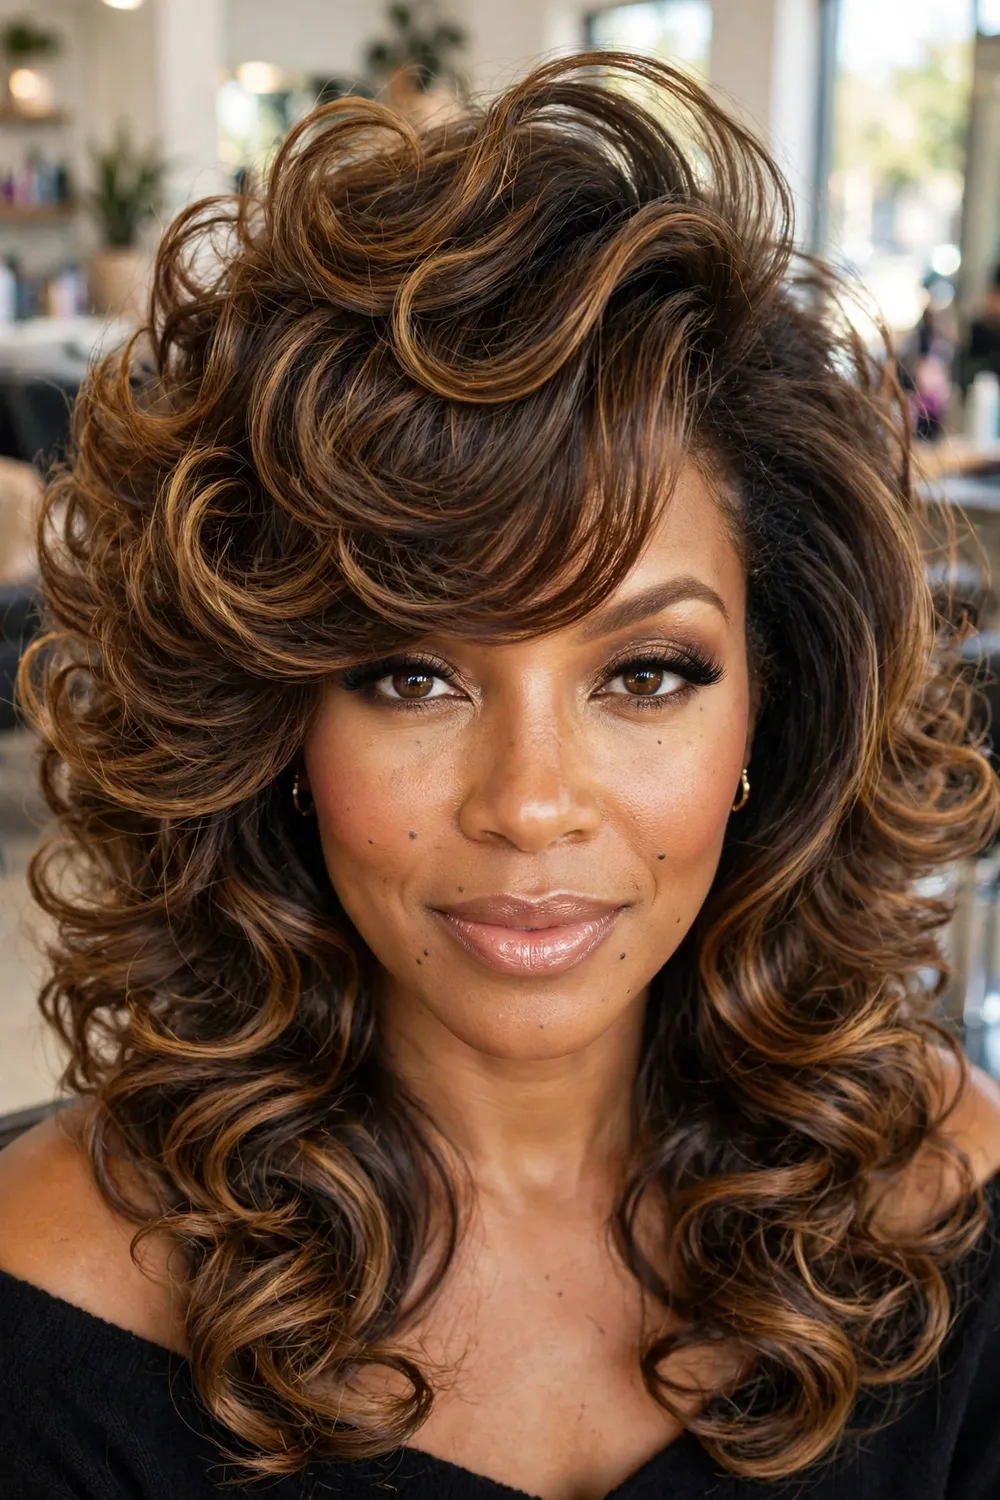
This is the big-hair entry, and it makes no attempt to be subtle. Layers on layers, curls with real bounce, and a side fringe cutting a clean path through the volume so your face does not disappear inside it. Without that diagonal sweep, hair this size reads round and wide. With it, the eye has somewhere to travel.
Two rules keep the glamour from becoming a burden. First, do not overfill the crown — most of the volume should live at the sides and ends, or the proportions go cartoonish. Second, the bang stays thinner than everything else. It should be the most controlled part of the style while the rest is allowed a little chaos. Break the curls apart with a wide-tooth comb or your fingers, never a brush, and expect to spend a few minutes each morning re-fluffing. Big hair is a relationship, not an install-and-forget situation. If that sounds like too much upkeep, it is — pick the lob at number 2 instead and be happy.
13. Side Ponytail with a Long Bang
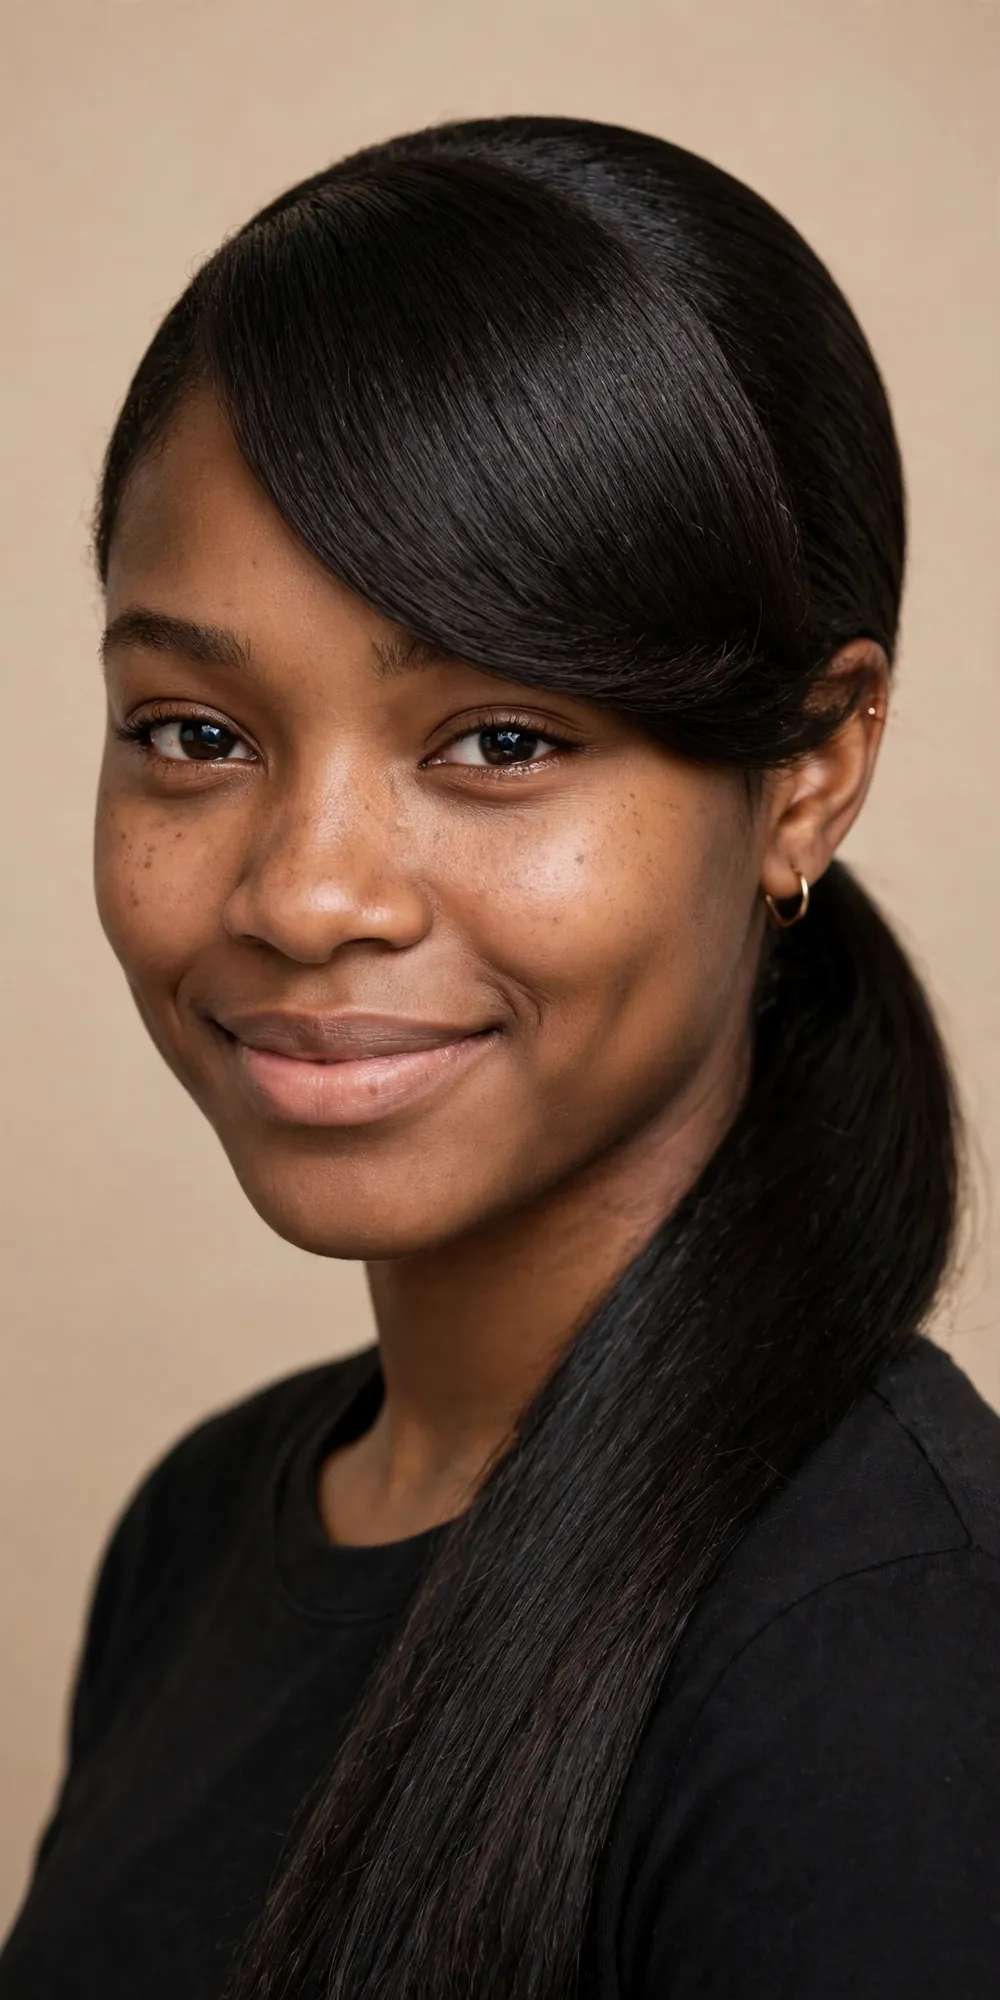
A side ponytail keeps hair off your neck and out of your way while the long bang stops the front from looking severe — the classic problem with pulled-back styles. The ponytail falls over one shoulder, the fringe sweeps across the forehead, and the whole thing lands somewhere between playful and polished that works for far more occasions than it should.
Now the caution, and it is a real one: tension. A ponytail gathered too tightly on top of a bonded install stresses your edges twice over — once from the install, once from the pull. Gather it low and slightly off-centre, keep it looser than your instincts suggest, and take it down at night. Ask for the bang to start fuller near the temple and thin gradually as it drops, and curl the ends under slightly so the front and the ponytail speak the same language. A light edge product is enough. Heavy gel dries white and flaky on a fringe by evening, which rather defeats the purpose.
14. Pixie-Style Quick Weave with a Long Bang
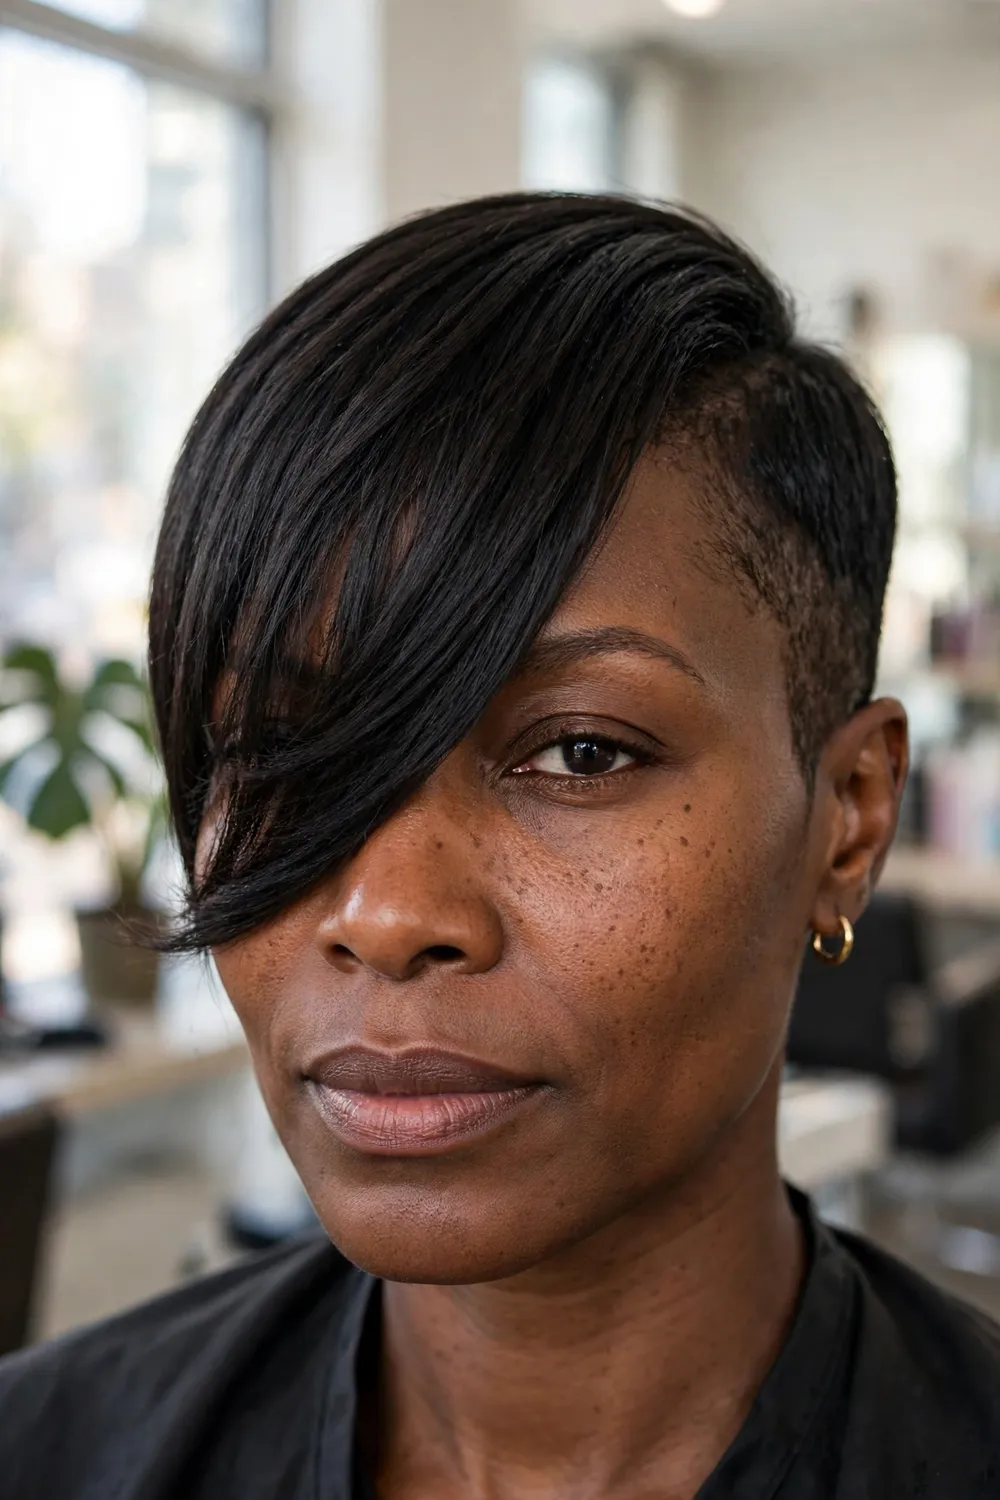
Want to test-drive short hair without the year of growing it back if you hate it? This is the entire reason quick weaves exist. The sides and back sit close like a pixie cut, the top keeps some texture, and one long bang sweeps across and carries the whole personality of the style. You get the pixie compliments with a three-week escape hatch.
Density is where this goes wrong. A pixie weave built too thick looks like a helmet with a fringe glued on. The install should stay light — the shape does the work, not the bulk. Tell your stylist to leave the top longer than they think, keep the crown smooth and close, and thin the bang until it falls instead of standing up. It suits women who like the idea of short hair but still want softness near the eyes, and because everything sits close to the head, it is one of the coolest, lowest-maintenance options here in hot weather. If short suits you, our Pixie Hairstyles guide has 39 real cuts to graduate to.
15. Wet-Look Shoulder Style with a Glossy Sweep
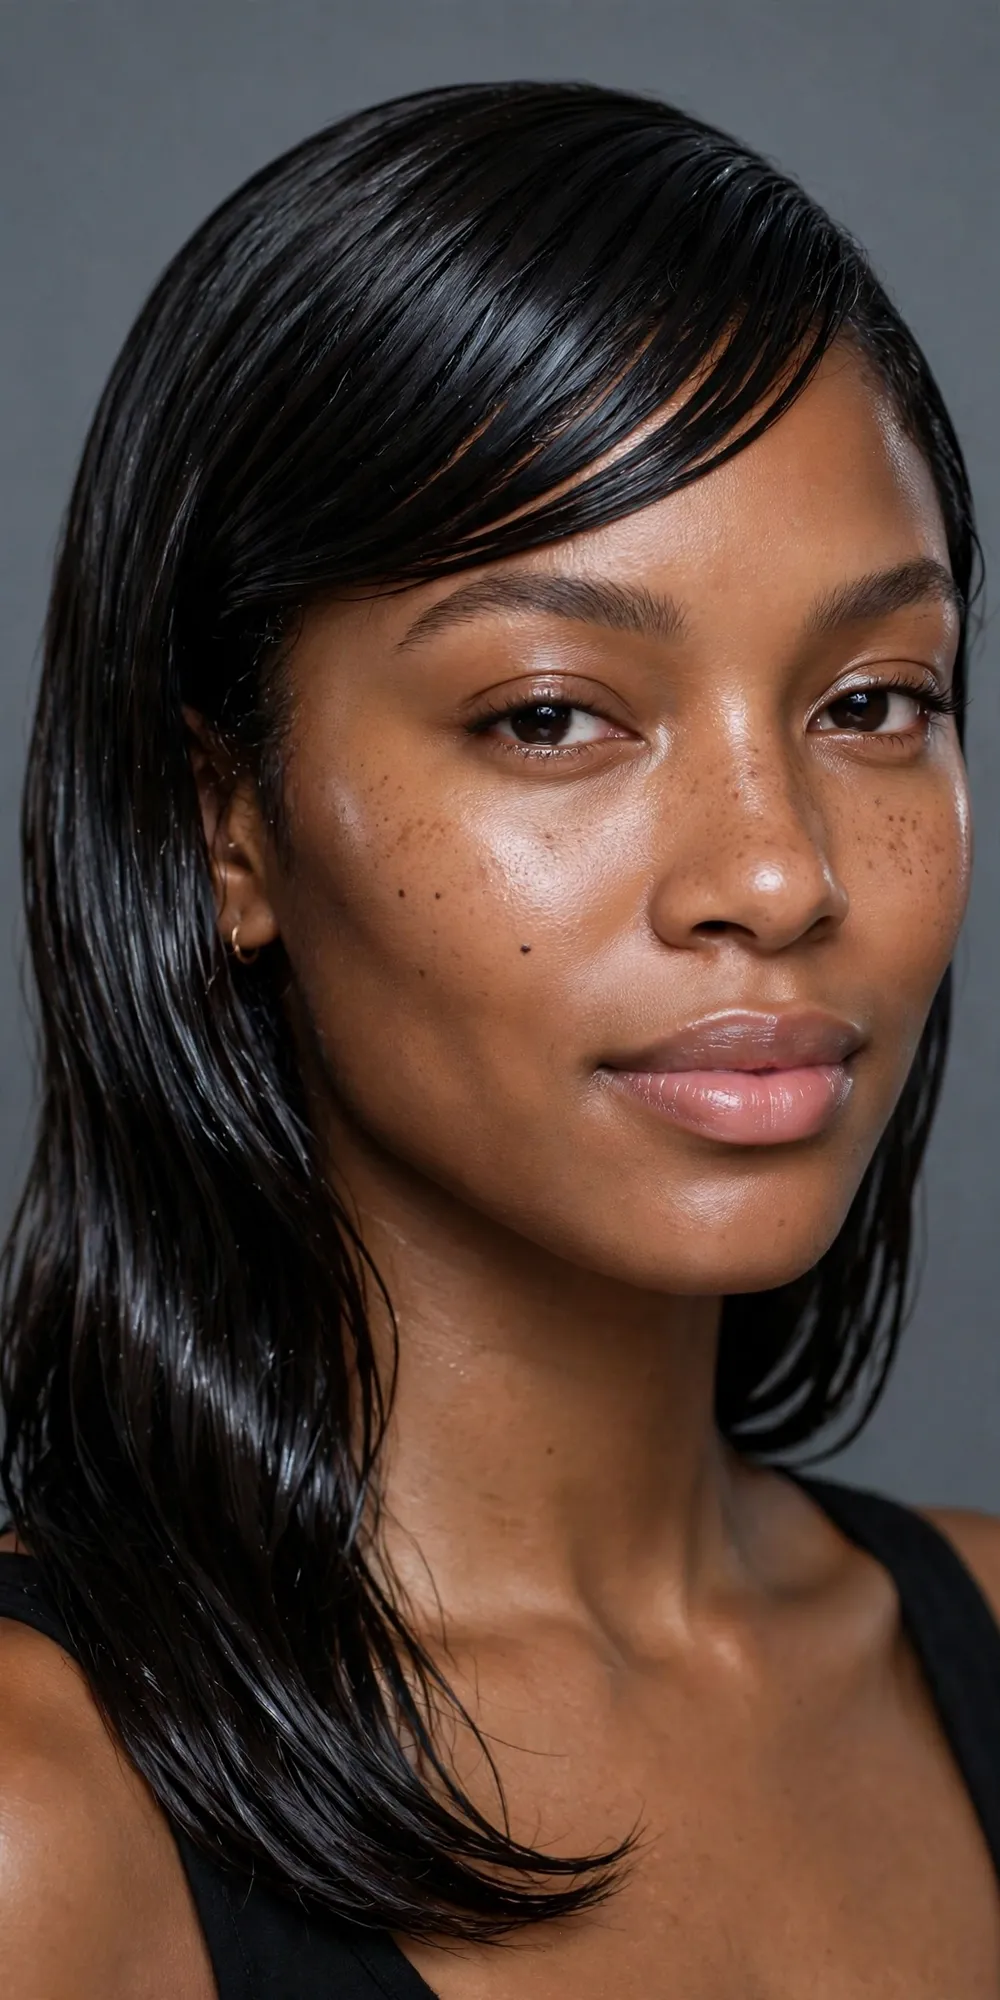
The wet look walks a narrow line. Done with restraint, it looks sharp and editorial — like you have just come from somewhere interesting. Done with a heavy hand, it looks like you have not washed your hair since the previous install. The side-swept bang is what keeps this style on the right side of that line, because it gives the shine a shape to follow.
Keep every drop of gloss on the mid-lengths and ends. Roots stay clean. That one rule prevents the greasy reading that ruins this look. Work a firm mousse or wet-look gel through with your fingers, comb the bang into its sweep once — twice at most — and then leave it alone to set. Every extra touch breaks the finish a little more. It suits shoulder-length installs and fashion-leaning wardrobes, and it photographs dramatically, but be honest with yourself about your climate: in serious humidity, this style has about four good hours in it.
16. Colour-Block Weave with Caramel Bang Pieces
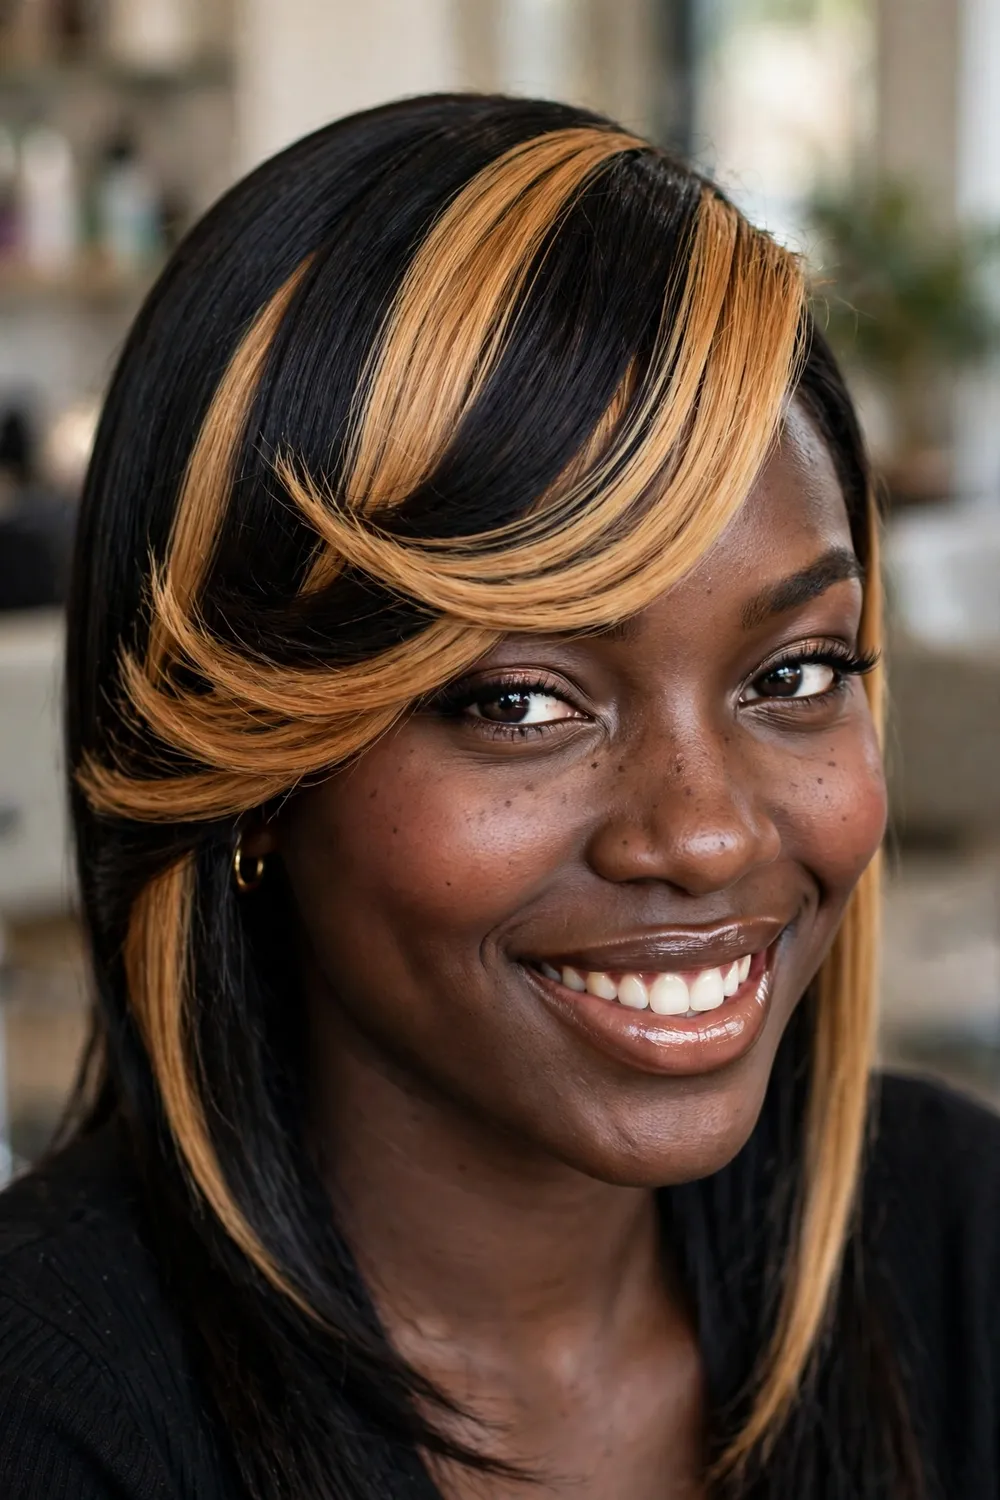
Colour placed exactly where the bang falls is the hardest-working colour in any weave. Two to four caramel, honey or chestnut pieces threaded through a side-swept fringe catch the light every time you move your head, brighten the skin around your face, and make the sweep itself easier to see. Streaks buried at the back do none of that. They are just expensive secrets.
Keep the base deep — soft black or dark brown — and the contrast controlled. Go too bright and the front starts shouting; the look tips from dimensional to striped, especially indoors under flat lighting. Ask for a gloss over everything at the end so the light pieces blend into the base instead of sitting on top of it. This is also a clever budget move: a few highlighted pieces at the front give the impression of a full custom colour for a fraction of the hair cost. The fringe is the billboard of any hairstyle. Spend the colour money there.
17. Tapered Wraparound Bob

A wraparound bob curves inward to hug the jawline instead of hanging in a straight chop, and that curve is why it flatters so many faces. Add the side-swept bang and the whole front softens — polished from the side, approachable from the front. It is one of the most office-safe styles on this list, and it transitions to dinner without changing a thing.
Balance is the whole game here. The bob needs enough density to hold its curved shape, but the ends must be tapered in small sections so they turn under instead of sticking out. Take too much at once and the finish sits badly for the entire wear. The bang should be light enough to move with the curve of the cut; a heavy fringe fights the line and wins, which is not what you want. A small bump with the flat iron at the ends refreshes it in the morning. That is genuinely all it needs most days.
18. Soft Shag with a Feathered Side Bang
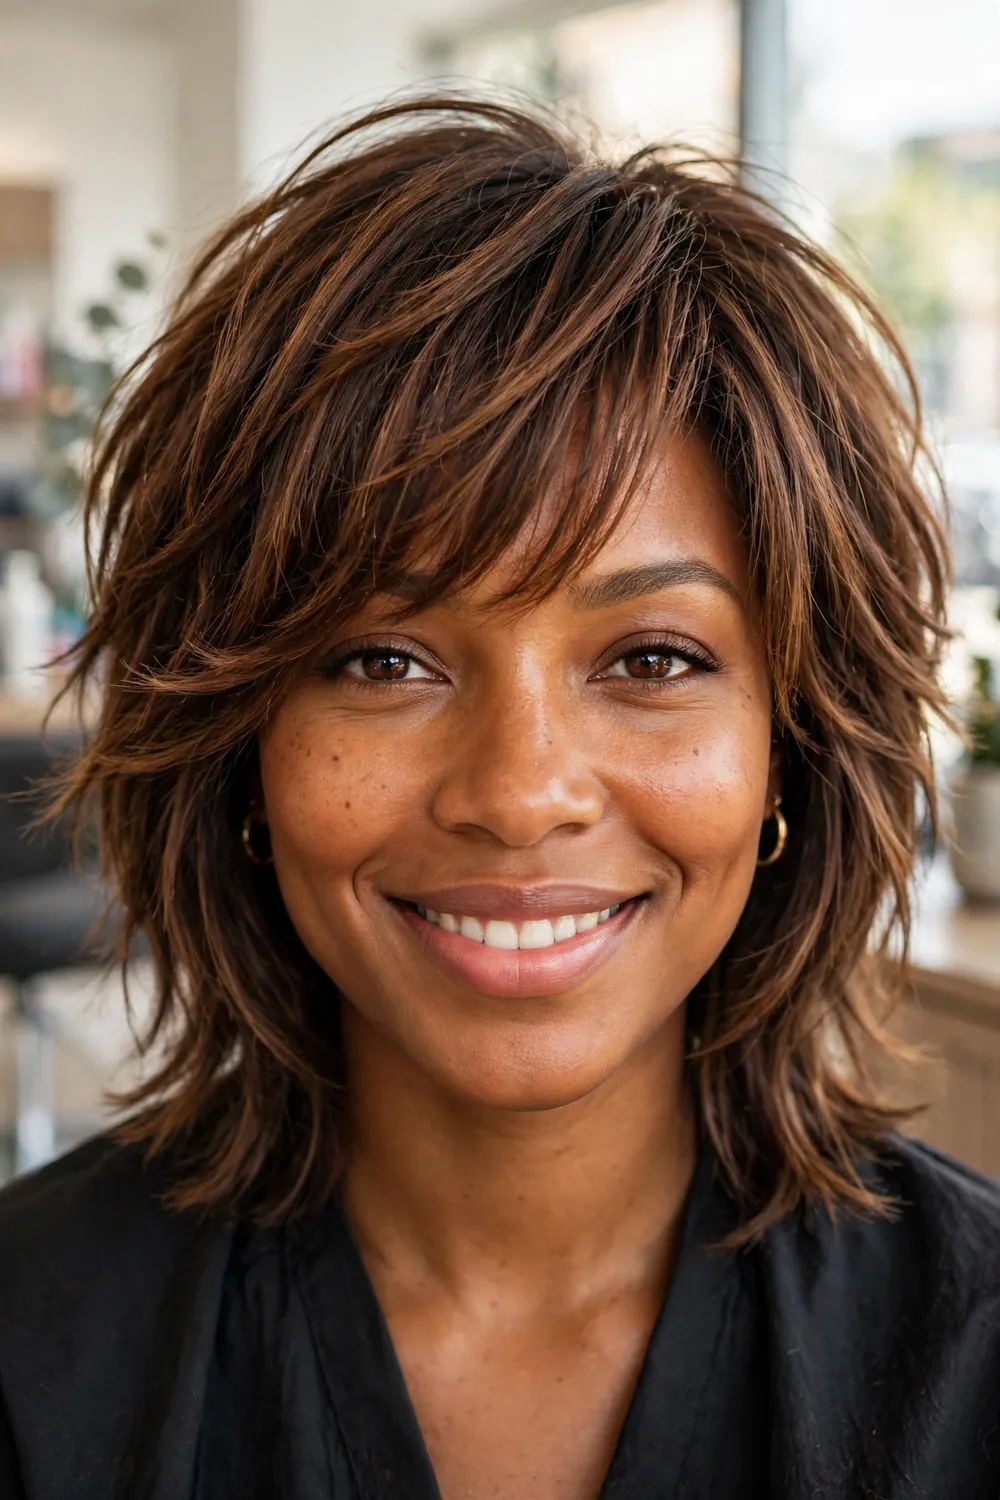
The shag is the style for women who find polished hair a bit boring. Layers are cut throughout so the hair has air in it — pieces separate, ends flick, nothing sits in one solid mass — and the feathered side bang carries that same lightness across the face. It looks styled even when you have done almost nothing, because the cut does the work while you sleep.
It works best with loose waves, blown-out texture, or ends curled just once and left alone. The bang should be the most controlled section; if the fringe goes as wild as the layers, the shape dissolves and you are just a person with messy hair and good intentions. There is a real practical upside too: a shag grows out gracefully. Where a sharp bob announces its age by week three, the shag just gets softer. For a lower-maintenance wear, few installs beat it. It pairs naturally with the textured looks in our Boho Braids guide when you rotate styles.
19. Deep Wave Mid-Length with a Side Part
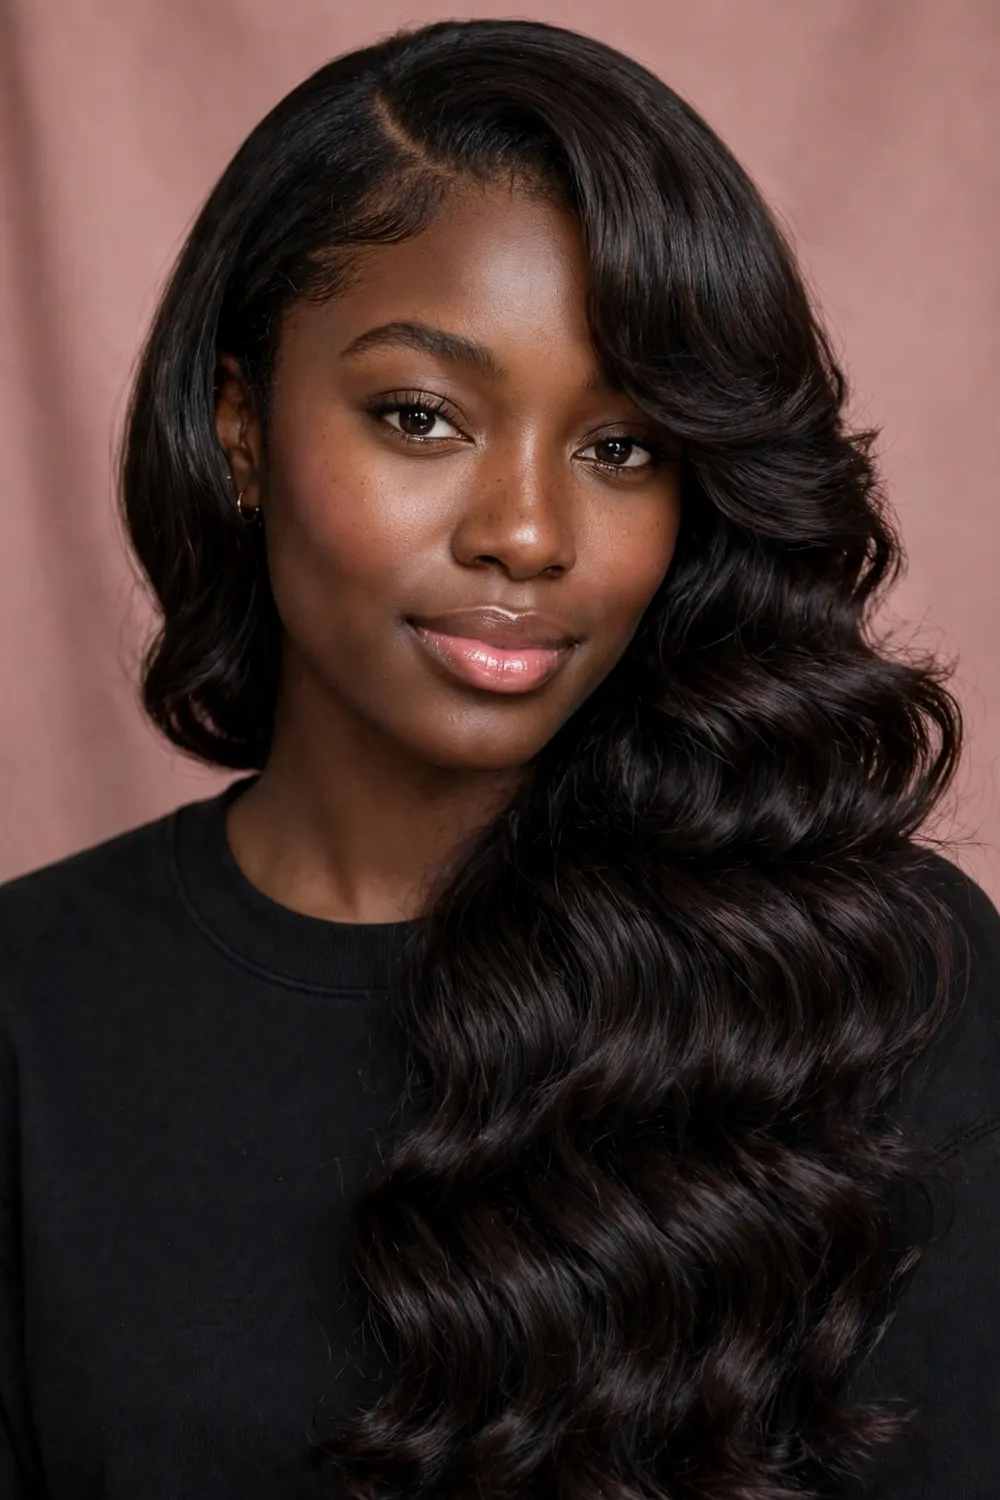
Deep wave has a tighter, more defined pattern than body wave — proper S-curves you can see — and a side part with a swept bang keeps all that pattern organised. The part gives the volume a direction, the bang softens the front, and the waves themselves create light and shadow that make the whole install look more expensive than it was.
Moisture is the maintenance story. Deep wave hair drinks product, but the wrong product flattens it: heavy creams and butters weigh the bang down until it droops across your eye like a sad curtain. A light foam mousse, scrunched in and diffused on low heat, is the sweet spot. Shoulder to collarbone lengths wear best; three bundles will give you full density at that length without the crown getting bulky. And here is the diagnostic worth remembering — if you have to rebuild the bang from scratch every single morning, the cut is wrong, not your routine. A well-cut deep wave fringe falls back into place with water and thirty seconds of scrunching.
20. Low Bun with a Swooped Bang

A low bun on a quick weave sounds simple, and that is exactly its power. The back is cleared neatly off the neck, the swooped bang keeps the front interesting, and the result passes for formal without an hour of styling. Weddings, interviews, christenings, court — this style has attended all of them and behaved impeccably.
The install underneath needs care because the hair gets gathered and pinned, and any lumpiness at the base shows once everything is pulled smooth. Position the bun slightly off-centre so it lines up with the direction of the bang; a dead-centre bun with a side fringe can look disconnected, like two hairstyles sharing one head. Use pins that match your hair colour, keep the bang glossy but never greasy, and let one good earring do the jewellery work. Studs plus a statement necklace plus the bun is a crowd. Pick a lane.
21. Kinky-Straight Side-Swept Lob
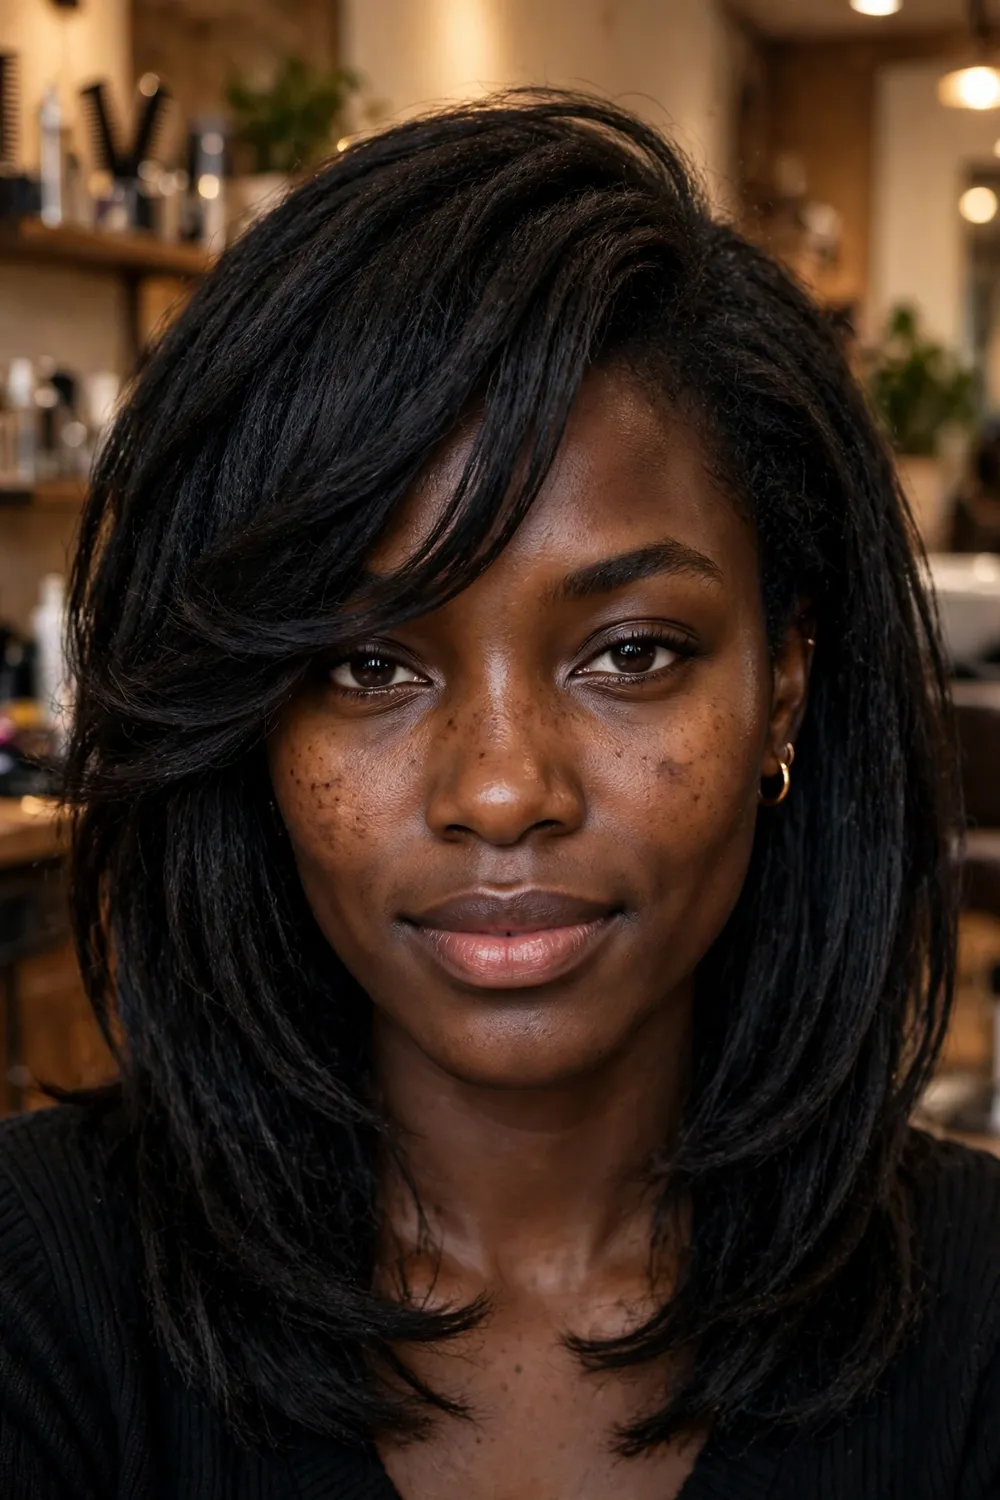
Kinky-straight is the texture that most closely resembles blown-out natural hair, which makes it the easiest blend in this entire list — especially around the leave-out, where installs usually get exposed. The side-swept lob shape keeps it soft and current, and because the texture has body of its own, the style never falls flat against the head the way silky packs can.
Day to day, it asks for very little. Wrap it at night, give the front a light pass with the flat iron in the morning if you must, and you are done. The one thing to watch is the bang’s thickness. Kinky-straight hair expands in humidity — all that lovely body works against you at the front — so the fringe should be cut thinner than looks right in the salon chair. It will puff to perfection by the time you get home. This is the quiet achiever of the list: no drama, no shine tricks, just believable hair that behaves.
22. Red-Carpet Length with a Full Side Sweep
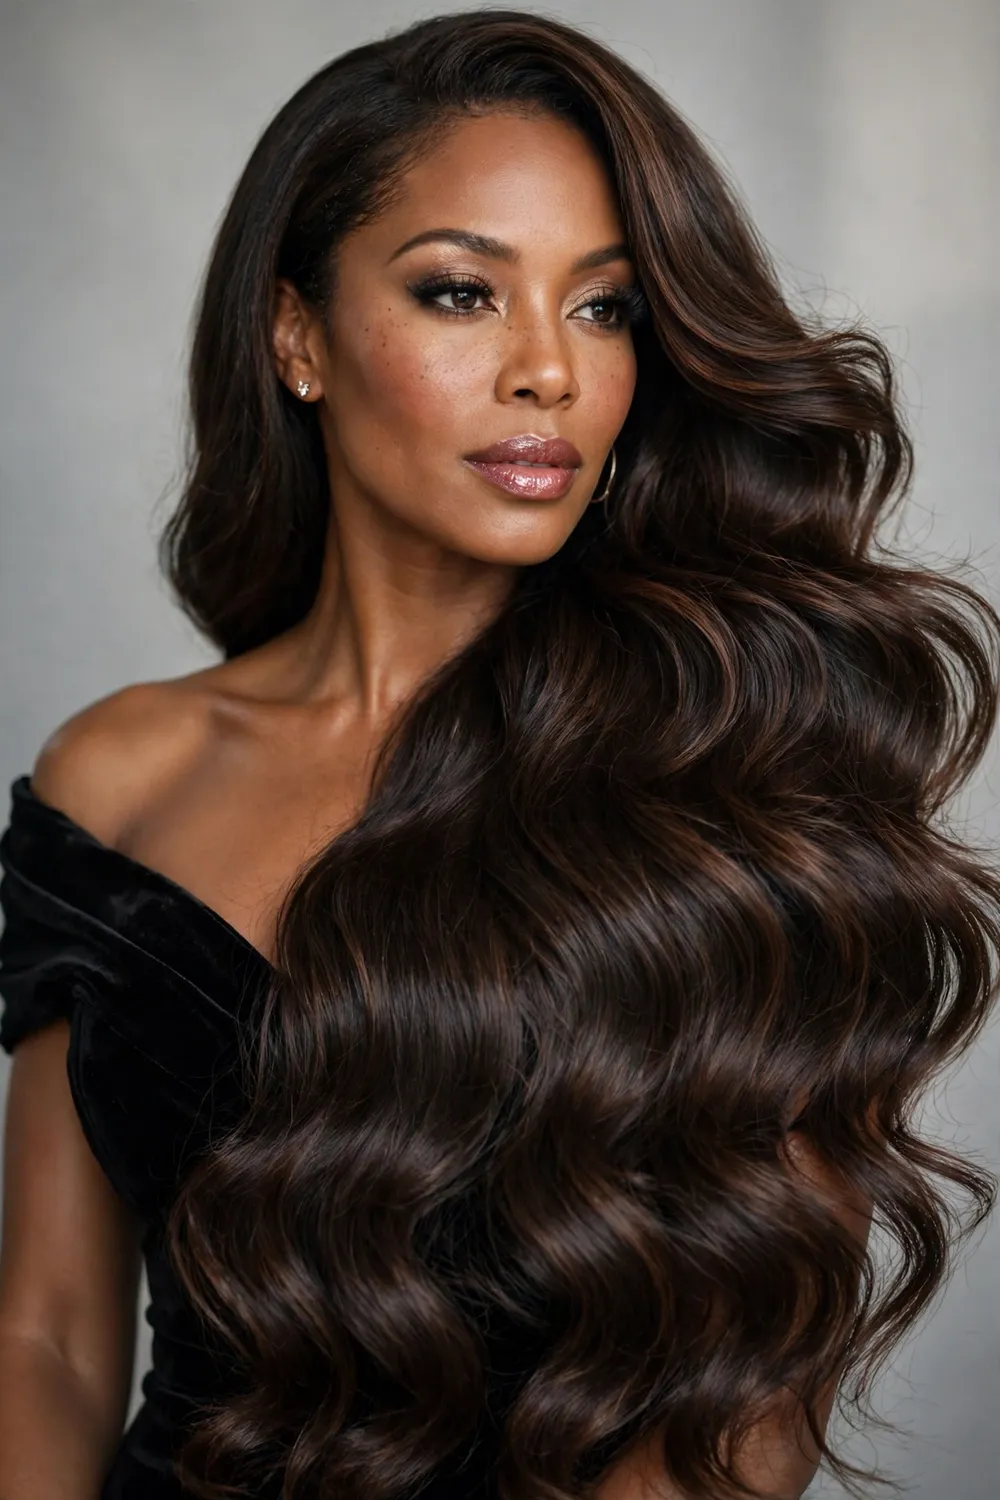
Maximum length, maximum sweep. This is the install for when the event has a photographer and you intend to be found by them. The hair falls below the chest, and the full side sweep gives the face one long diagonal line, which is what stops very long hair from swallowing the person underneath it. Long weaves without a shaped front are just expensive curtains. This one has architecture.
Ask for the front layered so it cannot hang in a single sheet, and a finish that is glossy rather than oily — there is a difference, and cameras know it. The bang must be long enough to tuck behind one ear and still fall forward on the other side. Too short and it looks disconnected from the length; too long and it becomes a second hairstyle covering your face. Soft waves or brushed-out body wave wear better than pin-straight here, because movement is what makes length read as glamorous instead of heavy.
23. Glueless Closure Quick Weave with Soft Layers
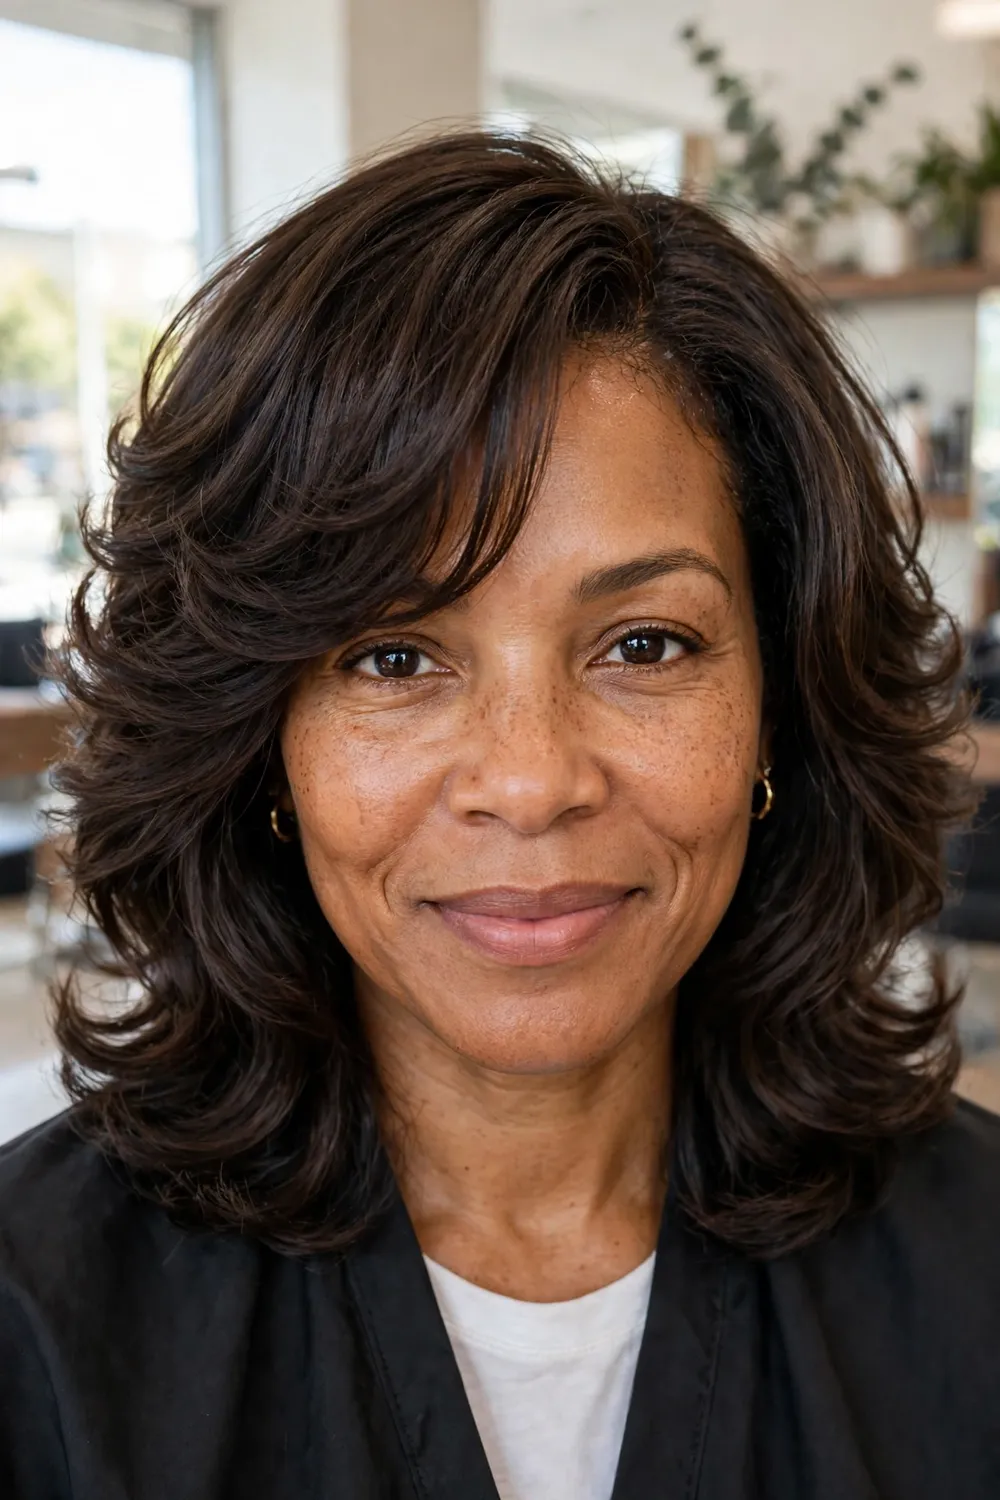
No glue. No bonded tracks. A closure piece — usually 4×4 or 5×5 inches of lace or silk with hair attached — is secured over the cap, and the wefts are sewn or clipped around it, so the whole install comes off without adhesive remover, patience, or tears. If the glue section at the top of this article made you nervous, this is your style.
The soft layers and bouncy finish keep it from looking like the “safe option,” too. A closure mimics a natural part convincingly enough that you can wear a middle part, a side part, or a side-swept bang cut into the piece itself. The honest trade-offs: a glueless install can feel slightly less flat than a bonded one, and very active wearers may need to re-secure it more often. In exchange, your edges and your own hair stay completely out of harm’s way, and removal takes minutes. For protective styling under an install, pair this with the flat, low-tension braiding patterns in our Cornrow Hairstyles guide.
24. Middle-Part Quick Weave with Long Layers

Not every great quick weave sweeps to the side. A dead-centre part with long, face-framing layers is the symmetrical answer — sleek, balanced, and very current. The layers start around the chin and cascade down, so the front has movement even though the part itself is perfectly straight.
This style lives or dies on the part. It has to be clean, flat, and believable, which is why a closure earns its money here: a 5×5 closure gives you a part that looks like scalp from conversational distance. If you are using leave-out instead, your own part must be pressed properly and matched in texture to the install, or the eye goes straight to the seam. Long layers also show split ends and dryness faster than shorter styles, so a light serum through the ends every second day keeps the lengths looking like they belong to the same healthy head of hair.
25. Blunt-Bang Bob Quick Weave

The blunt fringe is the side sweep’s bold opposite: straight across, brow-skimming, unapologetic. On a bob it creates a strong horizontal line that makes the whole cut look intentional and a little bit French. It suits oval and longer faces best, because the fringe shortens the face visually — round faces usually do better with the diagonal styles earlier in this list.
Cut the fringe after the bob is fully styled, and cut it a fraction longer than the target. A blunt bang cut even slightly too short has no way to hide; it just sits there announcing itself until the install comes out. The good news is that a blunt fringe is the lowest-effort bang to maintain daily. It either lies flat or it does not, and ten seconds with a flat iron settles the question. Keep the bob itself blunt too — matching hemlines, matching energy.
26. Burgundy Quick Weave with a Side Sweep
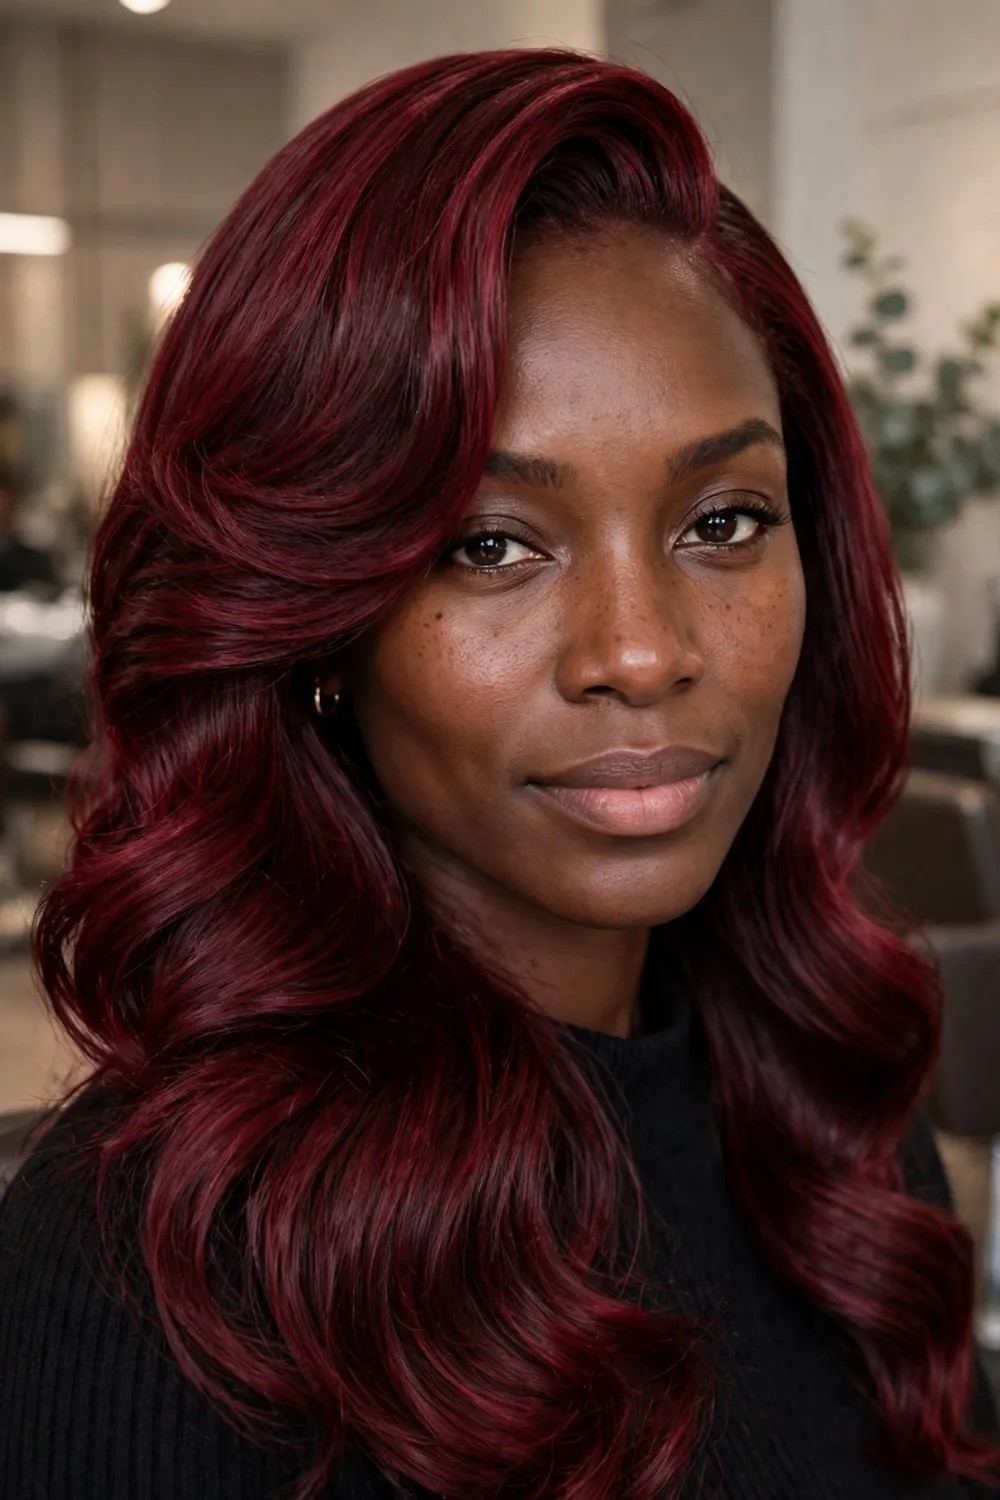
Burgundy is the colour women choose when black feels too safe and red feels too loud, and on a quick weave it is a low-risk way to experiment — you are colouring the install, not your own hair, so there is no bleach damage and no growing out a shade you regret. The side sweep shows the colour off properly, because the burgundy reads differently as it moves across the forehead from shadow into light.
Depth is what keeps burgundy elegant. A flat, single-tone burgundy can look wiggy under bright light; ask for a darker root or a near-black base with the wine colour through the lengths and bang, so the result has somewhere to be dark. It flatters warm and deep skin tones beautifully and makes gold jewellery look richer. Colour-treated weave hair dries out faster than virgin hair, so work a light leave-in through the lengths twice a week and keep the flat iron temperature moderate. Fried burgundy turns orange at the ends. Nobody wants that.
27. Frontal Quick Weave with Laid Baby Hairs
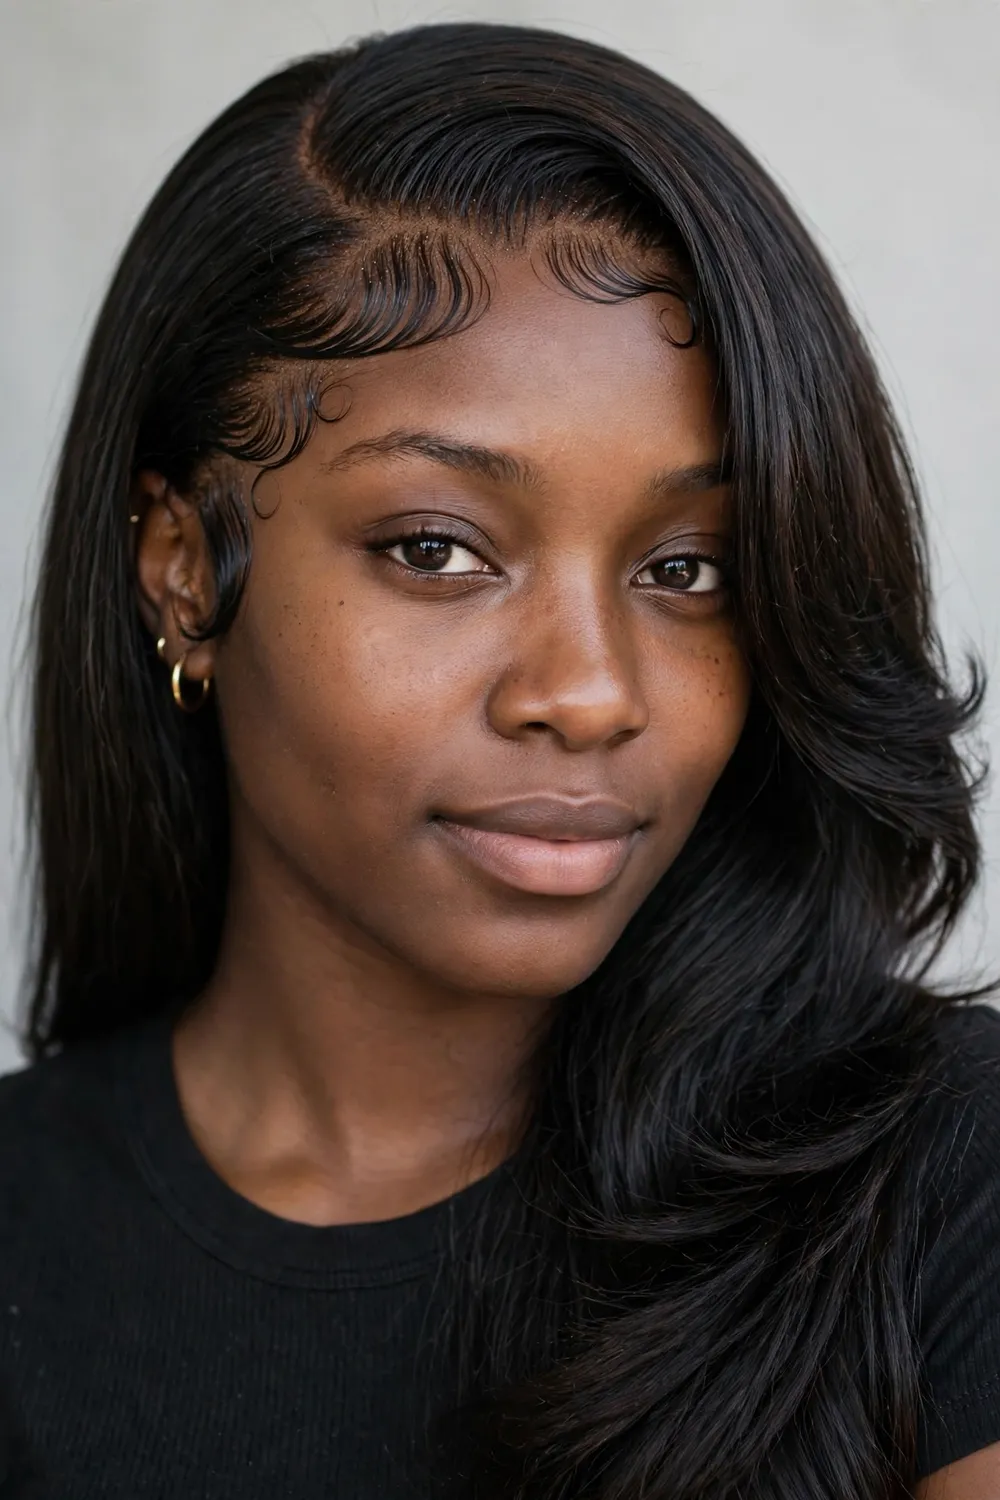
A frontal runs ear to ear, which means the entire front hairline is part of the install — and that buys you styling freedom nothing else on this list can match. Centre part today, deep side sweep tomorrow, pulled straight back on Friday. The baby hairs along the front, laid in soft swoops with edge control, are what sell the illusion at close range.
Let us be honest about the upkeep, though. Frontals are the highest-maintenance option here. The edges of the lace lift as the days pass, the baby hairs need re-laying most mornings, and the whole front wants gentle handling — no aggressive brushing, no sleeping without a scarf or an elastic edge band. Budget the extra ten minutes a day before you commit. If your lifestyle laughs at ten spare minutes, the closure at number 23 gives you 80 percent of the look with none of the daily negotiation.
28. Finger-Wave Pixie Quick Weave
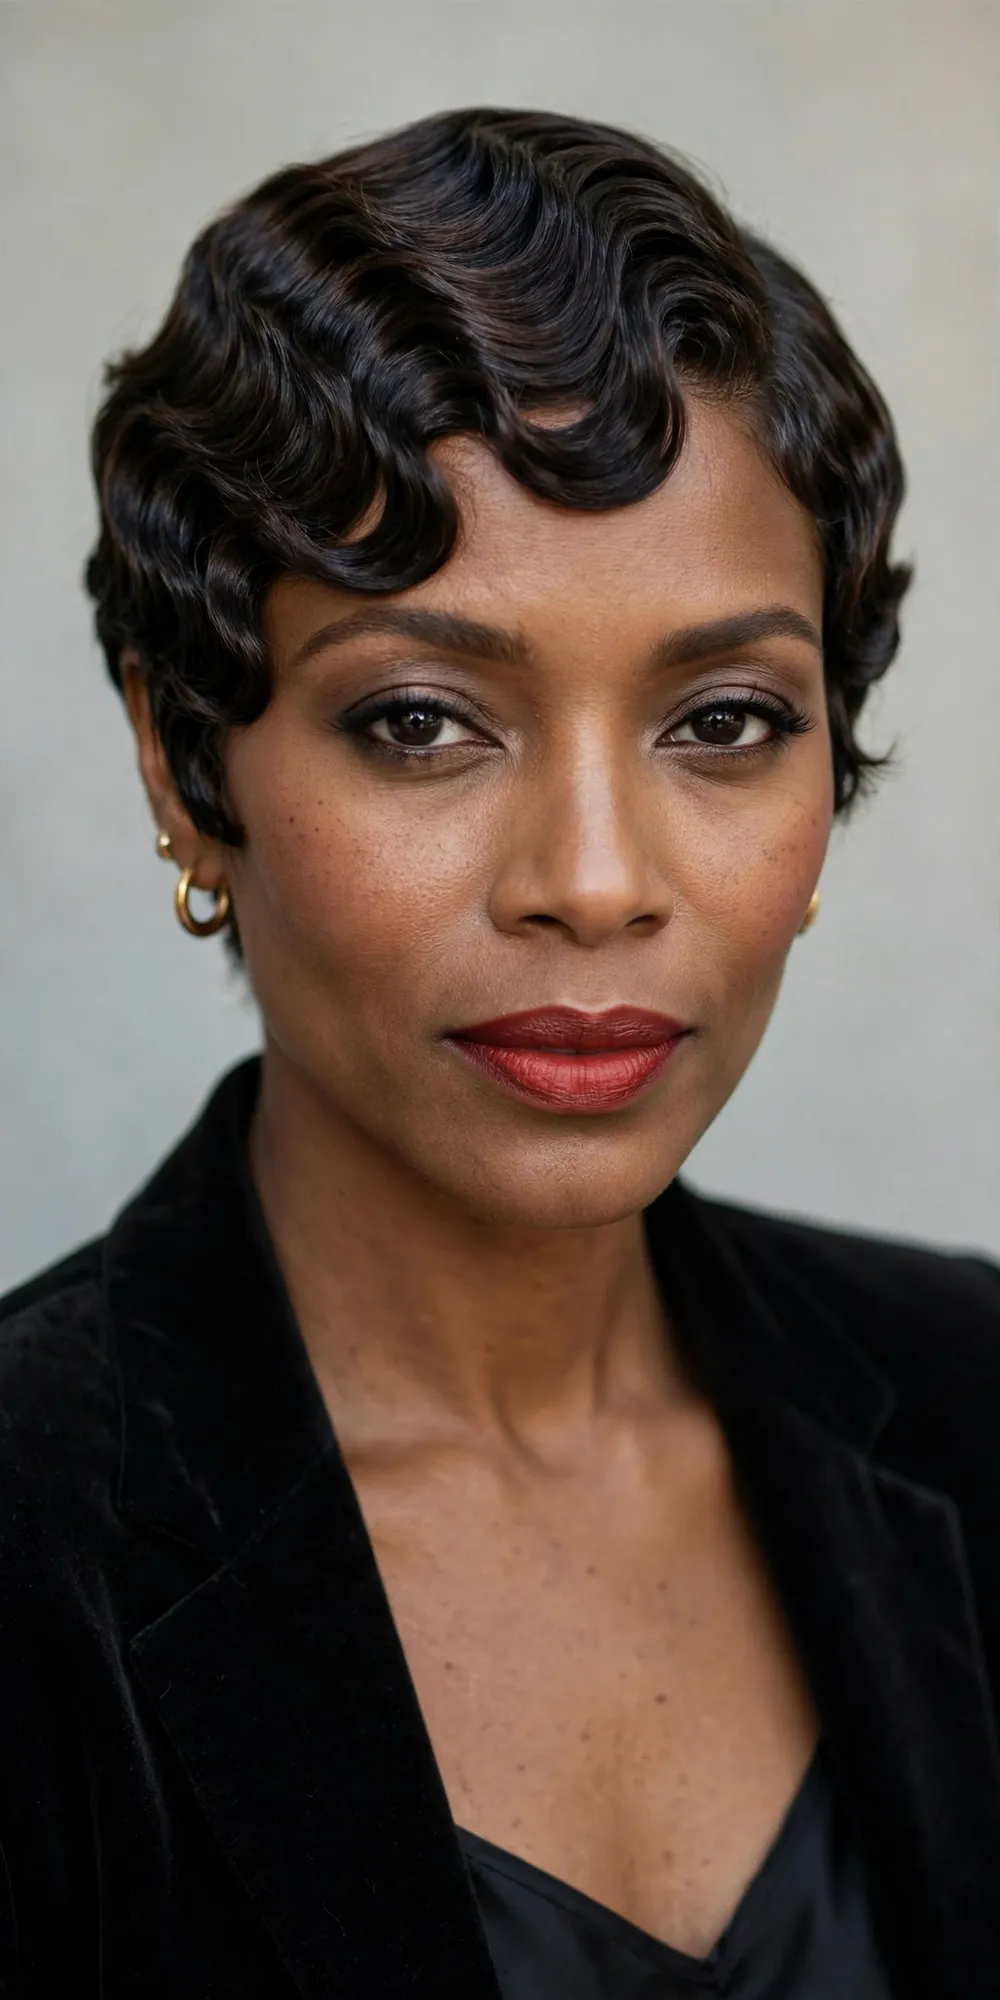
Finger waves on a short quick weave are pure sculpture — glossy S-curves set close to the head, with all the glamour of the 1920s and none of the growing or cutting. It is the most dressed-up short style you can wear, and because the install is temporary, you can have it for one big weekend and be back to your usual hair by the next.
The setting is the skill. The waves are moulded with gel and a fine comb while the hair is damp, then left completely untouched until dry — touch them early and the curves blur into ripples. A stylist who specialises in short hair is worth seeking out for this one; finger waves expose every wobble in the base install. Keep the finish glossy, the earrings simple, and your expectations realistic about longevity: this is a three-to-seven-day masterpiece, not a three-week workhorse. For special occasions, nothing else on this list comes close.
29. Jumbo Curls with a Curly Fringe

We finish big. Jumbo curls — large, loose, high-volume spirals — with a curly fringe that falls in pieces across the forehead instead of a sweep. It is joyful hair. The kind of install that gets compliments from strangers in queues, and the kind that needs a wearer who enjoys being noticed.
The fringe is what makes it modern rather than simply big. Cut it in pieces, at different lengths, so it reads as part of the curl pattern rather than a shelf sitting on top of it. Pineapple the hair at night — gathered loosely on top of the head — so the curls keep their shape while you sleep, and refresh in the morning with water and a light curl foam, scrunching upward. This style pairs beautifully with the texture-first approach in our Natural Hairstyles for Black Women guide for when the install comes out. Volume this generous will not fit under most hats. Plan your outfits accordingly.
How a quick weave is installed, step by step
Knowing the steps helps you spot a careful stylist — and understand what you are paying for.
- Your hair is prepped and flattened. Washed, conditioned, then braided into flat cornrows or moulded down with gel so the surface is as smooth as possible. Bumps at this stage show through everything.
- The cap goes on. A stocking cap or wig cap covers all of your hair. This is the barrier the glue will touch — never your strands.
- Tracks are measured, cut and bonded. Working from the nape upward, the stylist glues each weft to the cap in rows, leaving space at the front for the part, closure or leave-out.
- The front is finished. A closure is placed, or your leave-out is blended over the top tracks. This is the part everyone will look at, and good stylists slow down here.
- The cut happens last. Bangs especially are cut after the hair is pressed and settled, because installed hair sits differently than hair in a pack. Then a final style, and you are out of the chair — usually inside 90 minutes.
How to make a quick weave last
Two weeks is the floor for a well-kept quick weave; four is achievable. The difference is mostly night-time behaviour. Wrap the hair or sleep in a silk or satin scarf every single night — friction against cotton roughens the install and loosens tracks while you sleep. Keep heavy oils away from the bonded rows, because oil breaks adhesive down early. Wash carefully if you wash at all: diluted shampoo, gentle downward strokes, no scrubbing at the tracks, and dry the cap fully afterwards so nothing stays damp underneath. And when a track starts lifting at the edge, a dot of glue pressed down for thirty seconds fixes it. Ignoring it for a week is how one loose track becomes a public incident.
5 mistakes that ruin a quick weave fast
- Glue on your own hair. It bears repeating because it causes the most damage. Glue belongs on the cap. If it ends up bonded to your strands, removal turns into cutting, pulling and breakage.
- Skipping the patch test. Bonding glue on a reactive scalp means two weeks of itching you cannot scratch properly. Test behind the ear the day before. Two minutes. Just do it.
- Cutting the bang too early. Bangs cut before the install settles spring up short. Every stylist on this page’s research said some version of the same thing: cut the fringe last, and cut it longer than you think.
- Pulling styles too tight. Ponytails and buns gathered hard over a bonded install stress your edges from two directions at once. Loose gathers, low tension, down at night.
- Wearing it too long. A quick weave is a two-to-four-week style. Stretching it to six or seven weeks invites matting underneath, dried-out natural hair, and a miserable removal. Take it out on schedule and give your own hair a wash day and a rest.
Quick Weave FAQs
How long does a quick weave last?
Typically two to four weeks. Bonded installs worn past a month usually start lifting at the edges, and your natural hair underneath needs washing and air by then anyway. Glueless closure versions can be removed and reinstalled, which stretches the life of the hair itself even if each wear is shorter.
How much does a quick weave cost?
At a salon, most people pay roughly $65 to $150 for the install depending on the city and stylist, plus the cost of the hair, which ranges from cheap synthetic packs to several hundred dollars for virgin bundles. A careful DIY install at home can cost under $40 in supplies once you own the basics.
Does a quick weave damage your natural hair?
It does not have to. Done properly — glue on the cap only, low-tension styling, removed on time — a quick weave is a protective style, because your hair rests underneath untouched. The damage stories almost always trace back to glue on the hair itself, installs worn far too long, or violent removals. The method is not the problem. The shortcuts are.
Can you wash a quick weave?
Yes, gently, and many people choose not to bother for a two-week wear. If you do: dilute the shampoo, wash in downward strokes without scrubbing the tracks, rinse well, and make sure the cap and your braids dry completely afterwards. Trapped moisture underneath an install is a smell and scalp problem waiting to happen.
Quick weave vs sew-in: which is better?
Neither, universally. A quick weave is faster (about 90 minutes), cheaper, and easier to remove, but lasts two to four weeks. A sew-in takes three to five hours and costs more, but holds six to eight weeks and involves no adhesive. Choose the quick weave for short-term looks and events; choose the sew-in for a style you plan to live in.
How do you take a quick weave out safely?
Slowly, with an oil-based remover or bond dissolver worked along the tracks so the wefts release from the cap without force. The cap then lifts away with the hair attached, and your braids come down normally. If anything resists, add more remover and wait. Pulling is how length gets lost — a proper removal should involve zero tearing sounds.
Can you do a quick weave at home?
Yes — it is one of the most DIY-friendly installs, and plenty of women do their own. Work in a mirror with good light, keep the glue on the cap, and leave yourself more time than the videos suggest; your first attempt will take two to three hours, and that is fine. The styles that forgive beginners most are the curly ones at numbers 6 and 29, because texture hides imperfect tracks.
Final Word
A quick weave is not a compromise hairstyle. It is a deliberate choice: speed, variety and a protected head of hair underneath, in exchange for a shorter wear. Pick the texture that matches your real routine — not the routine you wish you had — keep the glue on the cap, cut the bang last, and take the whole thing out on schedule. Do those four things and nearly every style on this list will look like it grew out of your head. When you are ready for your next change, there are plenty more ideas waiting on our blog.